Showing posts with label Challenges. Show all posts

Friday, April 5, 2019

On the Grid!

Hello peeps! Earlier this week over on the Power Poppy Blog,  I ushered in a different kind of Creative Confetti Challenge. I hope you check it out and play along with moi! ;-) It was based on a tutorial the talented Ms. Dina Kowal did more than a few years back. Want to see? Click here!  She took us through -- step by step -- on how to create what she called a "9-block card." It was designed to mimic the effects of a quilted square and that, my friends, was the inspiration! You can check out all the details on the challenge HERE but I thought I'd share the process of creating my card here on my blog too! 


So, I wanted to give you a reference point so that you could "see" where I was going through my little step by step tutorial below. I am giving you a tutorial because I did my grid creation just a wee bit differently than Dina. She had a grid die. I wasn't so lucky but in the process of making this card, I remembered a little trick a fellow stamper taught me once. So, I reached into the cobwebbed recesses of my mind and dug that little trick out! 

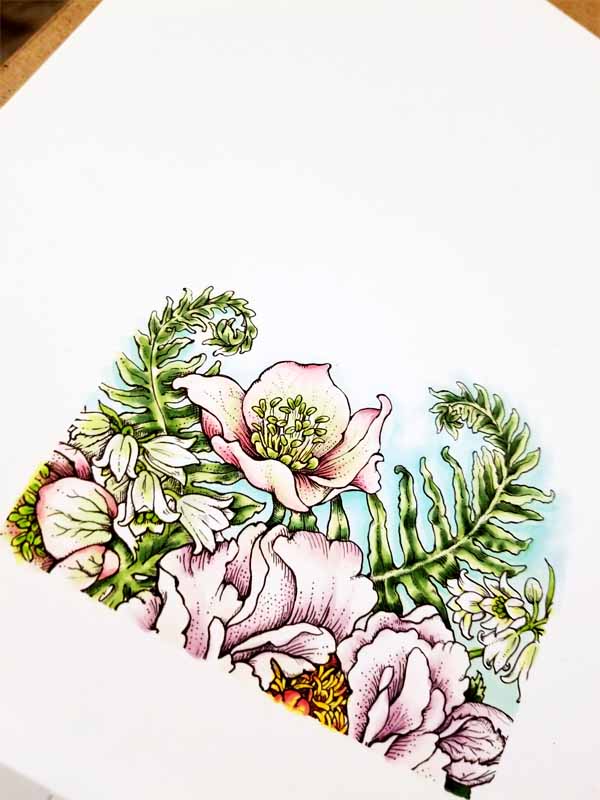
I started by printing off the brand new digital stamp by Power Poppy called Bowl of Beauty. Man, is it a beauty or what? I did only print off a portion of the image and I did blow it up a bit so that you could "see it" when I cut it up and re-assembled! Here's what it looked like after I finished coloring it with my Copic Markers! I have to admit I had a hard time taking my paper cutter to this one. I actually said to my husband, "I can't do it!" And you know what he said? "Don't complain, you knew you were going to do it when you started. Just do it!" HA! A little tough stamping love for me! ;-)


Now here's the little trick! I cut a few slivers of card stock to measure 1/8" wide. This would serve as my guide for layering all my little 1" squares! I started at the top and side....  


And then kept moving my slivers of paper as I went!


You can see just how easy this made it!


And here's a look again at the final "puzzle" all put back together!


Here's a closeup. Don't look too hard! You can see that I am just a wee bit off on my top three boxes. The paper must have shifted as I was making my little squares. It's okay though. Most people won't notice that hopefully!


And here's the cheery little sentiment that I added onto a punched circle and put on my card thanks to some silver cording! The sentiment is from the Power Poppy set Potted Primroses. Love that set!


So, now it's your turn to color up something, cut it up and piece it all artistically back together! While it was a bit tough cutting up this image, I do love the effect and was glad I cued up Dina's tutorial for inspiration! You should give it a try!

Time to take a little trip to see what these lovely ladies whipped up for us all this week!

Christine Okken
Julie Koerber >>> you are here! 
Katie Sims
Stacy Morgan

Thanks for stopping by! I hope you have an amazing and creative weekend and I'll see y'all back here soon! 💗

~Julie 

Friday, December 21, 2018

Tag... You're It!

Hello sweet folks! If you celebrate this beautiful season, are you ready? Have you made your lists and checked them twice? I have to say, I am about 2/3 of the way there. I am trying to "be still" however and realize that the real reason for the season is so much more important than if I bake cookies or get that one last gift. :-)

Having said that, we all need a "time out" to create, don't we? That's why this week over on the Power Poppy Blog, I ushered in a super dooper easy challenge for this week's Creative Confetti! I tried to focus on something small that you could do to 1. get in the spirit and 2. take some coloring time for yourself!


HOW TO PLAY: It's just as simple as the graphic says! Create a gift tag! Now, while my little bit of inspiration below is a Christmas tag, it doesn't have to be! Make one to have on hand for birthdays or any other holiday for that matter. I just knew this was something quick and easy that would still give you some time to create! Once you are done creating, all you need to do is link up your creation HERE! 

On to my creation! 


I decided, for my tag, to pick up a medium that I don't often gravitate toward  -- watercolor! It's soothing and I love the dreamy feel it creates when your project is all wrapped up. To get started, I picked up the Power Poppy set called Let Your Heart Be Light. I love, love, LOVE those poinsettias!

To create, I have to say I followed some of the same principles that Ally used in THIS tutorial. Now, I don't have Brusho but I did use Distress Inks to both stamp (Vintage Photo) and paint (Barn Door, Peeled Paint, Scattered Straw, Wild Honey, Antique Paper).  I started by stamping in Vintage Photo and then added a wash using Tattered Rose Distress Ink using a water brush. From there, I just added droplets of ink from my reinkers to a palette and diluting the color, gradually built up my color to where I wanted it to be. Now, I don't pretend to be an expert on watercolor. I have a lot still to learn about shading and really controlling the color but, each project is a chance to hone in on that. 

Here's a close up for you! I am kind of a "scribbler" when I watercolor and just let the ink flow where it wants to. Again, stuff I need to work on! ;-) 


Now, it's your turn! Do you have a last minute tag you'd like to create for that special gift or special someone? I hope you play along with me this week HERE because "Tag, You're It!" After you get those fingers inky, remember to link up your creation below. If you play along, you'll be in the running for a $25 gift code to the Power Poppy Shop! 

I happen to know that a few of the Bloomies are on standby, hoping you'll hop on over and pay them a visit! Go and see what they have creatively whipped up for all to see! ;-)

Christine Okken
Julie Koerber >>> you are here!
Tosha Leyendekker


I hope you have a beautiful holiday with family and make some amazing memories to cherish for years to come!

Blessings & Peace!
~Julie

Friday, October 19, 2018

Scribbled Sketches.....

Hello folks and HAPPY WEEKEND! If you missed me earlier this week over on the Power Poppy blog throwing up this week's Creative Confetti challenge, never fear! I have a rewind here in the hopes that you'll join me in all the fun!

Are you a sucker for a great card sketch? Do you doodle future layout ideas in notebooks just for times when you suffer a severe mojo drain? If you answered "yes"... then you and I have a little something in common! It's why I am so excited to throw up this week's Creative Confetti! Check it out sweet peeps! 


HOW TO PLAY: It's just as simple as this. Take a peek at the sketch below, use it to create, have fun and then, when your done with your card, link it up using our linky below! Couldn't get much easier than that!


Before we get to my card, I just had to show you the stack of sketchy doodles I keep in my craft room. Some of these are literally years old. I figure they never really "expire" and sometimes, I get a wild hair to pull them out and see if one fits. It's funny, in today's design world, the card layouts aren't as "fancy" or detailed as they used to be, so, sometimes I take off an element or just make it a little more on the simple side. Kind of like the sketch above! 


On to my card! On the heels of yesterday's Instant Garden Release - Painting Pumpkins, I just had to use this image. I love those little pumpkins -- they just make my heart smile!


Oh my... don't you love that little trio of happy faces? I do! After I printed it all off, I colored this scene using Copic markers and actually used so many that listing them all might take the entire post! I will say that I did add the shading with BV0000 and BV00 and above using G0000. I love the purple glow that the BV markers gave this image. I also added a little white gel pen to add some accents to the pumpkins eyes and give them a little more expression. Not that they needed it -- I just have a love relationship with my white gel pen! ;-)

And, here's a closeup for you!


The sentiment on the little sentiment tag is from Power Poppy's clear stamp set Feeling Fall. I thought it was perfect for this because of its size!  I added some BV00 accents and, of course, some white gel pen there too!

And, here's a peek at the inside. I just added the sentiment from the set and made the "Happy" like my son's favorite candy -- candy corn! This will probably be stuffed into a college card package to him. He doesn't really appreciate my handmade cards fully but I stick a little extra love inside to make up for it! ;-)


So there you have it! Now it's your turn! Let's see you take this super simple sketch for a test drive. Keep in mind, you can add more to it, flip it, and make it your own. All you need are the basic elements that I have above! So, get to it and link up your creation. I can't wait to see what you come up with! Again, just click HERE for all the deets on how to play! Remember, a $25 gift code to the Power Poppy shop is on the line! Woo Hoo!


Happy Creating! 

~Julie

Friday, March 2, 2018

Two fun challenges just for YOU!

Hello friends! If you were over on the Power Poppy blog earlier this week, you might have spotted this post. For those who weren't -- you're in luck! I have some fresh creative eye candy to share and it's something YOU can have fun with as well if you play along with me for this week's......


If you didn't know it, every Tuesday, yours truly helps host a color-fueled challenge that's a super fun way to stretch your creativity AND get some free stamps too if you're chosen as one of Power Poppy's guest hostesses! It's called HUES TO USE and all you need to do is use this little trio of colors in your next card or project. Yep, just that easy! 

MOVING ON TO THE LATEST COMBO! When Marcella spotted this amazing swirl of color above, she was at the Smithsonian Museum of Natural History in our nation's capital. This, my friends, is Tight Malachite and as Marcy said when she first set her sights on it, "Dare you not to swoon!" Well, I did indeed swoon and then I decided this would be a wonderfully fun color combo for.. HUES TO USE! I'll admit, it's a bit tricky at times to pull off monochromatic color combos. But, you know what? I know you can do it! And, I can't wait to see how you pull it off! Want to play along? Just click HERE for all the deets! 

Want to see how I took these colors for a whirl?


For starters, I picked up Power Poppy's Succulent Singles and Prairie Cheer stamp sets (for the sentiment). I stamped two of the smaller leaves directly on my decorative paper and then, stamped a bunch onto white cardstock to cut out later. Actually, I could have used the Succulent Singles Die Set that goes with this stamp set but I had a lapse in judgment and forgot to do that! EEK!

Now, here's the fun part. I decided that instead of letting ink play a prominent role in my creation, I would heat emboss. I dug deep into my drawer of embossing powders. Deep! I have so many embossing powders and many of them are more than 15 years old -- so underused! Take a look at the three powders I picked. They are from a company called BMuse. The company is still around but no longer makes these amazing colors of embossing powder. I have Copper, Aged Copper and Bronze. Here's a peek at what they look like, pre-emboss.


And, because you really shouldn't use Copic Markers with embossing powder (I hear that it damages the tip of your marker), I decided to reach for my Distress Markers and picked up these colors below. I never color directly onto my image when using Distress Markers. I scribble them onto a plastic palette or even a large acrylic block and then pick up the marker with either a blender pen or water brush. This time I used my Dove Blender pen. I love how this allows you to add color gradually and almost with a watercolor effect.

And here's a close up of how those embossing powders turned out! It's so hard to photograph the metallic sheen but they are really quite fun in real life. The Aged Copper has that bit of navy in it, which picks up on the navy in the base portion of my card. I love that blue tint, the distressed bronze and the copper. LOVE!


And here's a little better shot of the coloring! I love the almost dreamy wash on each petal. And, to be honest with you? I just scribbled on the color -- didn't really spend a ton of time on it! Isn't that the best?

And that, my friends, is it! Now it's your turn to take these colors and put our own spin on them! After you're done, don't forget to link up your creation below and let us all see your take on this color combo challenge!

But, guess what? This isn't the only active challenge right now over at Power Poppy! Today, Ms. Ally unveiled a brand new Power & Spark Challenge and it's a super fun one! Check it out! 

 
That's right, all you need to do is be inspired by a piece of fabric, a fabric look, and then, create using a bit of that inspiration! You can read Ally's details HERE! 


I happen to know some of the "Bloomies" are on standby, just waiting to share a bit of their creativity with YOU! So, stop on by to these lovelies if you will! 


Thanks for spending a bit of your day with me! I love your visits! :-)
~Julie 

Friday, November 3, 2017

Fluttering Hues

Hello folks! It's Friday, which means it's time to show off a little Power Poppy goodness! I had some time to play and so, before I got rolling, I cued up the latest....


I love these figs Marcella photographed on one of her trips this summer to the Farmer's Market in her town of Webster Groves. So delightful in color and she swears they were just as delish! I must admit to a bit of a snafu. When I looked at these hues on my phone screen, they looked far more purple. So, please excuse the lack of plum and the more purple flair! When I took a photo and popped this into my blog post, I shrieked! How could I have been THAT off! Oh well, such is life, right?


I had printed off the Power Poppy digi Sunset Sway months ago and never took the time to color it up! That's just plain wrong, isn't it!  After printing, I reached into my trusty bag of Copic Markers and these are the colors I grabbed!


Because this is a little larger of an image, I wanted to make sure it took center stage on my creation. So, I left the layout rather simple -- pairing up a few different, yet coordinating kinds of decorative paper, adding the sentiment from Easy Breezy Coneflower, and then accenting with some natural twine and a greenish yellow button!

Here's a little closeup for you! You can see that I did accent parts of this image with some of my favorite white gel pen!


And that, my friends is it! I hope you take some time to play along with Hues to Use before next Tuesday hits and we unveil a brand new color scheme. Keep in mind, however, if you don't play along this week, you can always visit HERE and go through all of our Hues to Use archives to play along in weeks or even months past! It's a never-ending linky, which means there's no timeline to play! :-)

Speaking of playing, the fabulous Cindy Lawrence is hosting a brand new Power & Spark Challenge which kicked off TODAY over at the Power Poppy Blog HERE! But, before you go hopping, here's a little peek at the challenge!


I will let you click on the link above to read all about the challenge! Yes, I will just tease you like that! I hope you check it out -- there's a $50 shopping spree on the line! And if you're in the mood to hop, I know these fine ladies below would love to show off some of what they've worked on this week!


Thanks so much for stopping by and sharing a bit of your day with me! Hope you have a wonderful weekend and I'll see you back here soon!

~Julie

Friday, September 15, 2017

Krafty Christmas Coloring!

Hello all and happy Friday to you all! I have a fun little card to share that's actually showing off not one, but two Power Poppy Challenges going on as we speak! On top of it all, I actually have a Christmas card to sock away for when I need it later this year. I know! Say it isn't so!

So, let's get right into all this fun, shall we? Earlier this week, Kate Sanders ushered in this little color challenge for Hues to Use showing off a bit of late summer flair! You can check out the deets on this fun-filled party HERE! 


Earlier this month, Christine urged us all to partake in....


You can read all about this little challenge HERE! 

And so, my sweet stamping friends, I decided to tackle both with my creation for today!


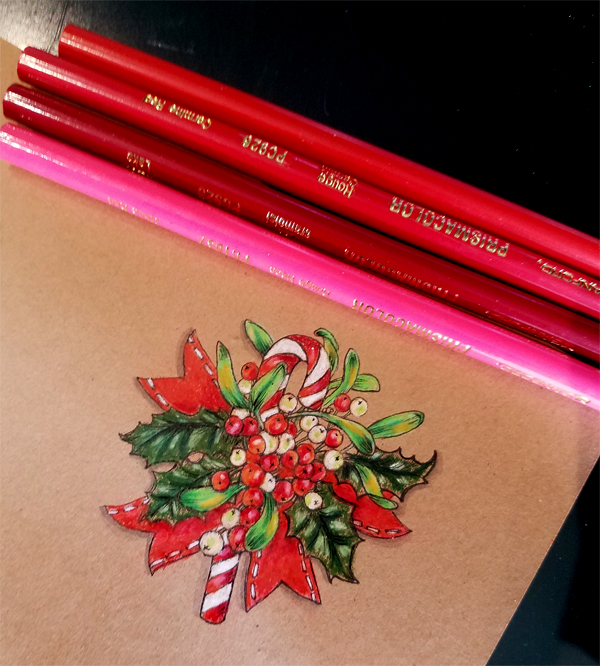
I knew I wanted to use one of Power Poppy's brand new additions to the Instant Garden for this one! Who doesn't just love coloring up new images, so I printed off this baby -- Merriest Berries -- which offers up three different images with a few beautifully scripted sentiments to match! I printed it off on kraft card stock and then.... grabbed these!


 I honestly don't think I've touched my Prismacolor Pencils in an eternity. So, this was good to try my hand at a different medium for a change. When I started coloring, you can see my little mistletoe branches had quite the shade of mint going on there....


 The beauty of colored pencils, as many of you know, is the fact that layering color can be done with ease. This shade still peeks through but you can tone it down by reaching for greens that are more grassy or even olive as I did! See?


You can see that I also took some cool shades of Copic and added a bit of a shading underneath my image. I should say that I did this before I started my coloring. I've been told that because of the waxy nature of Prismacolor pencils, you do not want to touch your Copic marker nibs to this because it will likely get gummed up thanks (or no thanks) to the wax.

And this, my friends, is my finished card! I added some antiquey decorative papers, a half doily and some gilded twine and... ta da! Done!


Here's a close up for you! You can see that do add back in some definition, I did use a Copic Fine Liner over top. I know I just told you that I didn't want to touch my Copic Markers to this waxy surface but for the liner, I did. I risked it! ;-) I think the result was worth it, just to bring back some of that fine line....


And that's it from me today! Be sure to hop on over to see....


These ladies have some fine works of art on display and they'd love it if you hopped on over to pay them a visit!


Thanks for spending a bit of your day with me! I have some coloring projects on my desk... as we speak... so I know I'll be back soon to share with you all! :-)

Have a great weekend!

~Julie


Friday, June 9, 2017

Good Vibe Friday!

Good Friday to Y'all! I am not sure if you've been checking out the Power Poppy blog on Tuesdays but yours truly is hosting a new color challenge of sorts! It's where we find inspiration in real life and put those colors into card making play!


This past Tuesday's little color exploration features a favorite of Ms. Marcella's! Just set your sights on this little firecracker on two wheels below!


If you didn't know it, Marcella's beau, Doug, loves to fix up vintage bikes. If you scroll through Marce's Ista-stream, man-oh-man you see the passion those two have -- and the soirees that they organize -- all for the love of the vintage bike! So, I thought it especially fitting since Marce just celebrated a birthday yesterday (she's not 46 -- she's forty-sassy!), that we'd honor this little number in this week's Hues to Use! Check-check-check-ity it out! So grab those shades of firecracker red, electric yellow and go-go green --- and get to creating!

On to my creation! On Tuesday, I shared how summers are such a busy time for my family. My daughter plays travel softball and when Tuesday rolled around we were already on the road -- hundreds of miles from my craft room! So, this is what I shared-- just a colored up creation using Power Poppy's digital stamp set Juicy Strawberries!  


Well, it's amazing what a difference a few days makes! I grabbed some spunky red and green decorative paper and went... to... TOWN! ;-) Here's the result!


Just in case you wondered, I grabbed my Copic markers for this little number and reached for YG03, YG17 and YG67 for the go-go greens! I used Y13 and Y35 for the electric yellows and then reached for R20, R32, R27 and R29 for the firecracker red strawberries! As you can see, I accented with some white gel pen and then highlighted my image with Y00 and YG0000 just to add a bit of glow! I also used some different card making dies to pull off this card layout for a super bright and perky creation designed to share some love with a friend!

Here's another little closeup for you!


I hope you play along and see where this trio of colors can take YOU! Once you do, be sure to click HERE and link up your creation so we can all see! ;-)


Until then, the Bloom Brigade is on standby, waiting to share some of their crafty goodness! Be sure to hop on over to these lovely ladies' blogs to see what they've been up to this week! I know you will leave their spaces inspired!


Christine Okken
Cindy Lawrence
Julie Koerber
Katie Sims
Stacy Morgan

Thanks for stopping by and spending a bit of your day with me! See you back here soon!
~Julie


Friday, June 2, 2017

Let Your Creativity Soar!

Hello folks and Happiest of Fridays to YOU! Are you ready to take flight with a brand spankin' new challenge designed just for Power Poppy Creative PEEPS? Well, being that it is a new month, there's a new Power & Spark Challenge and this one already earned its wings! Yours truly is the hostess this month so I invite to take a creative step back and... check it out!


HOW TO PLAY: This little challenge has us in search of digital and polymer winged creatures to help our creations soar! For our Junebug Challenge, all you need to do is use a 'bug' on your card! Just that simple -- ladybug, buzzy little bumble, beautiful butterfly, it's up to you!  You'll have to click on over HERE to see the official rules! I've also rounded up a fun little list of all the fabulous winged wonders in the Power Poppy Stamp Set arsenal that you can easily grab to get in on this challenge action! 

On to my creation! I had this digital stamp set  -- Climbing Clematis -- printed and ready to go and had it laying on a stack just waiting to be colored so I thought -- no time like the present! 


This card is really pretty easy peasy! I used die cut shapes to get literally every cut. The sentiment is also from the Climbing Clematis digital stamp set and the paper is a mix of Stampin' Up and some scraps from my decorative paper bin. I had a blast coloring this image and really love the vibrant colors. I used my Copic markers, of course, and reached for B60, B63, B66, RV00, G20, G21, G24 and G28. The butterfly was colored with Y35, YR04 and YR07. The whole image was highlighted thanks to RV0000 and R00. Then, when all was said and done, I did accent the little fluttering butterfly with some white gel pen and some sparkle gel pen as well! 

Here's a close up for y'all!


And that, my friends, is it! I almost forgot to mention -- if you play along and are the lucky winner for the Power Poppy drawing, you win a.....


$50 SHOPPING SPREE
AT THE POWER POPPY SHOP! WOOT WOOT!


Isn't that fabulous? You'll need to get those fingers inky and join me in the fun!

I will add -- there's so much going on at the Power Poppy Shop this weekend that you just might need to buckle yourself in for a few days! First up, if you missed the Good Vibe 5 for this week, just click HERE to see ALL the ab fab inspiration that Marcella has rounded up for you! It's a post that is always BIG on the warm fuzzies! And then, mark your calendar for next Monday, June 5th. That oh-so-special day just so happens to be Ms. Marcella's BIRTHDAY! And boy does she have a digital party planned! Look for a sprinkling of new sprouts in the Instant Garden, ready to download, print and create with! I CANNOT WAIT! Can you?

See you back here real soon!
~Julie