Showing posts with label Sketch Challenge. Show all posts

Friday, November 8, 2019

Power Poppy Friday!

Hello all! I have my very first Christmas card of the season to share. I know. Shocker! I am typically a "Last Minute Lucy!" This card below is actually one that I plan to use as a Thank You after the season! Since it's Power Poppy Friday, I thought it was a good time to share! I hosted Creative Confetti earlier this week (click HERE to see the challenge) and helped usher in a fun sketch for you to try your creative hand at! Check it out....


On to My Creation! 


I used Power Poppy's Snow Kissed clear set for my card. I just ADORE this little snow guy! This image is really kind of on the larger side but with my layout, I knew I wanted my snowman just peeking out of the top. So I stamped him using Memento Tuxedo Black ink and then used a stitched circle die to cut him out.  On the top rectangle, I used one of the nordic patterns in the set to tie in the Fair Isle/Nordic look! I colored the snow guy up with Copic markers and really didn't use a ton of them -- a couple reds, a couple greens and then BV20 and BV23 for his hat. I accented with RV0000, some white gel pen and, of course, glitter glue! Love those little sparkles on anything snow!

 If you've not seen this set, here's a peek at the entire set for you!


I am showing you because you can see that the sentiment I used is only a part of the sentiment in the set. So.... how did I do that? It's as simple as a little bit of masking tape!


So, I added the tape covering up those top words before inking it up. I realized after I constructed my card base that the top portion just wouldn't fit. So, thanks to a little tape.... 


I inked it up, pulled off the tape and then stamped! A perfect fit! After I was done stamping, it was just as simple as matting it up, adding some fun stitched ribbon and a few little red rhinestones. Easy Peasy! To get in the spirit, I actually cued up some Christmas tunes as I created and it was so fun, I am actually looking forward to some marathon afternoons in my stamp room. Now, to come up with some ideas! ;-) 

Well, since it's Friday, you know what that means!


This fabulous lady had some time this week to create, so be sure to stop by and say"hi!"


Thanks so much for stopping by! I hope you have a beautiful and creative weekend ahead! I'll see you back here real soon!

Until next time!
Julie 

Friday, October 19, 2018

Scribbled Sketches.....

Hello folks and HAPPY WEEKEND! If you missed me earlier this week over on the Power Poppy blog throwing up this week's Creative Confetti challenge, never fear! I have a rewind here in the hopes that you'll join me in all the fun!

Are you a sucker for a great card sketch? Do you doodle future layout ideas in notebooks just for times when you suffer a severe mojo drain? If you answered "yes"... then you and I have a little something in common! It's why I am so excited to throw up this week's Creative Confetti! Check it out sweet peeps! 


HOW TO PLAY: It's just as simple as this. Take a peek at the sketch below, use it to create, have fun and then, when your done with your card, link it up using our linky below! Couldn't get much easier than that!


Before we get to my card, I just had to show you the stack of sketchy doodles I keep in my craft room. Some of these are literally years old. I figure they never really "expire" and sometimes, I get a wild hair to pull them out and see if one fits. It's funny, in today's design world, the card layouts aren't as "fancy" or detailed as they used to be, so, sometimes I take off an element or just make it a little more on the simple side. Kind of like the sketch above! 


On to my card! On the heels of yesterday's Instant Garden Release - Painting Pumpkins, I just had to use this image. I love those little pumpkins -- they just make my heart smile!


Oh my... don't you love that little trio of happy faces? I do! After I printed it all off, I colored this scene using Copic markers and actually used so many that listing them all might take the entire post! I will say that I did add the shading with BV0000 and BV00 and above using G0000. I love the purple glow that the BV markers gave this image. I also added a little white gel pen to add some accents to the pumpkins eyes and give them a little more expression. Not that they needed it -- I just have a love relationship with my white gel pen! ;-)

And, here's a closeup for you!


The sentiment on the little sentiment tag is from Power Poppy's clear stamp set Feeling Fall. I thought it was perfect for this because of its size!  I added some BV00 accents and, of course, some white gel pen there too!

And, here's a peek at the inside. I just added the sentiment from the set and made the "Happy" like my son's favorite candy -- candy corn! This will probably be stuffed into a college card package to him. He doesn't really appreciate my handmade cards fully but I stick a little extra love inside to make up for it! ;-)


So there you have it! Now it's your turn! Let's see you take this super simple sketch for a test drive. Keep in mind, you can add more to it, flip it, and make it your own. All you need are the basic elements that I have above! So, get to it and link up your creation. I can't wait to see what you come up with! Again, just click HERE for all the deets on how to play! Remember, a $25 gift code to the Power Poppy shop is on the line! Woo Hoo!


Happy Creating! 

~Julie

Friday, April 1, 2016

It's a BIRTHDAY Celebration!

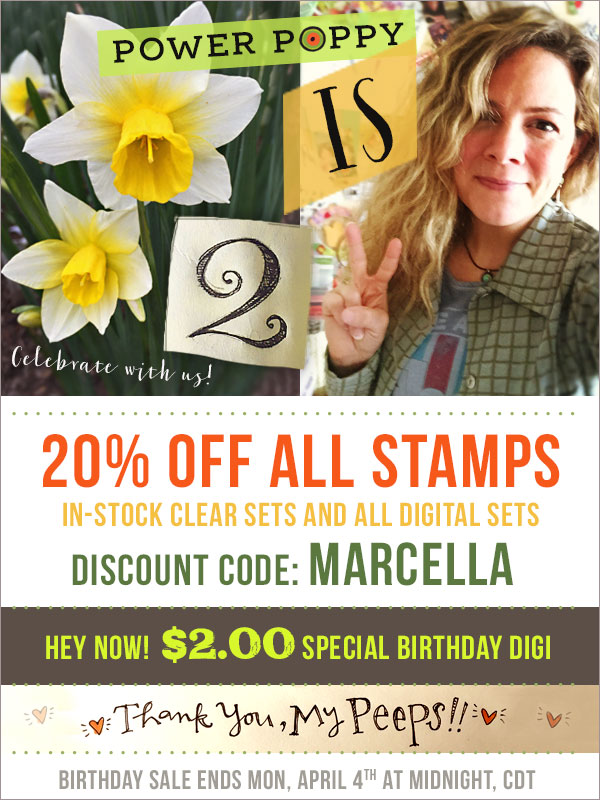
Howdy Ho there fellow stampers! Boy do I have a ton of fun to share today. Today is a pretty special day! Not only is it the start of a new month with a new Power Poppy Power & Spark Challenge to unveil, it's actually, the start of a new year for Power Poppy! Yes, TODAY marks the 2nd birthday of this fine, fun, FANTASTIC company!


To help us mark this momentous occasion, Marcella has a few gifts up her sleeve! Isn’t that just like her? It’s her company’s birthday and she wants to give YOU the gifts! ;-) So, stay tuned for the deets on that at the end of this post...

With the mark of a new month, we have a brand-spankin’-new Power & Spark Challenge and this one will have you stretching the bounds of your coloring creativity! 


Ms. Christine Okken is the hostess for this colorific quest to create something wonderful with — just THREE markers! Did I hear you gasp? You can’t fathom picking just three? Yes, I know, it sounds like a true (and FUN) challenge! Here’s how Christine explains HERE (that's also where you'll find the official rules and the linky to link up your creation!). In a nutshell, choose three markers by picking three in the same color family, pick three from complementary color families, or, BE COURAGEOUS, close your eyes and choose three randomly! Not sure I am brave enough to do that, but we'll see, the month isn't over yet! ;-)

On to my 3-color creation! Not only did I choose just three colors, I paired it up with one of the latest Pagemaps.com CardMaps sketches! The Power Poppy Bloom Brigade was asked to design cards using these fresh and fun new card recipes and you can find all TEN of the sketches HERE! 

Here was my sketch.....


And, here's my take on it!


As you can see, I kept pretty close to the sketch and, I'll admit, I had a lot of fun doing it! I had some dies that I honestly, haven't put my hands on in a long time -- like the fun edge die and the file folder die with the decorative tabs. It was a great excuse to use a few different tools to get creative! 

And, in line with Christine's challenge to use ONLY three markers, here's the three I picked. You can see I took my inspiration right from the challenge graphic! ;-)


I used BG15, YG23 and R81. You might look at my creation and say, "Hey, how did you get the color range with just three markers?" Here's a tip for you. 1. Grab an acryllic block or plastic palette, scribble off a little color and 2. Use your blender pen to pick up that color. Draw the excess ink off the nib by scribbling on a scrap piece of paper too! I colored dark to light and after I added all the dark that I wanted, used the scribble technique to add lighter layers of color. You can see below what I'm talking about! See the variations of green? Of pink? and of blue? I even used this scribble technique to add the blue shadows around my heart shaped wreath! After I was done, I did add a wee bit of razzle dazzle thanks to some glitter glue too! 

Here's a close up for you! 

And that, my friends, is it! :-) Fun stuff on a few different levels! Speaking of fun -- before we get to the Bloomies and their wonderful weekly creations, we interrupt this blog post to bring you a birthday special from the Chief Peep — Marcella Hawley herself! Since Power Poppy is 2, she wanted to kick off another flowering and empowering year by sharing with all of you! Check out these fun deets! 

http://powerpoppy.com

Well after all that fun, it's time to pass the baton to my fellow Bloomies. Be sure to check out these fine ladies below and see what they whipped up for your viewing pleasure! I should point out that along the way, you'll see not only a few 3- color creations but some of the sketches in play from the April edition of CardMaps over at Pagemaps.com!  You can find all of the inspiration HERE!


Julie Koerber >>> you are here!


Thanks for stopping by and spending a little piece of your day with me! :-) Have a great weekend!

~Julie


Pin It

Saturday, October 3, 2015

Happy World Card Making Day!

Welcome to a momentous occasion here in the card making world! It’s a day devoted completely to... US!


That’s right folks — for today we get to create with reckless abandon watching that ink flow, paper fly, and glitter float through the air like fairy dust! 

In honor of this oh-so-special day, Power Poppy thought it would be fantabulous (fantastic plus fabulous = fantabulous) to offer up a fun challenge that would give you a reason to create and also give us a reason to give away a little Power Poppy goodness! So, here goes! 

HOW TO PLAY:  MAKE SURE YOU USE ALL 3 ELEMENTS

#1: USE THIS SKETCH AS INSPIRATION


#2: USE NON-TRADITIONAL COLORS TO CREATE A HOLIDAY CARD

Here’s a little peek at how I used the sketch! Okay, I hope I don’t get “fired” for sharing this top secret look at an upcoming Power Poppy Holiday set. ;-) Take a gander at Power Poppy’s soon-to-be-released stamp set called Cozy Cupfuls! You can watch for upcoming Power Poppy Holiday Collection sneaky peeks starting October 13th with the full release on the 18th of October! You are definitely going to want to mark your calendar. This collection is buzz-worthy!!!


#3: ADD A LITTLE SPARKLE OR BLING

Anyone that knows me --- KNOWS --- I love my bling. It makes me happy! So, as you can see here, I have a plethora! I have a little rhinestone for my deer's nose, a little sparkle gel pen on the cup’s steamy drink and a little razzle dazzle on the package thanks to some glitter glue, see?


So, there you have it! Use the sketch, non-traditional colors for a holiday card and add a little sparkle! Then, link up your creation HERE ON THIS POST! You have a whole WEEK to play along! Contest will close next Saturday, October 10th and Power Poppy will announce a winner sometime on Sunday, October 11th. Random winner will receive their choice of three digital stamp sets or one polymer stamp set of choice! 

Want to see how some of my fellow Bloomies took this sketch for a spin?


Julie Koerber >>> that's me!


There you have it Card Making Comrades — get those fingers inky, have some fun, create and then link up your creation below! HAPPY WORLD CARD MAKING DAY!


~Julie


Pin It

Friday, January 9, 2015

Thinking of You!

Hello all and happy Friday! Hope your week is ending on a high note! Last Friday, I shared a little sketch from the latest crop of Cardmaps sketches over at pagemaps.com and today, I am bringing you another! So, let's get to it, shall we?

Here's a peek at my card.....


And, here's a peek at the sketch I used!


I started with digital stamp from Power Poppy called Camellias. Isn't it a lovely image? I sure think so! I printed on white Cougar Opaque card stock and then colored it all up with Copic markers! I used RV0000, R81, R83, G20, YG61, YG63, Y21, Y35 and BG0000. 

The rest is just matting it all up! The paper is from My Mind's Eye. I used a Classic LG Circle die from Spellbinders and while the die was still on, I added a splash of paper piercing around the inside edge of the die. I also added some glitter glue Add some Stampin' Up buttons threaded with twine and... ta da!!!


And that, my friends, is it! I have to say that I love using sketches, I grab some fun coordinating decorative papers and let the paper fly as they say! I have found that putting together my card without my stamped image is actually so much easier than stamping, coloring and trying to match up the papers afterward. For so long, that's how I did it! Leave it me to make things harder than they ought to be! ;-)

Want to see some more Power Poppy goodness? Well, the Power Poppy Bloom Brigade is at it again -- sharing their talent and creativity in the blogosphere! So, be sure to stop on by and say "hi" to these lovely ladies!

Allison Cope
Christine Okken
Cindy Lawrence
Dawn Burnworth
Julie Koerber
Leslie Miller
Stacy Morgan
Thanks so much for stopping by! I hope you have a wonderfully creative weekend ahead and I'll see you back here soon! In fact, mark your calendars! On the 15th of January (next Thursday) we will have a brand new release from Power Poppy that's ALL DIGITAL. In fact, on the 15th of EACH month, the Bloom Brigade will be showing off new images in its Instant Garden (all digital blooms and plants!). We'll also have some fabulous designers joining us for the big reveal! So, come on back now, y'hear? :-)

~Julie


Pin It

Friday, January 2, 2015

HAPPY NEW YEAR!!!

Hello all and HAPPY NEW YEAR! And, on this first post of mine for 2015, do I have a treat for YOU! There's a whole new crop of sketches over at Pagemaps.com's CardMaps! So, if you need a little help with your mojo, or just want to try a new layout, head on over HERE and see all the cardmaking fun you could have! 

The fun thing about these latest sketches is the fact Power Poppy's Bloom Brigade took the sketches and put their creative spin on them! Want to see my creation?


Above is my card and below is the Cardmaps Sketch! 


Instead of hearts, I simply used one of Power Poppy's Digital stamps called Winter Pick Me Up in the lower right corner. I printed it directly on decorative paper and then added a splash of color thanks to Copic Markers. I used YG03, G20, YG13, E23, B02, B00, BG0000. Once I was done coloring, I did add a bit of razzle dazzle thanks to some glitter glue! I also used BG0000 around my image to highlight it and then blended with a colorless blender. 

See?


The papers I used were a mix of My Mind's Eye, Bo Bunny and Bazzill. The ribbon is May Arts and the die is one of the Fancy Tag dies from Spellbinders! While the die was still on my paper, I did sponge some Adirondack Willow ink around the die. Add a few Prima sparkly gems and start matting it all up!

The sentiment is from the Sassy Succulents Power Poppy stamp set. It just fit perfectly in the center of my die cut ribbon slide. Don't you think?


And that, my friends, is it! Like I said, the Bloom Brigade took this latest round of sketches for a test drive. Again, you can find the sketches HERE. And, after you've taken a gander at the sketches, roll on over to these talented ladies below to see their spin on these different layouts!


Allison Cope
Christine Okken
Cindy Lawrence
Dawn Burnworth
Julie Koerber >>>> you are here!
Leslie Miller
Stacy Morgan
Tosha Leyendekker


Thanks so much for stopping by! I'll see you back here soon!
~Julie


Pin It

Monday, October 13, 2014

10 Minute, Sketch Inspired Creation!

Hi all -- time for another PageMaps Monday -- when we dig into the CardMaps possibilities, pick a sketch and bring it to life! Today's card literally took me 15 minutes and that's why I'm excited to share!

On to my creation!

I have to say, I had already stamped and punched these butterflies and they were just sitting on my stamping desk. The images are from the Stampin' Up set called Kinda Eclectic and I stamped them using Memento Sweet Plum and Memento Cantaloupe. After stamping, I used the Elegant Butterfly punch as well as the Bitty Butterfly Punch.  Once I saw those and saw this sketch below -- I knew I could whip out a card in no time flat! 


The panels of decorative paper are 1-7/8" by 3" and then matted onto 2" by 3-1/8" pieces of white card stock. The shorter decorative panels are 1/7/8" square matted on 2" white squares. Attach it to your card front, making sure to wrap one of the longer panels with some silver cording and you're almost done! I did add a sentiment from the Another Thank You clear stamp set from Stampin' up using Sweet Plum, punched it out using a 1" circle punch, matted it on a 1-1/4" circle punch, punched a 1/16" hole at the top, threaded my cording through and then tied it in a bow! Attach the little butterflies with glue dots and accent with rhinestones and... ta da! Done! Easy peasy lemon squeezy! 

Here's a close up of those little butterflies. I am seriously in love with them! ;-)


So you see, inspiration is literally just a click away over at CardMaps! Click HERE to see the latest round of sketches and HERE to go through all of the CardMaps archives! Grab a cup of coffee before you go -- you're going to want to stay awhile! ;-)

See you back here soon!
~Julie


Pin It

Monday, October 6, 2014

PageMaps Monday!

Hi all! Like most Mondays, I like to share a little PageMaps fun to get that creativity started for the week! There's nothing better than picking out a fun sketch and putting it to paper! And, this month, there's a whole new crop of Cardmaps Sketches! Just check them all out HERE!

On to my card! Here's a peek at the finished creation..... 


And here's the sketch that inspired it! 


I used Penny Black's stamp set called A Bunch for this one. I love the fact that this set has a variety of blossoms and then a handful of ways to display them -- a terra cotta pot, a vase or... like I chose -- I mason jar! ;-)

The images were stamped with Memento Espresso Truffle and then colored with Copic markers Y32, Y35, Y38, Y00, G20, G21, and G24. The jar was stamped on decorative paper, cut out and overlayed so that my flowers looked like they were just happily sitting inside!

Here's a close up!


The rest is just matting it up! All of the papers were from Carta Bella's Hello Again paper pack. I followed the sketch pretty much to a tee -- using an EK Success border punch, some May Arts Twine and a Spellbinders die for the curvy edge. 

And that, my friends, is it! Need some inspiration to kick start your week? All you need to do is hop on over to CardMaps and see all the fun sketches for this quarter! 

I'll be back soon and hope you will too! 
~Julie


Pin It

Monday, September 29, 2014

Hello Friends!


Hi all and happy Monday! Ready for a little Pagemaps Monday creative spark? I'm ready to share!! This card one actually one that I made a couple months ago and never blogged! Shame on me! So, let's get this show on the road, shall we?

This sketch was from the July Cardmaps & here it is!!!!


And, here's my card!


This shows that darling little pocket that is a part of the sketch! I actually had a kraft colored envelope and using Memento Toffee Crunch, I stamped the poppies from the Penny Black set called Friendship Flowers. The paper is a mix of Bo Bunny and Stamping up. I added some paper piercing, some fun buttons, a bit of May Arts lace and twice. That's it for the outside. Wanna see the inside of the tag?


I stamped the poppies using Memento Espresso Truffle and then colored them up using Copic markers. I picked up R20, R24, R27, G40, YR0000, and YR01. Just that simple!  And that, my friends, is it! If you are ever in need of something to spark you mojo -- check out PageMaps! If you just click HERE, you'll find dozens upon dozens of sketches to give you a shot of creative inspiration! 

Thanks for stopping by! Hope you have a wonderful start to the week! See you back here soon!

~Julie

Pin It

Monday, September 22, 2014

A little sketch to kick off your week!


Hi all and happy Monday! I took a bit of a hiatus from Pagemaps Monday this summer... but now I'm back and I realized there were a couple cards that I made.... and hadn't shared! What's up with that? I guess no time like the present, right?

So, this sketch was from the July Cardmaps & here it is!!!!


And... here's my take! I stamped the flower bucket from the Penny Black set called Friendship Flowers using Memento Espresso Truffle ink. And then? I picked up my Copic markers and went to town! I used V01, V04, V06, Y01, Y04, BG01, BG03, BG05, and G20. The sentiment (also from the set) was stamped on a Spellbinders tag die and then sponged with a little Broken China Distress ink. The ribbon is Hug Snug. The enamel dot is from Stampin' Up and the paper is just a mix from my scrap bin. 

Here's a look!


And here's a close up! You can see I  cut out the bucket and then added a little bit of razzle dazzle with the help of some glittle glue on the centers of the flowers!


And that, my friends, is it! If you are ever in need of something to spark you mojo -- check out PageMaps! If you just click HERE, you'll find a plethora (that's a big word for a Monday!) of sketches to give you a shot of creative inspiration! 

Thanks for stopping by! Hope you have a wonderful start to the week! See you back here soon!

~Julie


Pin It