Showing posts with label Stamp Room. Show all posts

Sunday, September 3, 2017

My Small But Mighty Craft Closet

Hello folks! First off, I have to say that I spent ALL DAY yesterday going through tubs of stamps and I have added A TON of stuff to my sale page...


I am getting rid of a ton of Spellbinders dies and have added a bunch of red rubber cling stamps -- all of which are in new or like new condition for dirt cheap! THESE THINGS ARE PRICED TO SELL FOLKS!  I just need to make room and decided if I didn't have time to use these beauties, they should go to someone who can put them to good use!

You might ask, you need to make room? You've been downsizing for a while now, haven't you?

The truth is, when we moved into our new house last March, we decided not to finish the basement right away, which is the future home of my craft space. Yep, sad but true. Sometimes, there are just more important things that pull on your finances -- like braces for the kiddo or school tuition or that softball camp, sending the boy child to college or.... you get my gist! So, I thought I'd share my little crafting  room closet with you all! It is literally a 5-foot by 5-foot walk in closet that I claimed. I told my husband in no uncertain terms that this closet was mine. I married a pack rat and if I didn't, he'd decide that those bank statements from 20 years ago (yes, this is the truth) needed a shelf or two. Love that man but... golly! Heavy sigh.

So, here's a peek. I wanted to show that, with some planning, you can cram a whole mess of stuff in a small space!

This is obviously a view from the door. You can see we have a few shelves added for plastic bins which house all kinds of buttons, embellishments, ink pads, glues, etc. -- basically anything that's small and would love to sit in a drawer! The two black bins (from the dollar store) at the top have glue runners and finished cards. Two white bins toward the right have pre-cut cards and envelopes in every color of the rainbow, ready to rock and roll as soon as a card front is done. Black and white patterned bins house die packages and embossing folders. Those bins from Thirty-One Gifts were the perfect size for these things! Ribbons are in jars on the bottom of the bookcase as are my Spellbinders machine and a plastic covered tub full of acrylic blocks.


On the wall behind the door, I added small hooks that I picked up at Lowe's over the years ($6 to $8 apiece) and as you can see, they house all my dies. Did you see I am selling a ton of these HERE?


On the third shelf, I have four of these little bins I picked up at Target for clear stamps. All of my stamps are placed in THESE Avery Elle sleeves to keep those little polymer stamps in their place! I did add a piece of white card stock to serve as a backer so I could better "see" my stamp sets! I have them in alphabetical order so I can also easily find them! 


Here's a close up of those bins I mentioned earlier! I love that they have a handle so I can grab and go if need be.


Along the other wall, I have cubbies that house paper and have a few extra drawers for wood stamps. the material cubbies have ribbons and scraps, some larger punches and large 12" paper pads. 


And, here's how I store my colored and decorative card stock -- in file folders arranged according to color group. 


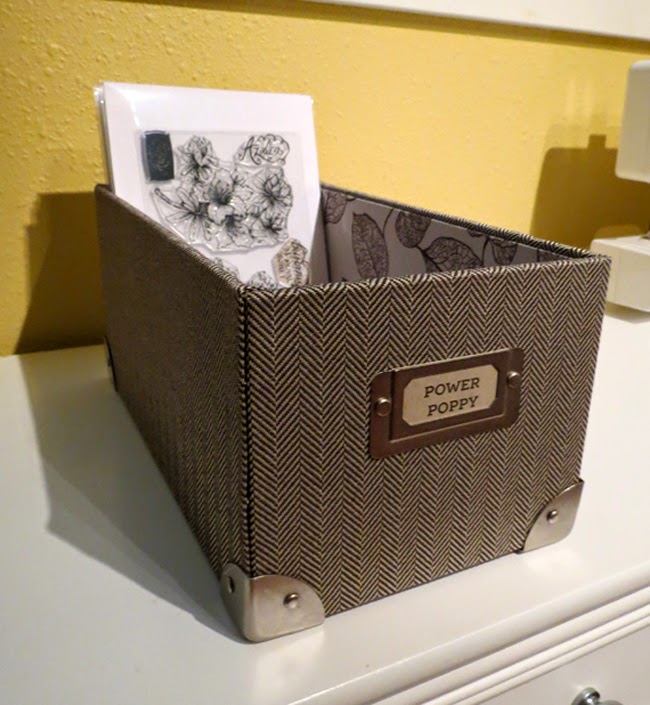
And then this guy was a lifesaver for ink pad and reinker storage! 


I got this from a store that went out of business for free and it houses my Copic reinkers nicely! Soon, I'll outgrow it but for now, it works! 


And there you have it my friends, my humble little craft closet. You might ask. If this is a closet, where do you craft. Well, this is the closet attached to the home office. So, I pull things from the closet and craft here....


You might say, wait a minute, you have a room! Well, I have to work here too. As a writer, my desk is USUALLY covered with papers, article clippings, notebooks full of my deadline schedule, etc.

So, there you have it peeps -- my little corner of the creative world! Maybe some of my tips might help you store more per square foot! ;-)

~Julie


Thursday, April 17, 2014

Operation Overhaul!

A few months ago, I decided my craft room was bursting at the seams and -- when you can't find anything easily -- something's got to give! And while it's not fun sharing photos like this below, sometimes you have to experience this...... (and no, this was not staged - this was me pulling apart everything to scale back!)


Before you get to this! Welcome to my storage closet. 
I started my saving my pennies and investing in THESE organizational cubes. I love the way they turned out. The fabric cubes were from Target -- love that they were just $6 apiece! I put 6 by 6" paper pads in one and ribbon scraps in the other. The filing drawers hold all my papers. That plastic cart to the left of m cube storage is going -- I took some of the clasp together drawers and filled one cube with them. One hold tags, one holds stickers and border strips, another holds card ideas and tutorial sheets.I have two that are empty just for future use. I loved how these drawers fit perfectly inside the cubes.  

I have been looking to organize my cards for a while now by category so that I don't have to flip through boxes to find just the right card. I did donate a TON to my mom's Card 4 Kids program. I shipped off probably 70 cards so that the kids at Children's Hospital of Michigan have birthday, thank you and congrats cards for when they need them! 

I found these little bins at the dollar spot at Target and with the help of some kraft paper and an oval punch, I labeled them all....

And, they fit perfectly in the cubbies in my desk! 


I also changed up the way I store my clear stamps. I used to use plastic clam shell boxes but I found that they really take up a ton of space and I wanted something that was more low profile. Thanks to a few fellow stampers, I found these sleeves by Avery Elle!


After I trimmed a piece of white card stock to give my package a firm backing, I set the stamps inside and then am storing them in these cut little boxes I found at Target for $7 apiece. I think I'll be able to fit about 100 stamp sets in each one (which is way more space than I need)!

I labeled them and have about four extras for different sets from different companies down the road! 


I admit, I am a sucker for Spellbinders dies and I added these small hooks a few years ago to hang my dies from. I added a few hooks here and then swapped out a cafe rod I had to store my punches for THIS bar from IKEA which is so much sturdier! If you wanted to use this for something other than punches, they have some cool hanging storage that works with this bar as well. They have little cups with hooks that hang off this bar. Check it out HERE -- great for pencils, markers or tools! I am *thinking* about adding one of these over my desk with my Copic markers grouped by color. 


I picked up this beauty a few years ago at Harbor Freight Tools -- it's a 12" Revolving Four Tray Bin for $19. It's perfect for reinkers, glitter glue containers and adhesives.


And... the last part of my overhaul was just reorganizing my plastic bins and making sure they were labeled. I bought a Dymo Letratag Labeler for work about 5 years ago and it came in handy! 


I still have a corner set up for my photography.....


 And, the overall room didn't really change much... still looks much the same!


I hate to say it took me 6 weeks to reorganize and downsize. I think by selling off some beloved stamps and organizers - I was able to get rid of about 30% of my things that needed a little more love! And... in the process, I have some room to move and places to store new and fun things. It's a win-win! :-)

Thanks for stopping by!

~Julie


Pin It

Saturday, August 18, 2012

Fun little project!

I don't know about you but there are times when I seriously think I might need a 12-step program for Pinterest. I look for recipes. I look for craft ideas. I look for home inspiration. I just... well... look! But, not too long ago, I found a really fun idea. Want to see?


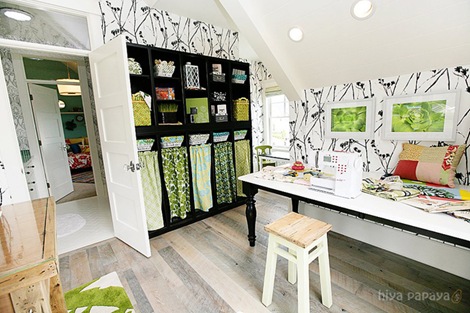
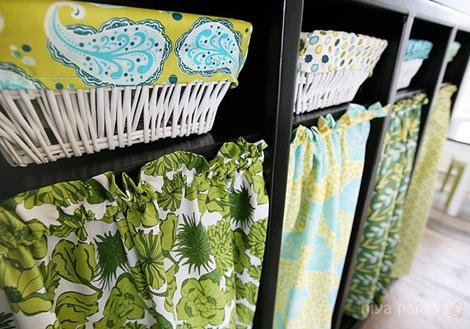
I just loved that this lady used tension rods and fabric to add splashes of color and hide what was on the shelves! Isn't this cute?


You can see more HERE.

While my craft room isn't as bold as that, I thought I could take some fabric and spruce up my room a bit. If you want to see the "Before" you can just click HERE   and see what I've done over the years. Keep in mind, this is not an earth shattering update, but just a little post on what a few bucks and some fabric can do!   Jo-Ann Fabrics recently moved to a new location here in town and so I managed to get the fabric dirt cheap. It was funny the lady said -- that's 30% off and then today you get an additional 50% off the 30%. Huh? I smiled and said.. OK! 

So, here's my take on the Pinterest Inspiration!


I measured out the insides of my shelves and multiplied it by 1-1/2 and that's the amount of fabric I used to create my little shelf curtains. I added a border of black and then stitched on some 2" satin ribbon for a little something extra. 

This is the other bookshelf. 


And you can see... this is what is underneath. It's not unruly or anything. I just really liked how the curtains almost make the room a little more "feminine." You know? Each of these bins has a different stamp set theme i.e. florals, celebrations, Christmas, sentiments, etc. 


And then, with some extra I bought, I covered two canvases to bring some pop on the wall. 


And there you have it -- one more way that Pinterest inspired my life. I just remembered that I need to grocery shopping today. Wonder if there's a recipe I can be inspired by? See... I told you I had an addiction! Hope you have a great day and thanks for stopping by! 


Pin It

Tuesday, September 29, 2009

Answering a couple questions.....

Hey all! I got a few email questions since my last post so... I thought I'd take some time to answer them here!

Q. What is that "contraption" in the corner of some of your photos?

A. This is my makeshift light kit..... total cost was between $40 and $50 but you could get away with a lot less.
The light is one of those clip on lights that you can find in the hardware store - ($5) I put a natural light bulb in and then covered it with a light diffuser screen that you can find at a camera shop ($15-25). I bought mine on line at B & H Photo. It is like THIS one. They come in smaller sizes - all you need to do is get one larger than the light source you are using.
The stand was one I found on ebay and I paid no more than $20 for. I just searched "light stand" and found it. It can reach to a 7 foot height. From here, you clip your light onto your stand and you can see I use a fancy schmancy clip to attach my diffuser. I raided my husband's desk drawer at work! ;-)
When I said you could get away a lot cheaper - you really don't need the light stand since the light is a clip on light. Attach the light to a chair back and-- you could be good to go! I just like the fact that I can adjust my light to height. I don't do that often, but it's nice to have.

Q. What kind of camera do you use?
A. I use a Cannon Powershot G6. I bought it for work about 5 years ago. I love it, but if you have a macro button, that's really all you need now a days to get great pictures of your cards/creations. Cameras are so much more sophisticated now that you can pick a similar camera for a LOT cheaper. I think now they are up to the G10!

Q. How do you store your border punches?
A. Honestly, that is becoming a problem!! ;-) I have them in one of the plastic drawers in one of the rolling carts and I won't be able to fit one more punch inside. I love the new EK Success punches that lock down to a slim size -- those rock! Anywhoo, no real great ideas on that front! LOL!

Q. What does the sign on your window ledge say?
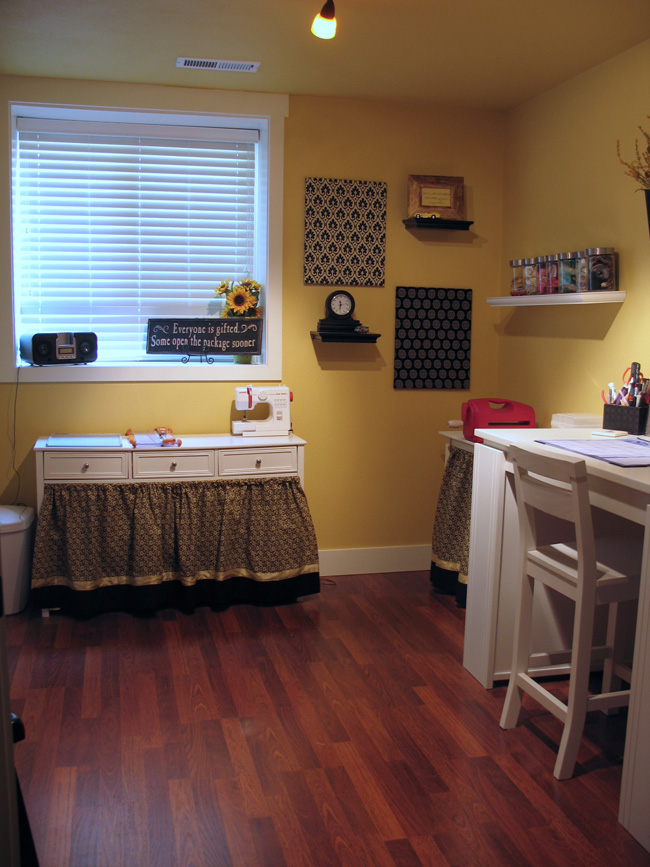
A. Well - it says 'Everyone is gifted, some just open the package sooner.' It made me laugh and realize that hey.. we all have our moments. So, if some day I finish a card and accidentally smudge ink all over it - I'm only human, maybe I'll get to open "the package" some other
day! :-)


And, to answer my friend Cheryl who said - if you are anything like me, you won't want to create for a while for fear of messing it up! Well, I am happy to report I have 8 new cards to show! hehehe! I just need to get my camera out so I can show you all!
Happy Tuesday! See you back here soon!

Sunday, September 27, 2009

My wild hair is.... OVER!

Ok, I got a lot of funny flack for showing pics of my stamp room this week. BUT, guess what? I found some deals and figured out some storage solutions that I am soooo jazzed about! I thought I would share because who knows -- maybe it would be useful for other stampers in blog land! :-)

My first find is what I consider a BIG FIND! I was flipping through one of my craft magazines -- Crafts 'N Things I think-- and I saw an ad for a company called Unikeep. They advertised some fun little two and three ring binders that were perfect for craft storage. They were trying to showcase this for photo storage but I thought -- OH MY GOSH-- I have been really looking for a system for my cling stamps. So, I logged onto their website and found THESE! And, they were on sale! Only $1.07 per binder! They measure roughly 5 by 9". I thought it was a perfect size! After shipping (super duper fast shipping I might add) I got 20 cases for less than $30!

I bought the white folders but they come in clear and black too. It has a clear wrap overlay so that you can customize your binders -- I decided to make mine for my Impression Obsession stamps and organize them according to categories. See?

This is what they look like open. It's basically a two ring binder that is about 1-1/4" thick. Here's an inside look...

As luck would have it I had some large EZ Mount sheets that you can stick cling stamps to. I wasn't aware of this but you can't or shouldn't stick cling stamps to acetate for storage. It creates a reaction that will ruin your cling. Anywho - I cut some of my larger sheets to fit inside. Then, the fun began as I started to put my stamps inside. Look how many stamps you can fit in these babies! I have the sheets full on both the front and back of my EZ Mount storage sheets. Each binder can fit between 30 - 50 cling stamps.

As I was trying to figure out where to put my new binders, I realized, they fit perfectly into one side of my craft desk. WOW! Can you see me jumping up and down??? Sorry, I am easily excitable! That bottom clear box is a container I put all my acryllic blocks in.

The next big find was these photo storage boxes - just $2 a piece at Hobby Lobby this week! This was my storage solution for my Flourishes clear sets!
I have been buying some of Flourishes Clear Storage Boxes a bit at a time to put all of my clear sets in. You can see those boxes HERE. They fit two 4 by 6 sets in each one! I organized the sets according to category and when all was said and done I was able to fit more than 70... yes MORE than 70 sets into five photo boxes -- with plenty of room to spare! Each box will fit up to 30 clear sets if you use the clear boxes. If you keep your clear sets in a plastic sleeve - you could probably fit upwards of 100 in each photo box.
I had some old baskets from my son's room that he wasn't using and put all my BasicGrey pads in one....
And ribbon spools in the other!

The loose ribbon went into some fun jars. I grouped the ribbon according to color and I used some baby clothes pins to secure the ends. The jars were on sale at Hobby Lobby for $2 each.

And... here's a peek at my stamp closet so you can see how it all fits together!

I use small hooks I got at Lowe's for my Nesties and an old cafe curtain rod for my larger punches...

Here's a shot of the room from one side....

And a wider shot of my closet. The plastic rolling storage carts house my papers. I have solids and dp organized now by color. Easy breezy to find what you need! The smaller storage drawers are for emellies.
Here's the room from one side so you can see the closet and how big of a part this is to my room.

The fun thing? Close the door and... bam... out of sight!
I know some of you have seen my room before but, with these new storage systems, I had to share. I had been struggling for a long time to find something that would make it easy. And, I am thinking this is going to be easy!
Hope you all are having a fabulous weekend! Take care and I'll see you back here soon! :-)

Thursday, May 24, 2007

My Stamp Room

While we were building our house, one of the things I desperately wanted was a place to create. For 7 plus years I would haul stuff up from my laundry room to the dining room table and transform the middle of my home into a stamping disaster area. My four-year-old would often say, "Mom, it looks like a tornado came through our house!" She was right! So, when we built, I claimed one of the extra bedrooms! My husband happily handed it over because, well, he liked the dining room table without all my junk on it!

Love my project desk that I picked up on sale at Pier One! Those cubbies on both sides come in handy for embellishments!

I've taken bins -shoebox size from Steralite - and have categorized them based on stamping categories - flowers, backgrounds, phrases etc!

These rolling carts make great places to store paper. 12 by 12 paper fits inside perfectly and when you slide out a drawer, they have lids so that you could take a stack of paper with you to a card making party! I've also used some of the drawers to store punches, envies, and my Vivid inks.

Little Steralite drawer storge units are perfect for extra ink pads, buttons, loose ribbon etc.!

You can see - it's not a huge space but the closet is key! I wanted to make sure the entire wall, pretty much, was a closet! On the other side of the entrance is another smaller closet that houses all my yarn, patterns and needles for my other passion - KNITTING!

Edited to add: IT'S RARELY THIS NEAT! IN FACT, IT'S NEVER THIS NEAT! I am human for crying out loud! :-)