Showing posts with label Thank You. Show all posts

Friday, January 13, 2017

Winter Blooms

Hello all! Hope your week is ending on a creative high note! I am not sure about you but my neck of the woods could use a warm up! That's why it was fun to take some time this week to snuggle in, grab a cuppa joe and just take some time to color and create!

Here's a little peek at what I whipped up!

And here's why I decided to color up the flower that I did! 


Just in case you missed it, you can click HERE to find out all about this month's Power & Spark Winter Blooms Challenge hosted by the lovely and talented Stacy Morgan! 

On to my creation! I started by stamping bits and pieces from the Power Poppy clear stamp set Glistening Paperwhites. If you look at the set, you can see there are buds and branches and single flowers just waiting to be stacked, cut and colored up! 


And so.... that's what I did! I stamped the pine and berry branch first, then strategically stamped the buds and then on scrap pieces, stamped the flower and the buds and leaves again, knowing I would cut out just the leaves and just the flower to create some dimension. After the images were stamped, I colored them up using some watercolor markers (You can click the link to see which markers I used). It's funny, these markers were ones that I bought at Hobby Lobby with a coupon for $7. I wanted to give them a try! And, they did okay. I love the fact that they have a medium size tip and fine tip. The fine tip came in handy more than a few times for many different projects! To color this image, I had to scribble the color onto a palette and then put it on my image with a Dove Blender Pen. But, I enjoyed using a different medium! After my image was colored, I cut and then added a little bit of razzle dazzle to the center of the flower and the berries with glitter glue! 

Here's a close up for you! 


The rest is just matting it all up! The sentiment is from the Play Ball stamp set. I loved the scripted "Thanks" and wonder why I haven't used it more often! The paper is a mix of Echo Park patterned paper pads that I've stashed away over the years. And that, my friends, is it! This one is going in the mail pronto because I am WAY behind on my post-Christmas Thank Yous!!

As your making your creative rounds, don't forget to pay these fine ladies a visit and see what crafty little things they've been up to this week!


Allison Cope
Christine Okken
Cindy Lawrence
Julie Koerber>>> you are here!
Stacy Morgan


Thanks for stopping by and I'll see you all back here real soon!
~Julie

Friday, December 26, 2014

a holiday full of thanks!

Hello all! Goodness, it's been two weeks since I've posted here on my little ole place in the blogosphere! I got caught up with Christmas spirit and literally spent the last two weeks trying to round up some holiday cheer with shopping and baking and decking the halls! It's been nice to just be with family and enjoy all that this time of year has to offer.I hope you are enjoying the season as well!

Today, I thought I'd share a card I whipped up last night. I have to have some holiday "thank yous" on hand and so this will be the first of many to come! ;-)

On to my creation!

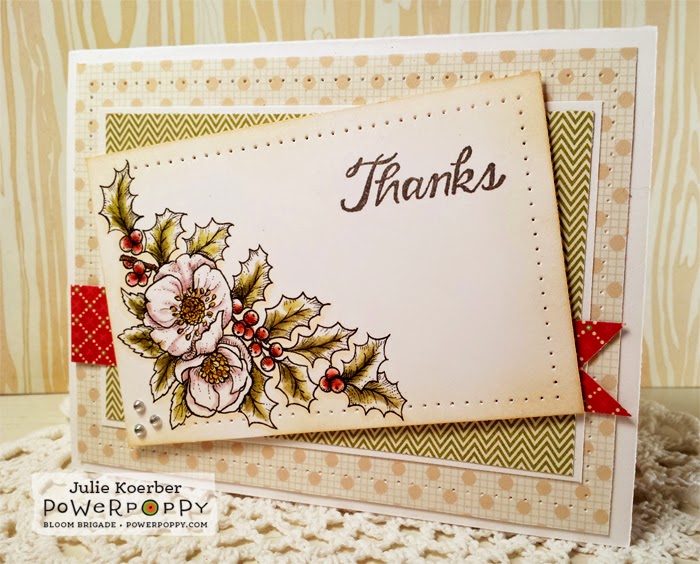
I have to say that I was in a bit of a food coma from eating toooooooo much on Christmas day, so when I set out to color up this grouping of Lenten Rose from the Power Poppy stamp set Heaven and Nature Sing, I needed a "blue print" for my card a.k.a. a sketch! I started this this little Sweet Sunday Sketch from Karen Giron. This sketch is a few weeks old (from November 30th) but I loved it, so I decided to use it as my inspiration! 

To start, I stamped my image using Memento Tuxedo Black and then grabbed some Distress Markers and used these ones to color up my flowers, leaved and berries!


And, here's a close up! 


For my card, I sponged on some Antique Linen Distress Ink, added some paper piercing and bling. You can see too that with my coloring, I really just scribbled on the color. I took an acrylic block, scribbled the marker on the surface and then picked the color up with a Dove Blender pen, again, scribbling on the color. I like the uneven and unpredictable look. ;-) The paper is a mix of Teresa Collins and Echo Park papers that I had in my scrap bin. The "Thanks" stamp is actually from Power Poppy's Play Ball set!

And that, my friends, is it! Some of my fellow Bloom Brigade members whipped up some craftiness thi week too! You'll have to stop on by and say "hi!"

Allison Cope
Christine Okken
Julie Koerber >>>> you are here!
Katie Sims


Thanks for spending a part of your day with me! Hope you have a wonderful weekend ahead and I'll see you back here soon!


~Julie


Pin It

Friday, November 4, 2011

Let it Snow!

It's hard to believe, but it's that time again... time for another Flourishes release full of creative fun! To get ready, the Flourishes Design Team is offering up a fun-filled challenge and the winner walks away with the entire November Release! So, without further ado....

HOW TO PLAY: It sparkles, shines and glistens on the landscape. Let's capture some of that snowy sparkle on our cards or creations! Use glitter, Flower Soft, or any kind of bling that offers up a snowy feel! If you use a gallery with a keyword, please use FLLCNOV11. And remember to link up HERE over on the Flourishes blog using the inlinkz widget in order to be in the running! You have until November 11th at 5PM EST to enter -- so let's get creative and make up some snowy delights!

On to my creation! I have to say, I used last week's Mojo Monday sketch as a starting point for my creation! Love those sketches....

I needed to get a thank you card made and so I took this opportunity to think a little bit out of the box and focus on the color and glitz instead of trying to use a "snowy" image! I hadn't picked up my Butterflies and Blossoms stamp set lately and that is honestly one of my favorite Flourishes sets! I stamped using a discontinued ink color from Close to My Heart (Sorry, it was the only one that matched my paper!) and mixed and matched some paper. Some dp is from my stash, other is a part of the My Mind's Eye Breeze paper pack. Add some silver leaf pen, some stitching, some paper piercing and you're almost there! I added some glitter glue to my butterflies and popped them up by stamping twice, cutting and then using glue dots to attach. Add in some Crystal Sparklets, some iridescent ribbon and... ta da!! 

Here's a close up of the tag. Honestly, it's not blank! I just chose a really faint ink and man, was it hard to photograph! It says... Thank You.


And that, my friends, is it! Need a little inspiration to get you started? You'll have to hop on over and see what our DT whipped up! I know you won't be sorry you visited! :-)

Barbara Anders
Christine Okken
Cindy Lawrence
Dawn Burnworth
Danielle Kennedy
Julie Koerber -- you are here!
Stacy Morgan
Tammy Hershberger
Sharon Doolittle

Thanks for stopping by! Hope you have a fun and restful weekend ahead! I'll be back soon with some new inspiration to share..... so stay tuned. ;-)

~Julie

Friday, April 9, 2010

Are you ready for.....

release week challenge graphic

I am! This Release Week Challenge is all about.... TWINCHIES! What's a twinchie you ask? It's a 2 by 2" little work of art that loves to take center stage on your card! And that is what Flourishes' Release Week Challenge is all about. To take part, all you need to do is make a 2 by 2" segment the focal point on your card. Play in the challenge and you have a chance at winning all 4 new stamp sets that will be released on April 16th! You have until next Friday at 5 PM EST to enter. Use Flourishes stamps if you have them, but if you don't, please play along anyway! If you upload to SCS, please use the keywork FLLCAPR10. Keep in mind, in order to be eligible, you need to link your creation HERE using the Inlinkz linky!

Ok... now to my creation! I call this my... TEN MINUTE TWINCHIE! With the help of Flourishes Lace Edges set and some paper my mother gifted me -- I had a flocked and flourished thank you note to add to my stash!
This paper is a flocked decorative paper my mom picked up for me. When I saw it, I just knew it was a perfect fit for Flourishes Lace Edges. I stamped the image on a 2 by 2-inch square and then matted it onto a scalloped square. The rest is matting it up, adding a sentiment (Tag Lines) onto a large oval punch that was matted on a scalloped oval. Add some black pearls and.... voila! Done! A Twinchie in 10!

If you need a little creative inspiration, please hop over and see what kind of Twinchies our ever so talented Design Team created!

Christine Okken
Cindy Lawrence
Danielle Kennedy
Dawn Burnworth
Laura Fredrickson
Leslie Miller
Stacy Morgan

Thanks for stopping by! Hope you can make time to play in the challenge. See you back here soon!

Thursday, April 23, 2009

Stamp Simply.... Pipe up!

Hi all! TGIF! Time for another Stamp Simply challenge and this one is all about piping up!

For those who sew, this challenge will make a lot of sense! You know the "piping" that you see on pillow cases, pillows, on trim? It's that thin pop of color that is added to a sewing project to bring a pop of contrast! Well, that my friends, is what Sharon Johnson wants you to try on your card! Basically, a narrow strip of paper to separate two other pieces of paper!
Click HERE for all the official details!

My card could not be any easier!
I used some Making Memories paper, some border strips from the same collection, and my piping can be found in my black strip! I added some fun May Arts ribbon that actually looks like a crocheted edge! Add some layered Nesties - one for your sentiment (SU) and the other for your mat. I ran my black mat through my Wizard with my Swiss Dots embossing folder for a little something extra.

My favorite part?? The bling of course!

Easy peasy card! You'll have to stop by to see what the other Stamp Simply gals cooked up!

Jenny, April Guest Designer
Janine
Jennifer
AJ
Becky
Dee
Tammy
Thanks for stopping by! Hope you make time for play time this weekend!
~Julie

Thursday, January 1, 2009

Stamp Simply --- Truly Thankful!

Happy New Year everyone and welcome to the very first Stamp Simply challenge of 2009! This one --- Stamp Simply 68 or ssnotime68 on SCS is all about being thankful for our blessings in the new year! If you are anything like me you have a million thank you cards to send out! So, today's challenge courtesy Sharon Johnson is all about making a Thank You card! That’s it — no other rules!!!

So, I had this sketch idea on my head and -- from start to finish, my card took less than a half hour. That is always a plus when it clicks! I used paper from Paper Crate and stamped the background stamp from Flourishes Stamp Simply Thank You set on my brown piece using Burnt Umber Palette ink. I outlined the brown piece with some gold leaf pen and then stamped the tulip in the set on watercolor paper. Use some markers and a water brush to paint it up, mat it onto some green decorative paper, add a ivory satin ribbon and some gold pearl style gems, add the sentiment in the lower corner and bam... done!

Here's a close up of the flower. I just did a real light watercolor style wash on it.

Before I go... I want to make sure to tell you to visit the rest of the Stamp Simply team! We have a new face on board too! January's Guest Designer is Deb Saaranen who's blog is Dream in Color. She is an amazing artist so it will be great to see what she cooks up each week! You can also check out Janine, Jennifer, Tammy, Dee, Becky, and AJ.

Hope you can make time for some play time!


p.s. The ever so talented Melanie Muenchinger is celebrating a year of blogging and stamp designing over at her blog "Hands, Head and Heart" and I'm hored to be a part of her anniversary celebration! Click HERE to check out cards she's sharing from all her sets released through Gina K. Designs and tune back in here Sunday when I'll have a card using one of my favorite Mel sets! Oh, did I mention prizes will be up for grabs? With great sponsors like Gina K? My Favorite Things? Scor-Pal? Paper Temptress? Even Mel herself? So head on over and check it out!

Sunday, March 30, 2008

And we have a winner!!!

Hi All!

Hope you are enjoying your weekend. We had beautiful weather here up until yesterday. So, it got cold and blustery just in time for the weekend. How unfair is that?

It's Sunday which means it's time to pick a winner for the Green Grass Stamps giveaway. And the winner is........

Cindy --
She wrote:
"What a nice card, Julie. There are a lot of Thank You sets out there, but you are right... that one is awesome!"


So, Cindy, if you click on my profile, my email address is there. Just shoot me an email with your address and I will get that fun set off to you!

I did want to post one more creation I did with this set. I want to start by saying this card is NOT my typical card. In fact, I don't think I've ever created a card this loud - BUT- the paper was perfect for the set and I had the right embellishments and so it just kind of clicked. You just might need sunglasses to look at it!

I started by stacking all the thank yous in the set on a long acrylic block - I didn't care if they were straight. In fact, I wanted a few to be a bit crooked. Let's face it, this card is all about the chaos!! I stamped the thank yous a few times down a 2" strip of paper. The scallop edge was created thanks to the stamp in this set. The rest is just patterned paper, a loopy brad with gingham strung through and a super big rhinestone on each brad. That's it!

Here's a close up of the bling! You know I gotta have the bling!


Hope you enjoy the rest of your weekend!

Monday, March 24, 2008

Thanks - A Bunch!

A couple of weeks ago, I was surfing or Blurfing as some call it! I stumbled upon a company called Green Grass Stamps! Well, after emailing the company with some questions, Tammy, the company's owner sent me this darling set of Thank You stamps! Guess what? She said for me to keep one and then give away one..... TO YOU! Wasn't that sweet?

This card is as easy as it gets and, I think, makes a card full of sunshine! I stamped the word Thanks in green pigment ink and then attached a sequin flower with a rhinestone to the top of the "k." I wanted it to look like the flower was just sprouting from the Thanks! There is another stamp that reads special thanks that has that little leaf. I stamped that as well, but only used the leaf so that my flower would have this little embellie to it.

There is also a really neat scallop stamp that is a part of the set that I stamped in hot pink, cut out and then using different size hole punches, punched out that part of the stamped image. You can see what I am talking about if you scroll down and look at the image itself. The rest is just decorative paper and ribbon!

Here's a close up....

Here's what the entire set looks like. Isn't this awesome? 10 different stamps in all!
Do you want one? Just leave a comment and I will draw a name next Sunday! Good luck and have a happy start to your week!