Friday, May 27, 2016

I'm a Copy Cat!


Hello all and Happy Friday! I hope you have some nice, relaxing plans for the next few days! While the Memorial Day weekend always brings that somber reminder of those who paid the ultimate sacrifice, I do enjoy having my family close while we take time away from the rush of daily life. And, that's why we'll be at the softball field all weekend, watching my D.D. play! I'm hoping for some sunshine!

Not too long ago, I was watching Jennifer McGuire's Youtube channel HERE where she was showcasing how to make a vellum overlay card. I absolutely LOVED the result and so I went on to CASE (copy and steal everything) this one. She used a solid layering stamp but I wanted to showcase one of my colored Power Poppy Images -- this one is from the Simply Camellias stamp set!

So, here's a peek at the finished card front....


The front is done by stamping the main image with Versamark ink and then dusting it with white ultrafine detail embossing powder and then heat setting it. I am always so careful when using vellum and making sure not to keep my heat tool in one spot for too long. The paper tends to buckle and warp when you let the heat stay in one spot. After the image was embossed, I did stamp the image again on a strip of white paper. From there, I had to make sure to trim my image so that I could mount it perfectly underneath the vellum to show the colored portion. I colored with Copics and used RV00, RV0000, R81, R83, R85, G20, G21, G24, and G28 and then highlighted around my flower with BG000, BG0000, and BG11. See? 


After I was done coloring, I matted my image onto a folded piece of bright pink paper so that there was 1/4" around all sides. From there, I matted the image on the inside of my vellum shell, again, making sure to line up my image perfectly underneath the white embossed lines. 

Here's a peek at the embossed portion. I also added a bit of clear Wink of Stella Clear Glitter from their brush tip pen. You can't really see the sparkle -- but trust me -- it's there! I also added some fun crystal sequins and the sentiment Take Good Care, also from this stamp set. 


And that, my friends, is it! I know this was a CASE but goodness, sometimes it is just too much fun to watch a pro and take her tips for a spin. I love trying new things and now I wonder how many more videos I'll take in in the days and weeks to come. Forget Netflix, I might end up binge watching some of Jennifer's work! ;-)

Speaking of talented ladies, the Bloomies are here to share a bit of what they've been working on this week! You'll have to stop by and pay them a visit! I know I will! 


Thanks for stopping by and spending a little bit of your day with me! :-) I hope you have a wonderful weekend and I will see you all back here real soon! 

~Julie


Pin It

Friday, May 13, 2016

Peony Love!

Hello everyone! With another Friday, it's another time for a little Power Poppy show & tell! I am actually showing off a card that I could actually have entered in the brand new Power & Spark Challenge!


Katie is the hostess this month and she wants you to pull out your favorite Power Poppy blooms and make them the centerpiece of your card or creation. If you haven't checked out this challenge, just click on over HERE to see what it's all about and find out how YOU can be in the running for a free Power Poppy stamp set of choice!

On to my creation! I am showing you this little number late because I didn't want my mama to see it before I got a chance to GIVE it to her! ;-)


I am not sure if you saw the brand new digital stamp set that Power Poppy released last week but it's a beauty! Peony Love is a lush peony laden wreath that is just begging to be colored and savored! The set comes with a few sentiments but I modified one of them for the front of my card. I wanted something simple -- To You Mom -- so the the real message could be on the inside.  After printing off the wreath I colored with almost EVERY pink and rose shade of Copic in my stash. I would list them all but, trust me, 30 markers later your head would be spinning! ;-)

Here's a close up! You can see that I did add a little razzle dazzle with the help of some glitter glue! 


And here's a look at the inside. I added the sentiment, plus enlarged and changed the color of the accent flower in this set! If you haven't played around with changing colors and the size of images, I have to say, it really makes these little numbers so versatile! I also added the Happy Mother's Day portion of the sentiment too. See what I mean about being versatile?


And just like the setiment shares -- You make life so very lovely -- that's exactly what my fellow bloomies do, week in and week out! They have some visual treats for you to see over at their places on the blogosphere! So, check 'em out, will ya?

Julie Koerber >>> you are here! 


And that, my friends, is it for this week! We do have a bit of fun coming up in the next few days! Sunday will bring another new addition to the Power Poppy Instant Garden. This brand new illustration from our Peep-in-Chief Marcella is one that offers a little somethin' somethin' for those card makers with grads on their list! So be sure to stop by the Power Poppy blog and see this beauty for yourself!

~Julie


Pin It

Friday, May 6, 2016

What's your favorite floral?

Hello happy stampers and T.G.I.F wishes to you all! I have a big 'ole dose of fun for you today. Why, you ask? For starters, there is a brand spanking new Power & Spark challenge hosted by the talented Katie Sims, just for you to try. Check it out!


HOW TO PLAY: If April showers bring May flowers, what kind of blossoms does this month of beauty deliver for you? To play along in this challenge, simply reach for your favorite Power Poppy stamp floral and make it the centerpiece of your design. You can check out all of the official details HERE and you have until the end of the month to play along! So get those fingers inky and join us for a little bit fun!

On to my creation....


I have to say that when I saw Katie's card, I chuckled because I picked the same exact stamp set for my all time favorite Power Poppy floral!

This Azalea branch masterfully illustrated by Marcella just exudes beauty. When I created this card, I actually did a remix of THIS card that I created way back when this set was first released. I had a ton of fun with this spotlight technique back then, so I opted to try it again only from a different angle by flipping it to a vertical orientation.

I stamped the large branch both on my decorative paper and then on a scrap of white. I took a 1-1/4 circle punch and chose the area that I wanted to take center stage. From there, I grabbed my Copic markers and had fun trying to bring this Itty bitty part of the flower to life!

Here's a little close up for you.....


The rest is adding a sentiment (printed from the Olive & Oak digital stamp set) and adding a little color and pizazz with a splash of decorative paper. And that, my friends, is it!

The rest of these fine Bloomies are on standby hoping you will pay them a visit to check out their creative pursuits for the week!

Allison Cope
Christine Okken
Cindy Lawrence
Julie Koerber >>> you are here!
Katie Sims
Stacy Morgan

Hope you have a wonderful weekend & I will see you back here next week- same time, same place!

~Julie


Pin It

Friday, April 29, 2016

Created to Create!

Hello all! Just a quickie quick post today to share a little something I colored up earlier in the week. Sadly, my entire family is under the weather so energy is at an all time low! :-(

When I saw this new digital stamp Marcella whipped up called Created tp Create, I could not help but want to print it up and color away. It was one of those that I printed and literally worked on all night while watching TV. I would ponder it, color, wait a bit, color some more, get caught up in a show, color a little, grab a snack, and yes, finish coloring! I love when I can just take my time and enjoy every bit of the creative process.

I used far too many markers to mention-- choosing sunny yellows, earthy shades for shadows and then my full color of the rainbow for the little watercolor palette. The shading was done with V0000 and V01. The sketchbook page was given a little bit of depth with the E81 marker in multiple layers. I should mention that I stamped the sentiment in the middle of the blank canvas and that sentiment is from the Power Poppy set Folk Heart. Loved how it seemed to fit perfectly!

Here's a little close up for you!

And then, the sparkle, of course, was added with different size sequins. I added some paper piercing and then some splotchy effects to my card base thanks to a paint splotch background stamp. I am not good enough to add those watercolor drops on my own! ;-)


And that, my friends, is it! I know some of my fellow Bloomies have some creative pursuits to share, so hop on over and see.....


And, I will be back again real soon with some more fun stuff to share. One reminder, I do have quite a few goodies FOR SALE HERE! I am trying to pare down my craft room and make it a little less jam packed! So, my spring cleaning effort just might be your GAIN so be sure to check it out! ;-)

~Julie


Pin It

Friday, April 22, 2016

Colorful & Creative

Is your weekend about to blast off? Well, I sure hope the answer is YES and that you have some fun planned to make life joyful! To start this blog post, I have a confession to make -- yes. I. DO! Well, some of you might remember THIS little post, where I colored up a card and promised to share the results. Well, guess what? I never did! What? I know! I never did!

So, lucky for me, I remembered to finally do that! And, TA DA!


For this creation, I grabbed not my Copic Markers but my Distress Markers. I figured they had been ignored enough and needed to come out of the drawer! I used these colors....


And, the background was created at the same time I made THIS card, which I used Christine Okken's tutorial HERE over on the Power Poppy Blog on how to bring dimension to your cards using embossing paste. I had never used this stuff and so, I was wowed! I will admit, I am not a messy stamper, so this took me a little bit out of my comfort zone, only in a good way! ;-) Here's a close up of the dimension......


And then, a close up of my colored area!


The rest is pretty self explanatory, add a strip of decorative paper, a little twine accented button and... voila! Done!

Before I go, did you know we are almost nearing the end to this fun-filled challenge?


It's Christine Okken's You Pick 3 challenge! Just pick three markers -- ANY KIND of markers -- and use them to color up your card's main image! You can click HERE for more on the official details and linky for your finished creation. Winner gets her pick of a Power Poppy stamp set! :-) So, join in the fun and good luck to you! 

Now it's time to turn things over to one of my fellow Bloomies who whipped up some colorful fun for you all this week! Stop by and say "hey" to.....


Thanks for stopping by and spending a wee bit of your day with me! You'll have to tune in to the Power Poppy Blog on Monday for a Big & JUICY digital stamp set reveal!!! Marcella has not one, but TWO digital stamp sets to tickle your creative taste buds! One is just about as sweet as they come, another stretches us to live and love sharing beauty on the canvas of life!

See you back here then!

~Julie


Pin It

Wednesday, April 20, 2016

MORE STUFF FOR SALE!


HELLO FOLKS! I've reloaded my Stamps & Dies for Sale page HERE with a boatload of new items up for grabs! This is good stuff people -- all items are priced below wholesale prices even though they are in excellent condition. I just need to make some room in my tiny space. Keep in mind, because these sales tend to be pretty fast moving, I can't hold items for you without an agreement for payment. You can see all the details of the sale at the top of the sale page. Thanks for looking!

I also have several dozen new cards on my Cards for Sale page as well that you can check out HERE! 

~Julie


Pin It

Monday, April 18, 2016

Check it out!

Hello folks! I am the hostess over on the Power Poppy blog today for Inspire Me Monday! So, if you click HERE, you'll see......


Have a fabulous week everyone! :-)

~Julie


Pin It

Friday, April 8, 2016

Happy Friday!


Hello all and happiest of Friday's to you all! I sure hope that the sun is shining and the flowers are starting to bloom in your neck of the woods! Being in the northern part of the country, I am just starting to see daffodils and hyacinth sprout and the little spots of color are just so heart-warming! It's like these little creations have personalities all their own! I love the jewel tones and just the over all dainty feel of these tiny plants! I digress!

Before I get to my creation, I did want to share a special post I helped write over on the Power Poppy Blog HERE sharing some news about one of my fellow Bloomies, Leslie Miller. I truly I wish this dear lady ALL THE BEST!!!!

For this Friday, I did have a quickie card to share and it's all inspired by the latest round of CardMaps over at PageMaps! This is a peek at my sketch....


And this is my take on it using Power Poppy's My English Rose stamp set! 


A quick and easy "how to" goes a little something like this: stamp using Memento Tuxedo Black ink, fussy cut and cut out just some of the foliage. Color using Copic Markers in these shades: R01, RV0000, R81, R83, R85, G20, G40, and G43. The rest is just using scraps of decorative paper to follow the sketch. add a doily and threaded button and... ta da! I also added a little paper piecing for a finishing touch around my sentiment. And that, my friends, is it! Some of the other members of the Power Poppy team took the Cardmaps sketches for a test drive as well and so, if you want a little more inspiration, I have good news! It is just a click away! HERE! 

And here's a look at the close up!


And that, my friends, is it! Time now to take a break and check in on the rest of the Bloom Brigade! ;-)

Christine Okken
Julie Koerber
Stacy Morgan
Tosha Leyendekker


Thanks for stopping by and saying "hi!" I hope you have the best weekend possible! See you back here soon! :-)


~Julie

Pin It

Friday, April 1, 2016

It's a BIRTHDAY Celebration!

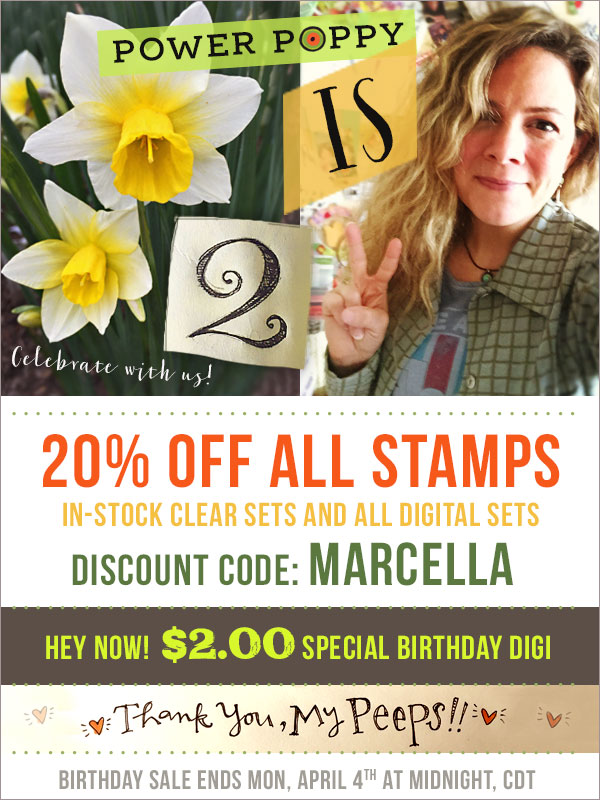
Howdy Ho there fellow stampers! Boy do I have a ton of fun to share today. Today is a pretty special day! Not only is it the start of a new month with a new Power Poppy Power & Spark Challenge to unveil, it's actually, the start of a new year for Power Poppy! Yes, TODAY marks the 2nd birthday of this fine, fun, FANTASTIC company!


To help us mark this momentous occasion, Marcella has a few gifts up her sleeve! Isn’t that just like her? It’s her company’s birthday and she wants to give YOU the gifts! ;-) So, stay tuned for the deets on that at the end of this post...

With the mark of a new month, we have a brand-spankin’-new Power & Spark Challenge and this one will have you stretching the bounds of your coloring creativity! 


Ms. Christine Okken is the hostess for this colorific quest to create something wonderful with — just THREE markers! Did I hear you gasp? You can’t fathom picking just three? Yes, I know, it sounds like a true (and FUN) challenge! Here’s how Christine explains HERE (that's also where you'll find the official rules and the linky to link up your creation!). In a nutshell, choose three markers by picking three in the same color family, pick three from complementary color families, or, BE COURAGEOUS, close your eyes and choose three randomly! Not sure I am brave enough to do that, but we'll see, the month isn't over yet! ;-)

On to my 3-color creation! Not only did I choose just three colors, I paired it up with one of the latest Pagemaps.com CardMaps sketches! The Power Poppy Bloom Brigade was asked to design cards using these fresh and fun new card recipes and you can find all TEN of the sketches HERE! 

Here was my sketch.....


And, here's my take on it!


As you can see, I kept pretty close to the sketch and, I'll admit, I had a lot of fun doing it! I had some dies that I honestly, haven't put my hands on in a long time -- like the fun edge die and the file folder die with the decorative tabs. It was a great excuse to use a few different tools to get creative! 

And, in line with Christine's challenge to use ONLY three markers, here's the three I picked. You can see I took my inspiration right from the challenge graphic! ;-)


I used BG15, YG23 and R81. You might look at my creation and say, "Hey, how did you get the color range with just three markers?" Here's a tip for you. 1. Grab an acryllic block or plastic palette, scribble off a little color and 2. Use your blender pen to pick up that color. Draw the excess ink off the nib by scribbling on a scrap piece of paper too! I colored dark to light and after I added all the dark that I wanted, used the scribble technique to add lighter layers of color. You can see below what I'm talking about! See the variations of green? Of pink? and of blue? I even used this scribble technique to add the blue shadows around my heart shaped wreath! After I was done, I did add a wee bit of razzle dazzle thanks to some glitter glue too! 

Here's a close up for you! 

And that, my friends, is it! :-) Fun stuff on a few different levels! Speaking of fun -- before we get to the Bloomies and their wonderful weekly creations, we interrupt this blog post to bring you a birthday special from the Chief Peep — Marcella Hawley herself! Since Power Poppy is 2, she wanted to kick off another flowering and empowering year by sharing with all of you! Check out these fun deets! 

http://powerpoppy.com

Well after all that fun, it's time to pass the baton to my fellow Bloomies. Be sure to check out these fine ladies below and see what they whipped up for your viewing pleasure! I should point out that along the way, you'll see not only a few 3- color creations but some of the sketches in play from the April edition of CardMaps over at Pagemaps.com!  You can find all of the inspiration HERE!


Julie Koerber >>> you are here!


Thanks for stopping by and spending a little piece of your day with me! :-) Have a great weekend!

~Julie


Pin It

Friday, March 18, 2016

Fr-Fr-FRIDAY! Woo hoo!

Hello and happy Power Poppy Friday to y'all! I hope spring is making a showing where you are. I have to admit, it is NOT in my neck of the woods. Can you believe that last week we had temperatures in the 70s and this week, SNOW! That. Is. Not. Fair!!!!

Want to know what else is not fair? Well, no, my dog didn't "eat my homework." She ATE my card! I am so glad that I photographed it and blogged it already because this is what I found overnight.... Waaaaaaahhhhhhhh! I was trying to stock up on my all occasion cards. My pup told me to "think again!" :-(


If I didn't love that beast, she would be relegated to the garage for a few days. But, instead, as I sit here typing my post, she's at my feet.  As you can see, I love this little lady, faults and all! ;-)


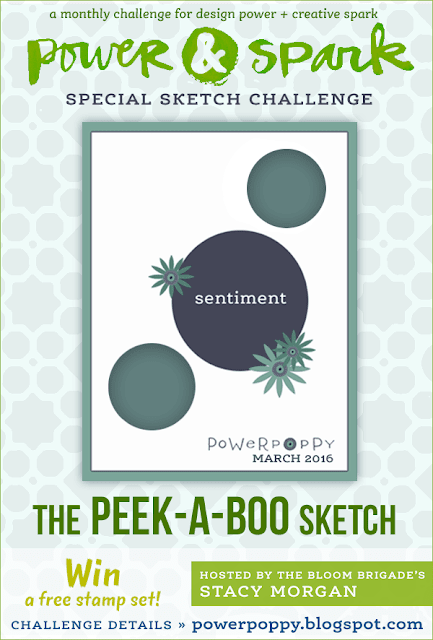
I digress! I did come here today, after all, to share my creation for this week. I knew that I had to do two things for my Friday post. I knew I wanted to play along in Stacy's Peek-A-Boo Power & Spark Challenge and second, I wanted to use the brand new digital stamp set Spring Meadow Bouquet for my card! So, here goes!


For starters, I followed this sketch below, which was Stacy's challenge! 


The fun thing about this challenge is that the circles in the sketch are actually cut outs that you were supposed to have your image "peek out" from underneath -- thus the title Peek-A-Boo! So, that's why I chose the image Spring Meadow Bouquet. I thought this larger than life image was perfect for a sketch like this because you could highlight just pieces of this showy bunch of blossoms! 

Here's a "peek" at part of the card that showcases that lovely butterfly! And, you can see I added splashes of bling too just for a little extra pizazz! 


And, here's the other little peek-a-boo window! You can see that I used my Copics to color up this image and honestly, there are too many markers to mention! I have all my favorite greens, a few yellows, shades of rose, purple, see? Too many! Here's a close up!


And that, my friends is it! Thanks so much for stopping by and sharing a bit of your day with me!

Now it’s time to take a gander at what the rest of the Power Poppy Bloom Brigade whipped up this week. I have a feeling they made “spring” their muse for their latest creations. It’s just a feeling! You'll have to make the rounds to see for yourself!


Christine Okken
Cindy Lawrence
Julie Koerber
Leslie Miller
Stacy Morgan


Before I go, I do have to say thank you to one of the ladies that stops by here every now and then -- DONNA ELLIS! About a month ago, I complained about losing my mojo. I told anyone who might happen to "see" said mojo to tell it to come home!!! Well she, being the sleuth that she is, spotted my mojo waiting for the bus from Tampa to Orlando. She said my mojo couldn't handle the cold weather and went south to play in the sun. I am happy to report that, while stubborn, my mojo came home! 

Stay tuned to see the mojo and me collaboration in the coming weeks! ;-) Thanks Donna! 


~Julie


Pin It

Friday, March 4, 2016

Keep Climbing!

It's Friday folks and that means another dose of Power Poppy goodness coming your way! Not only do I have a creation to share but I want to share a a brand new Power & Spark Challenge coming your way thanks to the lovely and talented Stacy Morgan!

Check it out folks!


HOW TO PLAY: The Peek-A-Boo Challenge is about being inspired by this sketch challenge and making sure that the cut outs on your card share a snippet or give you a "peek" of fun underneath! Stacy wanted to let you know that even though the shapes shown on the sketch are circles, let your imagination flow and make them any 'ol shape you like! To prove this point, she used hearts! Oh, she also wants you to use at least two panels as well, which makes sense with this peek-a-boo sketch! To read up on the official details or to link up your take on the sketch, just click HERE to the Power Poppy Blog!

On to my creation! I wasn't able to play along in the sketch -- will do that sometime this month for sure! Instead, I reached for one of Power Poppy's older digital stamp sets called Climbing Clematis!


After printing off my image, I reached for my Copic markers and used a mix from the BG family to give my flowers a kind of monochromatic feel. The greens that I chose also seem to have more of a blue base, which was my goal! After coloring, I added a little yellow glow to help make my image pop a bit more. 

I have to show off part of my card so you can see the dimension on one of the panels. I ended up following Christine Okken's tutorial HERE on using stencils with embossing paste. I had never tried this and while I am normally not a "messy" stamper, I did enjoy the process and the results! I ended up using the paste and then, when the paste was someone dry but still a little tacky, I brushed on some Pearl Ex, a mica based powder to give it a bit of opalescent sparkle! 


And, here's a close up!  I did add a little razzle dazzle to the center of my flowers thanks to some glitter glue -- love that stuff!


And that, my friends, is it!!! Now it's time.... drum roll please.... the fabulously creative, big-hearted, wonderful women also known as THE BLOOM BRIGADE! Hop on over and see their Friday Power Poppy creations and... don't forget to say "hi!" while you're there!


Julie Koerber >>> you are here!


See you back here soon! You should know that Power Poppy does have some fun coming your way tomorrow when Marcella unveils a brand new digital stamp set that is a beautiful expression for the Easter Season! She'll have all the details tomorrow over on the Power Poppy Blog!

~Julie


Pin It