
I was at Michaels the other day and they have two rows full of wood pieces that you can use to create your own signs. That's where my idea was ignited! When I saw the options along with some of the fun wooden Halloween messages, I knew I had the start of something fun!
Want to see what we are creating today? Here's a peek.

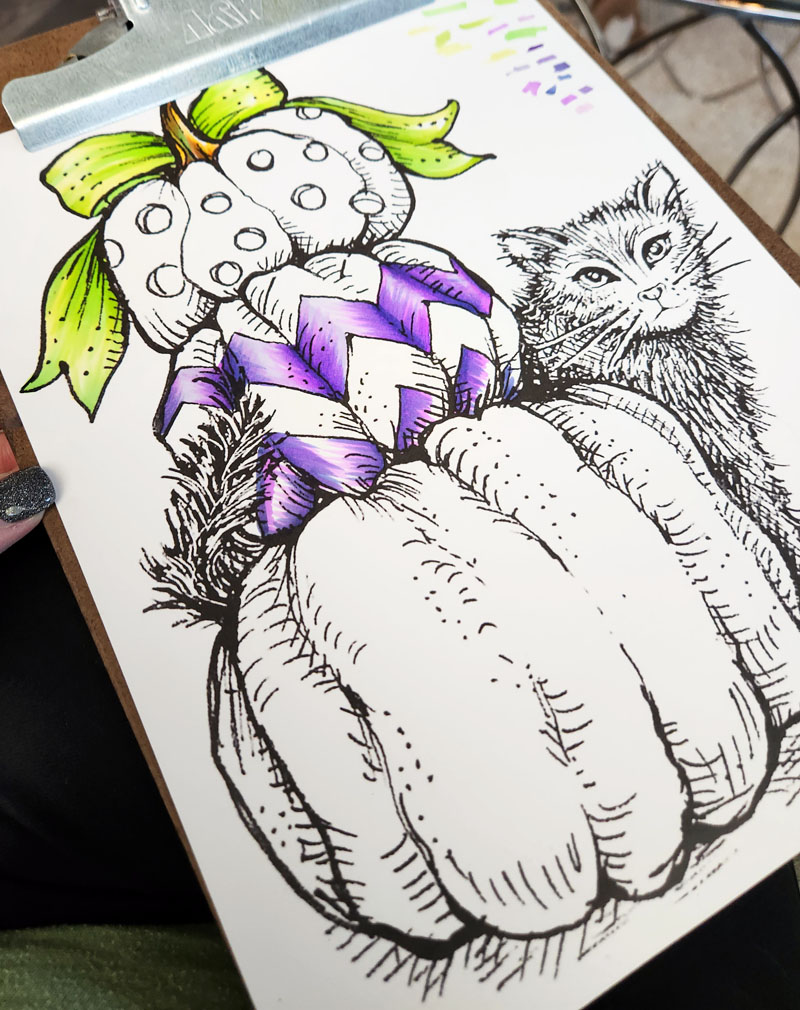
Isn't that super fun? And, while I thought this might take me quite a bit of time to put together, I was done in a little less than 3 hours. I started by printing the digital stamp "Boo Cat & Pumpkins" at 81/2 by 11 inches. Basically, I opened it and printed it so that it would cover an entire sheet of card stock. My wooden base was 91/2 by 14 inches, so I thought this would work perfectly. Then, I continued with some loosey-goosey coloring. No need for super intricate coloring here! I used super large strokes and just colored with strokes instead of constant color.
So this.....

Grew into this....
And, ultimately, this...

Now it was time to turn my attention to my sign! This is what I started with: a few bottles of acrylic paint, some foam brushes, the natural wooden sign, a natural Halloween sentiment and some decoupage glue.

You can see I started painting the base of my sign black. I started wanting to cover only those cracks but quickly decided it would be better to give the entire sign a coat of black. You can see, I wasn't too careful to provide an even coat. I already knew I was going to cover this up a bit!

From there, I took and dry brushed some purple paint over top to create a kind of weathered look. I also painted my Happy Halloween words --- although please ignore this color. After I painted this black I decided I needed a pop of color here and painted over top with a lime green shade of acrylic paint!

And now, it's time to add my boo cat to this backdrop! I just fussy cut around my image cutting a jagged edge around the kitty so that I didn't have to cut all the little pieces of fur! After it was cut out, I attached it to the wooden base by putting some decoupage glue on the back side with one of the foam brushes. Make sure the edges of your paper don't curl. The key is to apply a super light coat, press down and then weigh the image down by covering it with a book or a few magazines to hold it all in place.
From there, I added some layered ribbon at the top, securing with a little hot glue. I adhered the Happy Halloween wooden piece with some foam tape so that it would have some dimension. After everything was dry, it was time to add it to the hearth for a little home Halloween flair! What do you think?

And that, my friends, is it! A fun little way to use a digital stamp to create some home decor that's both frightful and fun! Until next time,
