Hello all and happy Friday! How is everyone doing this week? Goodness, it has been a LOOOONG time since I've posted on my personal blog. Hosting the
Creative Confetti Challenges over at
Power Poppy has taken me away from "home" I guess! The card I am going to share today is actually from this week's challenge but I decided I should share here too. :-)
Recently, I scrolled through some of my recent cards and thought about design and what I liked about certain creations and what I didn't love about others. That got me thinking about being inspired. Why not take a card or a series of cards that you love, and downsize them -- make them a mini version?
Let's take a look at my creative process!
First of all, I want to share the inspiration for my mini. A few months back, I hosted the Inspire Me Monday tutorial and mashed up a few techniques to come up with what I call Embossed Silhouette. Ever since that tutorial, I've been looking for new ways to incorporate this look because it is so easy and ushers in dramatic results. So, here's a peek at some of the cards that inspired today's creation. And...
HERE's a link to the original tutorial as well.
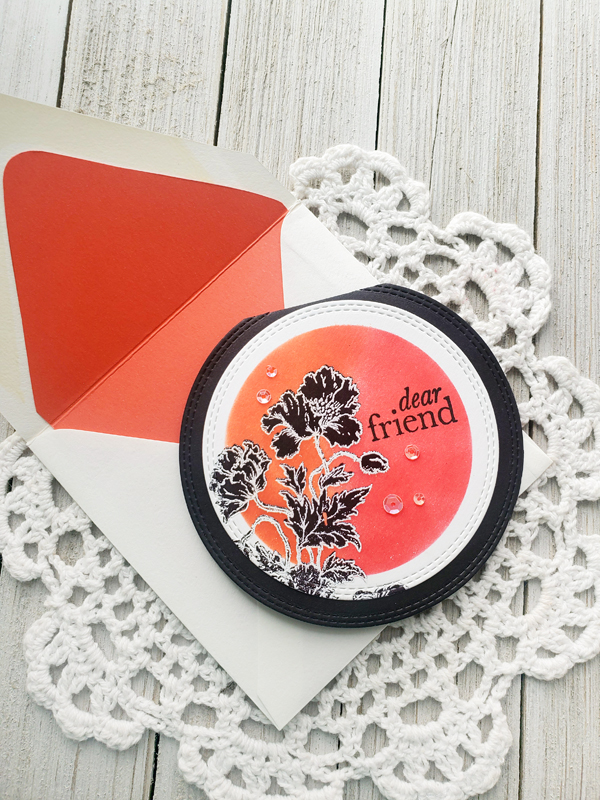
And, here's a peek at my "mini!" Instead of using the
Power Poppy set Vibrant Thanks, which is currently sold out, I decided to pick one that you could actually get your hands on now! ;-) I chose the stamp set
Poppies.
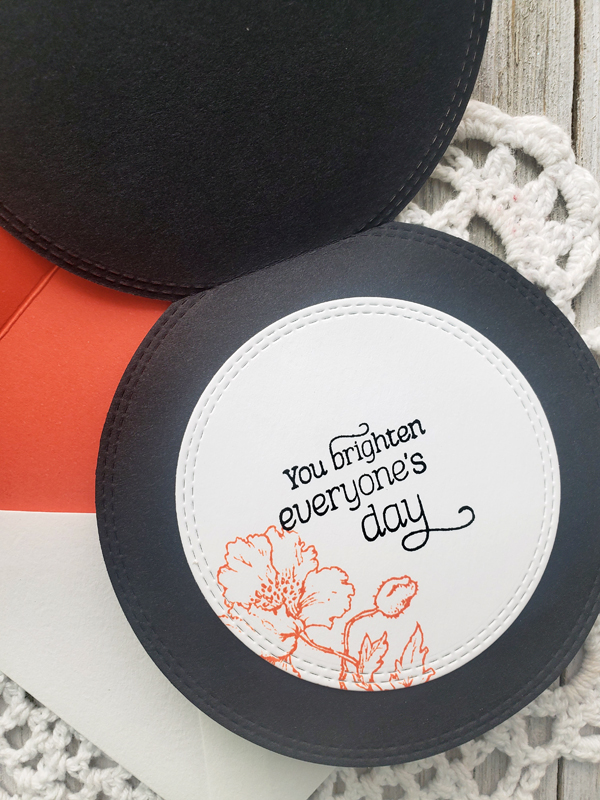
Instead of making a rectangle card, I decided to use some stitched circle dies to create not only my card base but the layers as well. I folded a 4" by 4" piece of black card stock and then set my die on top, leaving just a sliver of the card at the fold to keep the card's integrity and still have a circle shape. Then, I used one size smaller die for my white layer. And, I cut one smaller from that to serve as my mask so that I could sponge on that bold color.
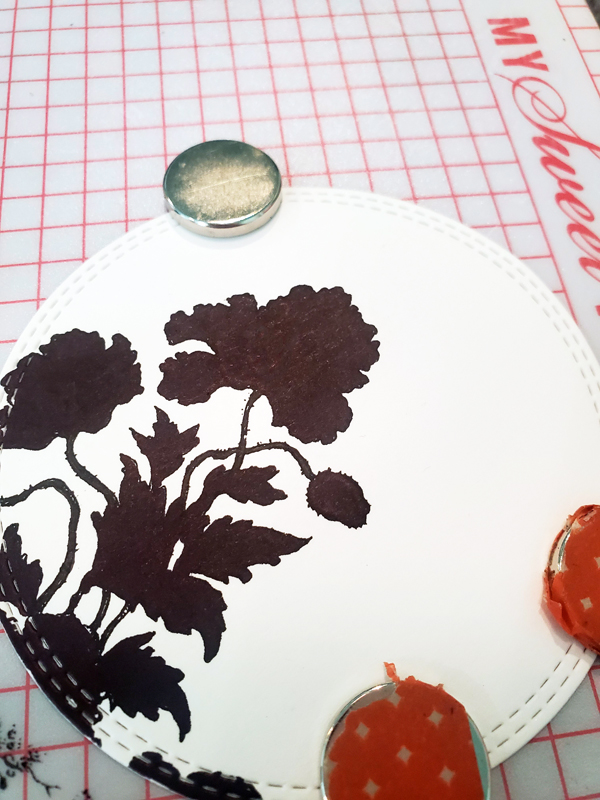
First up, if you looked at the tutorial link, you know I stamped the poppies stamp in black ink and then colored it all up using a black marker to create a silhouette.
As you can see, I used My MISTI stamping tool to keep my circle in place because after I colored it (I didn't remove it from my MISTI), I inked up my stamp with Versamark ink and then heat embossed using white detail powder to get that detailed silhouette image. Afterward, I lined up my mask and using low tack tape, taped both the mask and the main image down real good so that it wouldn't move as I sponged on the ink. For my ink, I used Morocco and Lady Bug inks by Memento.
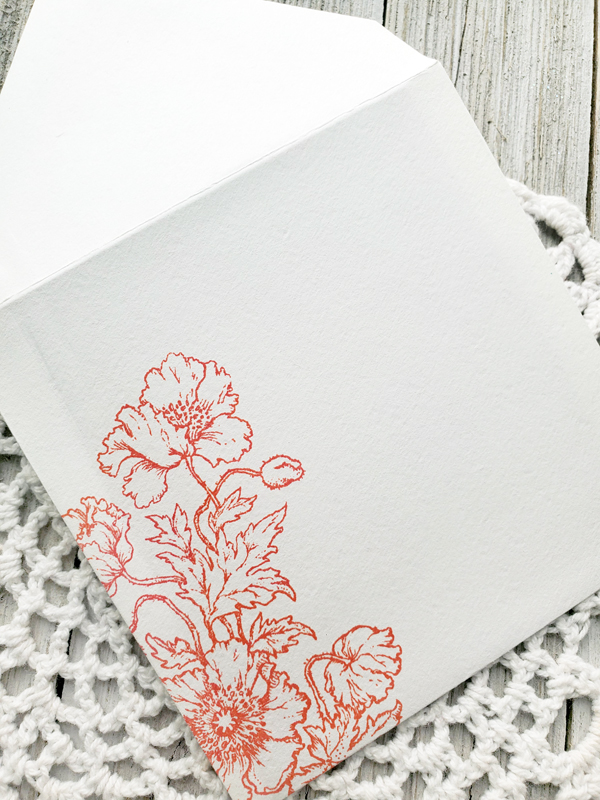
And then, the fun continued! Not only did I add a little pizazz to the envelope...
I added a little something extra to the inside of my mini card!
If you missed it, I also make an envelope liner using that pop of orange on the inside...
I added the "Dear Friend" sentiment from the stamp set
Heart Abloom and a few iridescent sequins and.. ta da! Finished! I think it turned out so cute and you can still see the inspiration from the original creation. Do you have a "mini" in your future? If so, I hope you join me over on the Power Poppy blog! Every month, we choose a random entry for a $25 gift code to the Power Poppy Shop, just for playing along!
And that, my friends, is it! Do you need/want a little more inspiration on this Friday to help you get those creative ideas rolling just in time for the weekend? Well, check out these fine ladies and see what they've been up to!
Stacy Morgan
Leslie Miller
Broni Holcombe
Thanks for stopping by! Until next time!