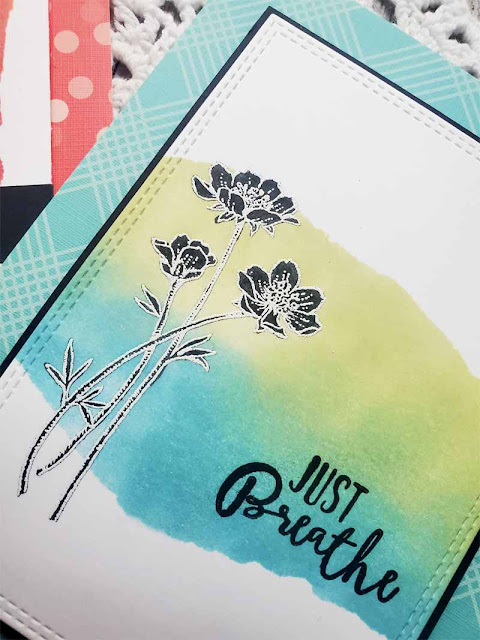
Hi all! It's Friday, which means there's a little Power Poppy fun on the ole blog today for all of you! Earlier this week, did you see the Inspire Me Monday tutorial I posted? Well, if you missed it, you can
click HERE to check it out because, my friends, this is the basis for
this week's Creative Confetti challenge! So, two bits of fun! And, on top of that, I have a bonus creation here for you today using the same technique!
On to my creations!
Just to give you a little bit of my tutorial this week, I showcased a super duper easy peasy way to create a graphic card with lots of visual punch! And, the MISTI stamping tool was key. If you keep your stamp positioned in this tool, it allows you to stamp overtop a previously stamped image, which opens up some different design possibilities, like the one I showcased! In a nutshell, you stamp the image, color it using a fine-tip black pen and then, situating it in the same way as when you initially stamped the image, stamp the image again using embossing ink and then heat emboss using a detail embossing powder. You get an embossed silhouette that is super quick, yet impactful! I started with the
Power Poppy Vibrant Thanks stamp set for all three of my creations.
Now for a closeup of that Zinnia after I stamped with Versamark and added that detail back in with white detail powder. I just love the depth! I also added a sentiment that I also heat embossed. The sentiment is also from the
Vibrant Thanks set as well.
And, here's a third card that I just made last night using vibrant shades of purple and the third flower in the
Power Poppy Vibrant Thanks stamp set. I was inspired by
Theresa Pollack's card HERE that she made after giving this tutorial a try. I love just how many different color combos you can try with this -- endless opportunities!!
I love that this technique delivers a design punch without a ton of effort. These cards took minutes to create and are the perfect way to create a little snail mail love in a jiffy!
So, if you want to give this technique a try, please do and then,
click on over HERE to enter it in this week's Creative Confetti Challenge! Then, you'll be in running for a $25 gift code to the Power Poppy Shop! So, get those fingers inky and play along with me!
These lovely ladies also have a little Power Poppy eye candy to share, so be sure to hop on over and see what they have in store!
Nancy Sheads
Gloria Stengel
Leslie Miller
Barbara Walker
Lisa Johansen
Stacy Morgan
So glad you stopped by! I hope you have a beautiful and creative weekend!
Until next time,
Julie


