Wednesday, April 11, 2012

Flourishes Sneaks Day 2: Botanical Bookplates 2!

Hi all! It's day two of  Flourishes' April release and I have some news for those of you that fell in love with their Botanical Blossoms 1 set released last month! That set has a "sister!" Wait until you meet....
Pansies and Lily of the Valley as beautiful as those in real life! That's what you get when you ink up this new set Botanical Bookplates 2, illustrated by Marcella Hawley. Another fun fact? Botanical Bookplates Vol. 2 was designed to match Flourishes' Tailor-made Classic Bookplate Die for a perfectly cut and embossed image each and every time! 
   
On to my creation! I have to say, I adore Marcella's style of drawing and when I first laid eyes on her version of a Lily of the Valley, I just swooned. Lily of the Valley grew all behind my house when I was growing up and if I close my eyes, I can not only see these beautiful flowers again but I can smell their sweet fragrance!


To create my card was rather easy, thanks to Flourishes brand new 123 Create Kit called Howdy Doody. Here's a peek! Isn't this full of country charm? I think so! You can see all this kit has to offer HERE! 

For my main image, I stamped using Tuxedo Black Memento ink and then, reached for my Copic Markers to color. I used these collections:


You can see I added a hint of blue to the flowers just to add a wee bit of depth. The pink was to highlight around my image and match my paper and I only used the lightest shades of the Sweet Pea Collection.  For my die cut main panel, I used Spellbinders Classic Oval and Big Scalloped Ovals, cut thanks to my Grand Calibur. 
And one more shout out for the kit. I just love the ribbon in the kit - so classy! And, you can also get a glimpse of the little crystals as well. You can't tell but they are faceted and have a wonderful shimmer to them!  

And that, my friends, is it!  Would you like to win their new Botanical Bookplates 2 set? All you need to do is leave some love in the form of a comment on the blogs below! Why? You need to try to figure out…..


One of the ladies on our link list below will be picking a name from the comments on her blog post today. We don’t know which one it is… so the more blogs you leave comments on, the more chances you have to win! If all of that didn't entice you, I am sure you're going to want to stop by and see the handiwork of Flourishes finest designers!

SENIOR DESIGN TEAM

FRIENDS OF FLOURISHES TEAM

DID YOU KNOW YOU COULD WIN FLOURISHES' ENTIRE APRIL RELEASE?  Have you checked out their Motherly Love Challenge? Just click HERE to find out how to play! You can also play in the Noon Time Challenges! Yesterday they brought you the Lovely in Lace Challenge HERE. And, be sure to tune in today over at the Flourishes Blog at noon for one more fast paced way to win!  All challenges will close this Friday at 5 PM EST! So get those fingers inky and good luck! See you back here soon!
Pin It

Flourishes Sneaks Day 1: Love & Lace


Hello all and welcome to Flourishes' April Release week! One thing you'll notice, right off the bat, is that this release has a very feminine feel! It's that time of year when we start to think about honoring the moms in our lives and watching parts of the world turn to spring! So, without further ado, let's get to the sneak of Flourishes' first set!

What's more beautiful than an antique cameo? This set illustrated by Lauren Pope showcases that feel. Stamp the silhouette in the center of this circle antique lace frame or use one of the six beautifully scripted sentiments inside. It's a timeless and classic image that can honor your mom or any new mom in your life! This set measures 4" by 6". This set is a perfect companion to our Antique Lace background stamp. It's another brand new stamp! See?


On to my creation! When I first saw this set, I knew that it would create beautiful cards in a jiffy - no coloring needed for this one!


This card is super simple because it's basically Flourishes Classic White Card Stock with some pink accents thanks to Angel Pink Memento Ink, some pink cotton linen ribbon and a fun Want2Scrap pearl pink circle embellishment. Right now Flourishes doesn't carry the circles but click HERE to see all the fun shapes they do have! You can see I used the new Antique Lace background for the bottom of my creation to add a little pattern. The die at the center of my card is the Spellbinders Heart Circles die that was cut thanks to my Grand Calibur.  I added a little embossed strip and using my Scor-Buddy, I did add an embossed line around the top of my card. The sentiment was added thanks to a 1" circle punch and tied on with Blossom Twinery. 

Here's a close up of my bow and tag!

And that, my friends, is it! Want to win this set? All you need to do is leave some love in the form of a comment on the blogs below! Why? You need to try to figure out…..


One of the ladies on our link list below will be picking a name from the comments on her blog post today. We don’t know which one it is… so the more blogs you leave comments on, the more chances you have to win! With that bit of eye candy, you’ll surely want to see the design team’s cards and creations in full color when you take a trip over to their blogs!

SENIOR DESIGN TEAM


FRIENDS OF FLOURISHES TEAM


DID YOU KNOW YOU COULD WIN FLOURISHES' ENTIRE APRIL RELEASE?  Have you checked out the Motherly Love Challenge? Just click HERE to find out how to play! You can also play in their Noon Time Challenges, which start today at noon with another one ushered in tomorrow at noon!  Both are fast-paced and fun challenges that will give you yet one more chance to win the full April release!   All challenges will close this Friday at 5 PM EST. So get those fingers inky and good luck!

I'll be back tomorrow with another one of Flourishes newest stamp sets, so be sure to stop back and see what I've got cooking! ;-)

Pin It

Monday, April 9, 2012

Window Treat Bag Tutorial

Hi all! For those of you celebrating the holiday this weekend, I hope you had a joyous and restful one! It's back to business and to jump start your creativity, I thought I'd share a little project that I featured on my blog a few weeks back, only this time - with step-by-step instructions! It's a little window treat box that could be decked out for all occasions!

To get started you need:
Flourishes Classic White Paper
Decorative Paper
Decorative Edge Punch or  Border Die
Flourishes Clear Card Stock 
Mother's Words of Wisdom Stamp Set and Tiny Flowers and Tags Set
Copic Markers
Tuxedo Black Ink 
Ribbon & Silver Cording
Small die cut shape for tag
Scor-Tape   

Here's a peek at what we're going to be making....
    

We'll start with two sheets of Classic White Card Stock - measuring 8" by 8-1/2". On both pieces, you will score 2" around the two longest sides and only one of the shortest sides. As you can see by my example below, score down the 1" line on the two longest sides ONLY to the bottom score line and then stop. On one piece, you will cut along the bottom score lines creating flaps  - you can see that in the picture below.


On the second piece follow the same instructions, except instead of cutting flaps, you will actually notch out both 2" by 2" segments on the bottom on both sides, like this....


 I wanted the front of my bag to be somewhat more colorful than just plain white - so I trimmed a piece of decorative paper to measure 4-1/2" by 6", added some decorative stitching and secured it to the front of my box like this...
   

 Now, the fun begins because we get to start to build our "window!" I took a circle die (Spellbinders Classic Circle Lg.), lined it up and used a post-it note to keep my die secure...


 Here's what it looks like after I've run it through my Grand Calibur...


 From here, flip this panel over, trim a piece of Flourishes Clear Card Stock down to fit over your circle window and secure using Scor-Tape.


 Next, stamp the wreath from the Mother's Words of Wisdom stamp set onto Flourishes Classic White and color using Copic Markers. I used these collections for my creation!
After coloring, I used a mix of detail scissors and a craft knife to trim the opening on the inside of my wreath like so....


And afterward, I used detail scissors to trim along the outside as well, creating the window for my window box! I secured with Scor-Tape and here's a peek at the work in progress!


Next, it's time to assemble the box.... you'll need some more Scor-Tape and you'll want to add tape just like I did below...


From here, you'll undo the tape on the bottom and on the two flaps and secure so that the finished front looks like this...


Then, securing tape to the bottom of the flap on the other part of the box, you are going to connect both pieces like below. You can also see from the photo below that I trimmed 1" off each side of this other part of the box - basically cutting along the score line.

From here, add some Scor-Tape to the flaps on the part of the box above that is laying down and connect both sides. The next part is adding all the little extras! To create the top of my box, I took a 4" by 4-1/2" piece of decorative paper, scored it in the middle at the 2" line and then added a punched decorative border....

You'll secure this to the back of your window box using Scor-Tape...


Add the wreath to the front, a little band of ribbon that's tied up in a bow and a sentiment tag made with the help of a die cut circle and sentiment from the Tiny Flowers and Tags set (added with a snippet of silver cording).


Here's a peek at the box from the side.....


And... a close up of the tag!

Now all this little bag needs are some goodies to stick inside. A certain friend of mine hinted that she might like some cookies in this little window bag -- so we'll see what we can do! ;-)  Hope you enjoyed today's tutorial and if you make one of these boxes, be sure to link it up here, I would love to see what YOU create!

Happy Creating and happy Monday!

~Julie

Thursday, April 5, 2012

A challenge just for MOMS!

Hi all! Can you believe that just in a matter of days, Flourishes will take the lid off its April release? Can you feel the excitement in the air? The DT sure can! Mostly because we get anxious waiting to share our designs and creativity with all of YOU! To get ready for the big reveal, Flourishes is ushering in a fun-filled challenge, giving you a chance to win the entire release! So, without further ado ~ you are cordially invited to get those creative juices flowing for....


HOW TO PLAY: Playing is simple - just create a card for a mom in  your life! It could be your own mom for Mother's Day. It could be for a new mom - welcoming in her brand new bundle of joy. The sky is the limit and the creativity is endless! You have until a week from today - Friday, April  13th at 5PM EST to enter. You can click HERE to see all the official rules.

On to my creation!
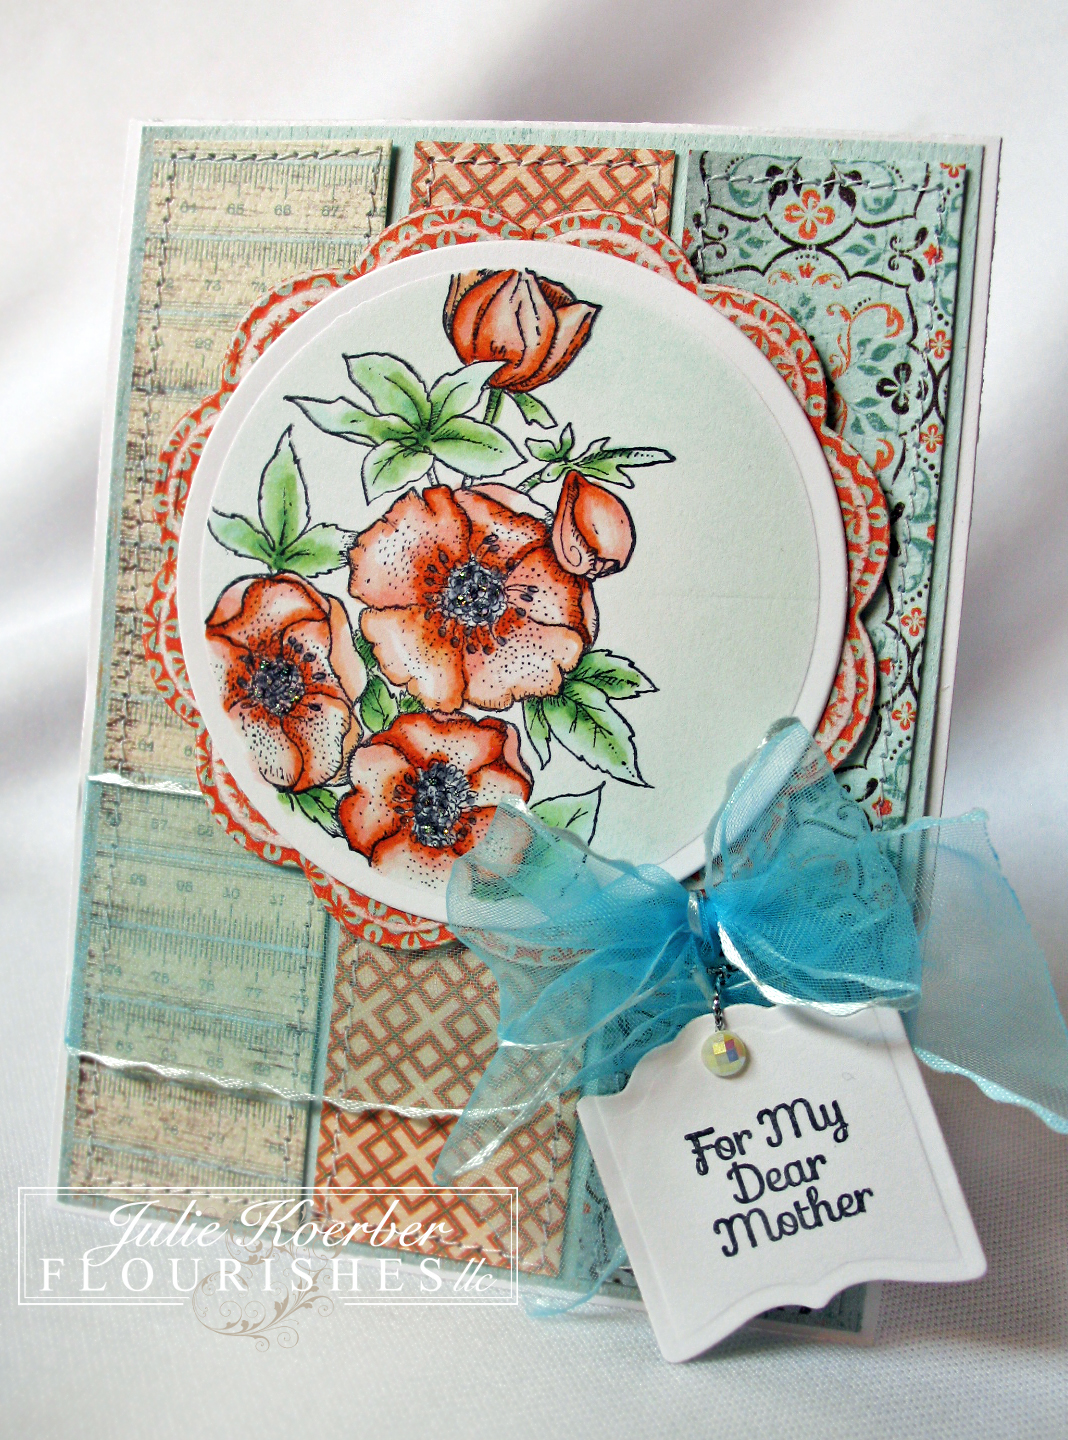
I started with some of Flourishes brand new paper called Gathering by Authentique. I just love the sky blues and poppy oranges in this pad! Normally, I color and then look through my paper stash to see what paper I have that matches. Lately, however, I've been doing it just the opposite - picking paper and embellishments and then - matching up my Copic markers to the paper. So much easier!

Here's a close up of my colored image!

I used these collections to color it all up! The flowers were a mix of the Sweet Pea and Burnt Orange collections. I used R01, R02, YR00 and YR18. 

And, here's a close up of my tag that I created. It's attached to some fabby ribbon my sweet friend Beate sent me - it's her fave. :-) Good news! This ribbon is on the way to the Flourishes store and will be here soon. if you like the look - the store does have a similar ribbon you can find HERE.  After I added the ribbon and attached the tag, I did accent it with a pretty little crystal.  The sentiment is actually a teaser and is in one of the new sets Flourishes will soon release! It was just the perfect size, so I couldn't resist! ;-)


So... how did I do this little tag? Easy! Let me show you!

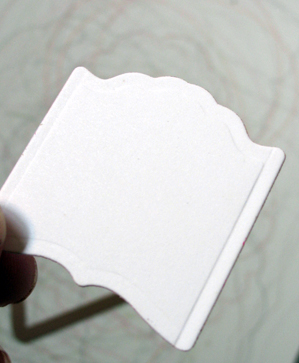
First I started with Flourishes Classic Bookplate Die and a snippet of Flourishes Classic White Card Stock....

After I cut and embossed, I trimmed off about 1/2" to 3/4" off the top using my paper cutter.
Line the die up back into the die like the image above....
And presto! A shorter version of the bookplate die that's perfect for tags of all kinds! And that, my friends.. is it! So, get those fingers inky and let's see what you've got! Our design team has been busy with this challenge, so make sure you head on over and see what kind of Motherly Love they've whipped up this week!
One note to our customers! Flourishes will be closed for customer service needs starting Friday through Sunday. Any orders or emails will be responded to first thing Monday morning so that the Flourishes family can enjoy the Easter holiday.  Blessings to you and yours during this joyous and holy time!

~Julie

Wednesday, April 4, 2012

Summer Fun in Water & Sun!

If the title of my post got your interest... it should! Today the Impression Obsession gals are ushering in a fun new challenge -- Summer Fun and they are showing off some brand new stamps that were just released TODAY to showcase this challenge!

On to my creation and a darling new clear stamp set from IO by Claudia Tenorio-Pearl! You can see all the NEW stamps by clicking HERE. This one is called Jill (CS376) and is a darlin' little gal on the beach....

This card is pretty simple -- just a 5-1/2" square with layers to fit inside. The little pennants on the side are actually from a Spellbinders Die called Nested Pennants. I used a range of decorative papers (from Glitz' Happy Travels collection) to make them all stand out. You can see I used one of the sentiments from this little clear set -- "Oh Happy Day!" on one of the pennants and then, threaded through some baker's twine in a bright red. Add some stitching and a button and... ta da! 

Here's a close up-- I colored my image with these Copic Markers: R20, R29, E31, E33, E55, E57, BG72, BG70, BG11, BG000, BG0000, RV52, RV00, C00, C03, C05, E50, and YR0000. You can also see that I added a bit of sparkle to the sand with the help of some Stickles Diamond glitter. 
 And... here's a closeup showing that little sentie tag!
You'll have to make the rounds to see what the rest of the Impression Obsession Design Team has in store and what fun new stamps they are showing off! If you want to know more about the Summer Fun in Water & Sun challenge, click on over to the IO Blog HERE to find out how you can join in the fun! I do know there is a $25 gift certificate to the IO store on the line!

Hop on over and see....

Daniela Dobson
Dina Kowal
Jeanne Streiff
Jenny Gropp
Laura Fulcher
Vicki Garrett

Thanks for stopping by! I'll be back tomorrow with some more fun... so tune back in to see! :-)

~Julie