Hi all! This week, some of the Scor-Pal Design Team is pairing up with Glue Arts to show you some fun projects that are created when you combine both products. The sky was the limit on what we could create, so I turned to fun type of fold that's been around for quite a while!
If you've been stamping for any length of time, you've probably seen, heard of, or tried the "Joy Fold" card. Splitcoast Stampers has a fabulous tutorial HERE. But, one thing I've been wanting to do with this tutorial is put a new spin on it. With all the fabulous die shapes out there right now, the sky is the limit for how many ways you could create this look! So... here's my version! Here's a peek at the final card...
And here's how I started - with the smallest shape in Spellbinders Grand Labels One.
As you can see, I cut, embossed and then, with a sanding block, I sanded my embossed edges to reveal the paper's white core.
You can really score anyplace on this shape. I wanted my shape to have a little overlap so, I lined up my shape with the edge of my Scor-Buddy and scored on the 3" line.
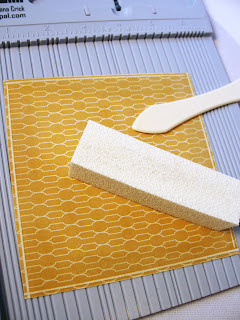
Next, I cut a piece of decorative paper to measure 4-1/8" by 5-1/4". I scored 1/8" all the way around using my Scor-Buddy and then, using a sanding block, sanded the edges.
Using another piece of decorative paper, I picked up the Labels Eighteen and used the largest die in that set, cut and embossed and then, again, sanded the edges of the paper to reveal the white core. From there, I scored just to the one side of the points on the die. I didn't measure, just eyeballed it!
And here's what it looks like when you assemble it to a 4-1/4" by 5-3/8" card base. This isn't your typical card base - it's just a panel. The folded dies will create the "opening" for your card.
Add the embossed panel to the center and your card just needs decking out!
This is where Glue Arts 3-D Raisen's come into play! I wanted to add a button to my front to help keep my joy fold secure. I didn't want my flaps flying! ;-)
Put the Raisen on the button.....
And attach it to the front of your card!
This is the button in action! Because the 3-D Raisen's are so highly tacky, they really secure the button so that you can then insert the flap underneath and keep the card front closed!
Next, Glue Arts U Cut It comes into play. I love the fact that this foam can be cut to size. How many times have you tried to piece a bunch of foam tape together to lift up an odd shaped piece of paper? I know I have!
So, here you can see, I cut the foam to the exact size I needed!
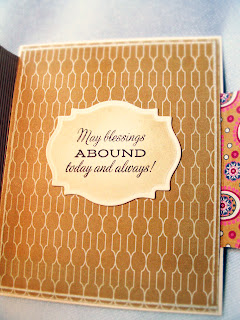
And above is a peek again at my finished project! I also adorned the inside with a sentiment from Flourishes A Season of Thanks (just released last Friday!) set to accent the inside.
And there, my friends, you have it! A new spin on a well loved type of card fold! Hope you enjoyed! Be sure to check out the Scor-Pal blog HERE this week for more fun-filled projects and ideas!
~Julie
SUPPLIES:
Paper: My Mind's Eye - A Happy Heart; Flourishes Classic Ivory
Stamps: A Season of Thanks by Flourishes
Ink: Memento Rich Cocoa, Antique Linen Distress Ink
Button: My Mind's Eye Sunshine buttons
Twine: May Arts
Adhesive: Glue Arts 3-D Raisen's and U Cut It Foam
Scor-Buddy mini scoring system by Scor-Pal
Dies: Labels Eighteen, Classic Circles, Grand Labels One, Grand Calibur machine all from Spellbinders
Copic Markers


24 comments:
Great card, Julie! What a fun twist on the joy fold - your card is beautiful. I love fall creations, and yours is wonderful!!! Thanks for the inspiration :)
This is beautiful! Thanks so much for the awesome, tutorial too!
Love your card, and thanks for the tutorial. I've never heard of this type card before, but I'm definitely giving it a try.
What a wonderful fall type card. Love this image and have some colored up to use. Beautiful job.
Mom
I am so glad I found your blog - I am in LOVE with the things you make and the way you teach how you make your amazing creations!
Lovely! I am thoroughly impressed with that button. Well, I like the papers and your colored image and all the cool shapes, but sometimes I get stuck on one thing and here it's that button - well and how you stuck it on. Does it really stay with just the glue? You are giving away even more goodies! I'm not commenting, though, since I got an awesome box just 2 days ago. Did make my first card with some of the treasures and it's photographed, so I'm on my way to having fodder to fluff into your mailbox!
Very cool!!!
What a neat card! I love the different shaped flaps! It looks almost like a wallet when clsed. I will have to try this for myself!
Love this new take on a joy fold card!
Thanks so much for the tutorial! You made it look so easy maybe I can do it! Your card is beautiful, love the fall colors, and the coloring. Thanks!
OMGoodness Miss Julie! This is so Lovely! Wonderful twist on a Joy fold card! I am definitely going to have to give this a try! What a wonderful tutorial too! Thanks so much for the inspiration!
Hugs
Shannon 8-)
I have never seen this type of card before, I'm totally in love! WOW!!!! Beautiful finished card, awesome tutorial.. Thank you soooo much!
That is fabulous!! Love the new shapes added. What a wonderful twist. Also really like the shading of the gourd on the far left and the pumpkin. Great card!
Beth Greco
What an awesome card! Love the colors, the different flaps, and the excellent tutorial!! Its a beautiful card, and you did a fantastic job in explaining step by step how to do it! WITH pictures- thank you!!!!
Julie, your joy fold looks AMAZING! I love the paper and shapes you chose for this. And of course your coloring looks GORGEOUS!
Hugs and smiles
Oh how beautiful! Lovely design, coloring & truly inspirational!
cool....What a neat card! I love the different shaped flaps! It looks almost like a wallet when closed...:))
discount card printing
custom gift cards
plastic card
Scratch Card
What a neat twist on the Joy Fold. Love the colors/papers/embellishments you used. And your tutorial was so clear. Bet there will be a lot of "Julie folds" showing up everywhere! I know there will be at least one!
Love your card. What a great idea! It's a great idea to use for any occasion. Thanks.
I just saw this on Pinterest and I love it!! Thanks so much for the fantastic idea.
Fancy jazzy die cut busy, Wow! a joy fold card smartly ready to surprise a very special person. Cut a second die cut front in half, glue it to the inside of the front flap for a recipe or poem expressing how very special that receiver truely is. What a fun idea! Keep Looking Up!
Very cute card. I was not familiar with the "Joy" fold. Clever! Thanks.
I love this! I plan on sharing this on my daily inspiration.
Thank you for showing me new ways to use my dies! Lovely card.
Post a Comment