Sunday, October 25, 2020

Power Poppy: Garden of Gratitude!


Hello happy stampers! Welcome to DAY THREE of Power Poppy's amazing new holiday release -- QUIET CHRISTMAS! -- Are you liking what you see so far? I am absolutely loving these images and today's set that the Bloomies are sneak peeking is about as sweet as can be! I can't wait to show you all! Take a look at Garden of Gratitude!


I have to admit, it's hard not to squeal when you see a set like this. I mean, look at those lush poinsettias, amaryllis and Lenten rose popping out the top of those wellies! And that trellis tree? Brilliant! 

On to my creation! 


When I saw this set, I knew. I just KNEW that I had to use the wellies with those lush, beautiful blossoms! I mean, look at them! Just too pretty for words! I did what I love to do and I stamped and then grabbed my Copic markers, a clip board and parked myself on the couch while I watched the World Series to color this one up. I was so entranced, I have to say I missed a couple of great plays. Thank goodness for instant replay! ;-)  After I was done coloring up the flowers, it did need something, so I took a super sharp white colored pencil and I added in some detail on not only the poinsettia and some of the leaves but on the boots as well. On the berries, I added some white gel pen to help those berries POP! 

Here's a little closeup for you! 


And here's a peek at the inside! I wanted to accent the inside too and used not only a sentiment but those darling little scissors with the berry! 


And that, my friends, is it! 

Before I let you go
.... just a few notes about the release -- if you haven't noticed, instead of sharing these new sets each morning, the Bloomies are moving instead to a happy hour format! ;-) We're posting every evening at 5 PM Central, for five nights in a row! 

Each night you'll have a few options to tickle your creative tastebuds! You can purchase the clear stamp we’ve revealed OR you can purchase the digital download versions of the illustrations and sentiments — IMMEDIATELY. No waiting. Purchase, download, print, and you can be making a card within 10 minutes.

And, a new feature, which I am super excited about. Power Poppy --for the first time ever-- is offering release bundles for a limited time! You can pre-order the 5 stamp sets that we’re sharing in October. You can also pre-order the 5 stamp sets that we'll be sharing in November (yes, even before we unveil them! Oh, you know you'll love them. This isn't a high-risk purchase! LOL!) You can check it all out in the Power Poppy Shop! 


And now, my friends, it's time to see what the rest of the Bloomies did with this garden-inspired beauty! I know you won't be sorry if you hop on over and see.... 

Ally
Leslie 
Gloria 
Broni 
Barbara W  
Stacy
Christine
Nancy
Barbara C
Lisa 
Jenny 
Sathya
Power Poppy Blog  -- for all the deets! 


Be sure to swing by tomorrow for a set that is so perky and fun, you just might jump straight out of your shoes with excitement. It's one of those that has so much potential, you'll be dreaming of ways to use it for weeks! ;-) So, come on back for day FOUR of the Quiet Christmas Release!  

Until then!

Saturday, October 24, 2020

Power Poppy: Enchanted Branches


Hello happy stampers!
It's DAY TWO of Power Poppy's amazing new holiday release -- QUIET CHRISTMAS -- and I have to say Marcella is bringing us some of the most charming images ever! If you missed DAY ONE, please click HERE to travel back to the Power Poppy blog and get caught up. If you're ready for more, you're in the right place because today's stamp set is all about the peace of the holiday and the reason for the season. Set your gaze on this beauty, will you?


Enchanted Branches features a whole host of imagery that can be used on its own or as tiny glass ornaments delicately hanging from an evergreen branch. The sentiments are beautifully scripted and really bring about the peace of this beautiful season! 

On to my creation! 


I have to say, I was completely enamored with the angel in this set. She is so beautiful and while I used her as an ornament, I could see so many ways to put this beautiful illustration into play. I also doubled up on the branch, just to give a little more greenery at the top. From there, I colored up my image using Copic markers. I decided to keep with the red and blue theme that I started with THIS card yesterday. Do you ever decide to use scraps from a previous card and say -- hey, why are all my cards the same color scheme? Yep, I do that! ;-) 

I also wanted to look like light was being cast down on the angel. So, I used a mix of yellow Copic markers and flicked color in that direction. 

Here's a little closeup for you! 


And, super fun thing! Because the sentiments in this set are also available in digital format, I printed off the sentiments using my laser printer and then foiled them using a rose gold foil. See? 


Love that! I think a splash of gold on a Christmas card is almost mandatory. :-) 

Before I let you go.... just a few notes about the release -- if you haven't noticed, instead of sharing these new sets each morning, the Bloomies are moving instead to a happy hour format! ;-) We're posting every evening at 5PM Central, for five nights in a row! 

Each night you'll have a few options to tickle your creative tastebuds! You can purchase the clear stamp we’ve revealed OR you can purchase the digital download versions of the illustrations and sentiments — IMMEDIATELY. No waiting. Purchase, download, print, and you can be making a card within 10 minutes.

And, a new feature, which I am super excited about. Power Poppy --for the first time ever-- is offering release bundles for a limited time! You can pre-order the 5 stamp sets that we’re sharing in October. You can also pre-order the 5 stamp sets that we'll be sharing in November (yes, even before we unveil them! Oh, you know you'll love them. This isn't a high-risk purchase! LOL!) 


    CHECK IT ALL OUT IN THE POWER POPPY SHOP!


And now, my friends, it's time to see what these fine ladies whipped up using the brand new set Enchanted Branches: Nativity! Beauty abounds in these samples, I have to tell you! 


Power Poppy Blog  -- for all the deets! 


Be sure to swing by tomorrow for a set that will share the vibes of the season, and satisfy that green thumb of yours! It's such a darling set, so you will have to come back to see this set in its glory! 

Until then!


Friday, October 23, 2020

The Power Poppy Quiet Christmas Release is HERE!

 Hello all! It's an exciting time here on the ole blog! Why? Because Power Poppy is gearing up for a holiday-pa-looza with all new stamps, all new digis and lots of fun-filled samples from the Bloom Brigade! Check it out! 


I have to say that I am over the moon excited to share all the amazing illustrations freshly drawn by the hands of Marcella! She has really outdone herself with this release and I know, once you see what she's whipped up, you'll agree!

So today, the Bloomies are showing off the first set in this Quiet Christmas release! It's a beautiful set that I had such a blast coloring up! Paperwhites are one of my favorite holiday flowers. If you've never tried to grow them from bulbs, I strongly suggest it -- so fun, especially if you have kids who like to watch things grow! 


On to my creation! 


I chose the largest image in this set because I just love, love, loved all that moss and thought it would be a blast to color up. Guess what? It was! I used my Copic markers and chose to lay down a layer of YG00 to set off the moss with a kind of glow as I layered darker greens over top. I used BG70, BG72, and BG75 for the blues, RV25, RV23, and R32 for the pinky reds and then BV000 and BG000 to add depth to my paperwhites with shadows. The greenery was done with a range of YG shades of green and the entire image was highlighted with RV0000 and RV00. I did add a little BV00 at the base to add some shading!

Here's a close up for you! 


And the rest is just matting it up! I used some Stampin' Up decorative paper and played on the shades of blue, adding a bit of sparkle to pick up on the pinky reds in the ribbon. What fun! The whole thing reminded me that I do need to pick up some paperwhite bulbs and get that process started so that they are ready to bloom for the holidays! 


Want to see what the rest of the team did with this beautiful set? Well, you'll have to hop on over and check out their beautiful interpretations!


Be sure to swing by tomorrow! This set might just be my favorite of the release. It covers some new ground since Marcella has never done a set quite like this! You'll have to come back to see what I mean. 

See you tomorrow!


Friday, August 28, 2020

Power Poppy: Healing Bouquet!

Hi all! The sweet treats continue today with another brand new illustration fresh from the Power Poppy Shop!  These juicy new images are from Power Poppy's Fresh Squeezed Scents Collection and each is just as divine as the other! 

On to my creation!

Set your sights on this new image -- Healing Bouquet! It is rich in color and healing properties with sage, lavender, lotus, lemon and colorful porcelain vine! I colored this up with Copic markers and just kind of let the color flow. It's one of those images that you can just get lost in the process. I tried to add a little texture along the way to the lemon, adding dots of color and changing up the range of yellows as I went along. I also added a little white gel pen accents to both the lemon and berries --just to give both a  little more depth. The sentiment is from the retired set called Dynamic Duos Glads and Gerberas. 

Here's a little close up for you! 


And, as you can see from my finished card above, I used a die-cut set to create my layers, a little foam tape to pop it all up and a couple of rhinestones to add a little pizazz! I have to say, this is just a beautiful illustration that was such a joy to color up! 


There's so much more juicy creativity thanks to the Bloomies! Just hop on over to these fine designers below and you'll see for yourself! 


See both new sets HERE! And remember, with digital images, it's instant gratification! Just buy, download, print and color with reckless abandon! 

So glad you stopped by!  


Thursday, August 27, 2020

Power Poppy Mini Release! Aloe and Oranges

Hi all! Today I have a sweet treat to share that is ripe for the pickin'! Freshly squeezed images straight from the Power Poppy creative vine! Marcella has some juicy new images and I can't wait to share! 

Some of you might have already seen this creation below. I featured it over on the Power Poppy blog for a Creative Confetti tutorial on digital stamp manipulation. 


This lovely image is called Aloe and Oranges! Isn't it DIVINE??? As you can see, I added a frame around the image and if you want to know how to do that, all you have to do is click HERE to see the tutorial! 

I have to say, I wish I could tell you which Copic markers I used to color up this image but I was watching baseball on TV and just grabbing from my Copic Marker storage bag as I went! I do know that I tried to use more blue-green colors for the aloe and more rich green colors for the leaves. the oranges were pretty straight forward. I chose the most vibrant shades of orange and deep yellow. The background was colored with V01, and V0000. I just LOVE purple and orange together! My two favorite colors!


Since this image was so large, I just stuck it on an orange card stock base and then added a stitched oval sentiment. Not a lot needed when the image is so bodacious all on its own! ;-) I used the sentiment from the Summer Berries clear set because I thought it was so perfect for this image. Pop it up with foam tape, add a few rhinestones and.. ta da! Done! Easy Peasy Orange Squeezy! 

The rest of the Bloom Brigade has been busy bringing this lush beauty to life as well! So, before you call it a day on the world wide web, be sure to hit these lovey and creative women up and see their creations as well! 

Power Poppy Blog -- visit for Marcy's take plus some fun news! 


Thanks for stopping by! Power Poppy will release another fun new "juicy" image in its Fresh Squeezed Scents Collection tomorrow --- so --  get ready for another Bloom Brigade Parade, showing off these delish new digital illustrations, ready for you to pick, download and color in a jiffy!

See you back here then!


Friday, July 24, 2020

Make mine a mini!

Hello all and happy Friday! How is everyone doing this week? Goodness, it has been a LOOOONG time since I've posted on my personal blog. Hosting the Creative Confetti Challenges over at Power Poppy has taken me away from "home" I guess! The card I am going to share today is actually from this week's challenge but I decided I should share here too. :-)

Recently, I scrolled through some of my recent cards and thought about design and what I liked about certain creations and what I didn't love about others. That got me thinking about being inspired. Why not take a card or a series of cards that you love, and downsize them -- make them a mini version?

Let's take a look at my creative process!

First of all, I want to share the inspiration for my mini. A few months back, I hosted the Inspire Me Monday tutorial and mashed up a few techniques to come up with what I call Embossed Silhouette. Ever since that tutorial, I've been looking for new ways to incorporate this look because it is so easy and ushers in dramatic results. So, here's a peek at some of the cards that inspired today's creation. And... HERE's a link to the original tutorial as well. 


And, here's a peek at my "mini!" Instead of using the Power Poppy set Vibrant Thanks, which is currently sold out, I decided to pick one that you could actually get your hands on now! ;-) I chose the stamp set Poppies. 


Instead of making a rectangle card, I decided to use some stitched circle dies to create not only my card base but the layers as well. I folded a 4" by 4" piece of black card stock and then set my die on top, leaving just a sliver of the card at the fold to keep the card's integrity and still have a circle shape. Then, I used one size smaller die for my white layer. And, I cut one smaller from that to serve as my mask so that I could sponge on that bold color.

First up, if you looked at the tutorial link, you know I stamped the poppies stamp in black ink and then colored it all up using a black marker to create a silhouette.


As you can see, I used My MISTI stamping tool to keep my circle in place because after I colored it (I didn't remove it from my MISTI), I inked up my stamp with Versamark ink and then heat embossed using white detail powder to get that detailed silhouette image. Afterward, I lined up my mask and using low tack tape, taped both the mask and the main image down real good so that it wouldn't move as I sponged on the ink. For my ink, I used Morocco and Lady Bug inks by Memento.

And then, the fun continued! Not only did I add a little pizazz to the envelope...


I added a little something extra to the inside of my mini card!


If you missed it, I also make an envelope liner using that pop of orange on the inside...


I added the "Dear Friend" sentiment from the stamp set Heart Abloom and a few iridescent sequins and.. ta da! Finished! I think it turned out so cute and you can still see the inspiration from the original creation. Do you have a "mini" in your future? If so, I hope you join me over on the Power Poppy blog! Every month, we choose a random entry for a $25 gift code to the Power Poppy Shop, just for playing along!

And that, my friends, is it!  Do you need/want a little more inspiration on this Friday to help you get those creative ideas rolling just in time for the weekend? Well, check out these fine ladies and see what they've been up to!

Stacy Morgan
Leslie Miller 

Broni Holcombe

Thanks for stopping by! Until next time!


Friday, April 3, 2020

Power Poppy Fun!


Hello all and happy Friday! Earlier this week, I shared a fun little digital challenge and tutorial that I thought that I would take time to share right here on my own blog! With everyone staying home and trying to take their minds off what the world is facing right now, I've noticed quite a few folks trying their hands at new things. My daughter's taking online guitar lessons through Fender. I am taking up sewing again. I just made THIS little caddy for my knitting and it turned out so cute! Here's a picture of mine below! What was so fun about this project is that the fabric is all scraps from a quilt that I made my mom literally fifteen years ago. I knew there was a reason I hung on to those bits and pieces of fabric! 


So, with this week's Creative Confetti Challenge over on the Power Poppy Blog, I challenged you all to use digital stamps for your creation! New to digis? Well, you're in luck! A long while back I did THIS tutorial on getting used to manipulating digis. It's a great starting point. And, if you need a little ammunition to get started, Marcella has plenty HERE in the digital section of the Power Poppy Shop! 

So, with that tutorial in mind, I thought I would dig deep into my digital stash to morph an older Power Poppy stamp into a brand new design! Want to see?

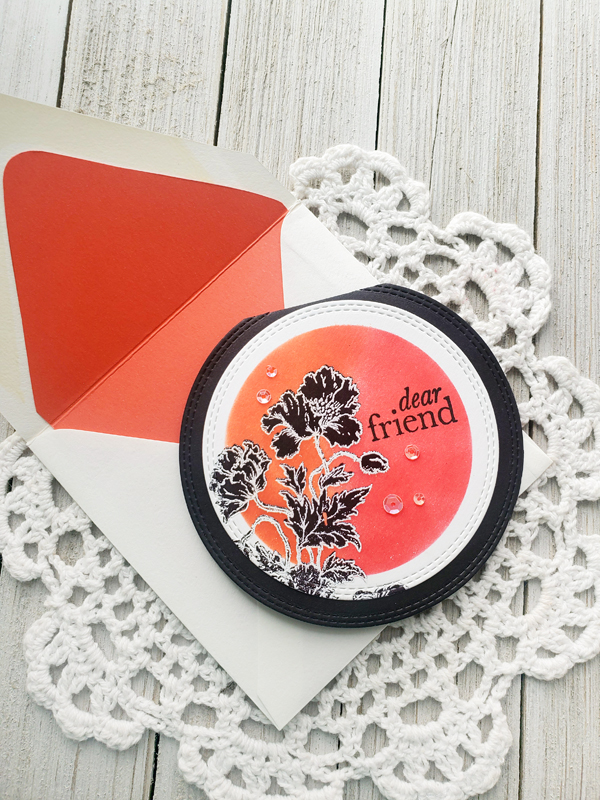
I started by coming up with a concept in my head -- I wanted a frame for an uplifting sentiment so that I can spread some joy thanks to an envelope and a stamp. I know there are so many people right now that I can't see, can't hug and can't share time with. Our craft, dear friends, is the next best thing! It's a handmade creation, just from YOU made especially for that beloved friend!

So, I started by creating a 2" by 2" canvas in Photoshop Elements. This helped me to create just the right size circle. I used the Marquee tool, clicked on the circle and then drug my cursor over the square to create this image. After I made my circle, I outlined it using the "Stroke" effect, adding a thin black line around my circle. (You can see the stroke tool off to the right of my image)


Then, I created a second file to measure the size of a card front - 4-1/4 by 5-1/2 and I centered my circle on top.


I knew I wanted my frame to be surrounded by loose florals and after scrolling through the digital section of the Power Poppy Shop, I knew this image below, Sweet Pea Show would be perfect! After opening it up, I used the eraser tool (you can see I clicked it off to the left of my image in the toolbar) and I removed my background.


From there, I erased everything but sections of the image, using each piece to create my floral frame.


Sometimes, this is how small my piece was!


And after I moved and manipulated all of the pieces, this is what my frame looked like!


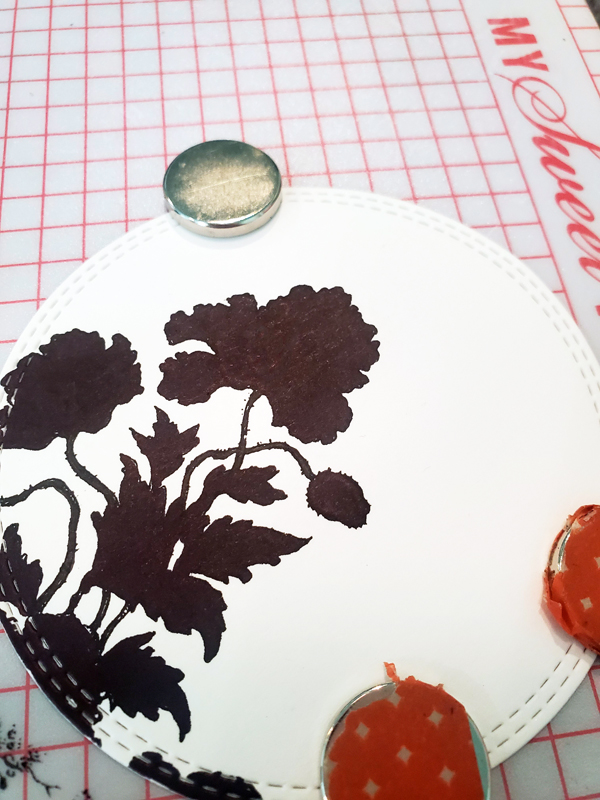
After printing and using a stitched rectangle die to cut out my image, I set my digi in my MISTI stamping tool.


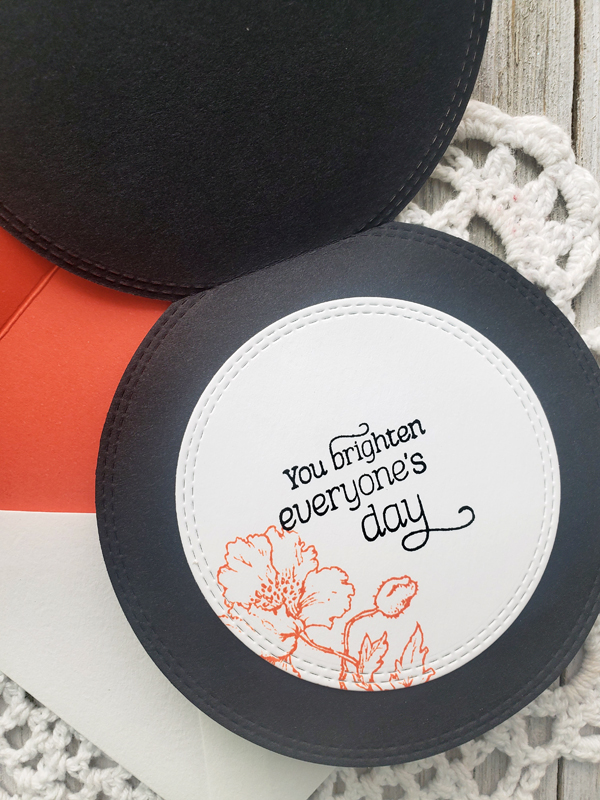
Here's another trick that I want to show you today! I set the "Radiate Joy" sentiment from Power Poppy's M-Powering Words stamp set to the left-center of my circle. (Can I just say that this stamp set is PERFECT for the times we are living in right now -- so much encouragement! AND, it's on sale right now!) There's a reason for this! I knew by using the MISTI, I could create a shadow effect with my sentiment and I thought that would be a fun effect!  


I stamped it with Tea Rose Vivid! ink -- funny, I have had this stamp pad for probably more than 15 years and it is still going strong. They don't even make this ink any longer. My reinker will probably keep it alive for another 15 years! ;-) 


Now, here's the fun part. I cleaned off my stamp and as you can see, I offset the stamp, placing it down and to the right of the original image. You can tell when you see the "white space" around the stamp. Can you see it? I closed the door of my MISTI, setting that stamp in place and then set the MISTI aside for now. When the time comes, I will be ready for this knowing my next stamp layer will provide the perfect shadow effect! 


Then, I went to town coloring! I used my Copic markers and used R81, R83, RVOO, and R00 to color up my petals and G21, G24, G20 to color up my leaves. I highlighted around my sentiment using BG0000 and BG10. When you see my finished card, you'll see I added these highlights around the outside of my main panel as well. 

Once I was finished coloring, I pulled out my Versamark ink pad and my silver detail embossing powder and using my MISTI, I stamped and heat embossed! Isn't that fun?


And here's a peek at my finished card! It is a super simple design -- decorative paper background, silver cording, pink button. That's it! 


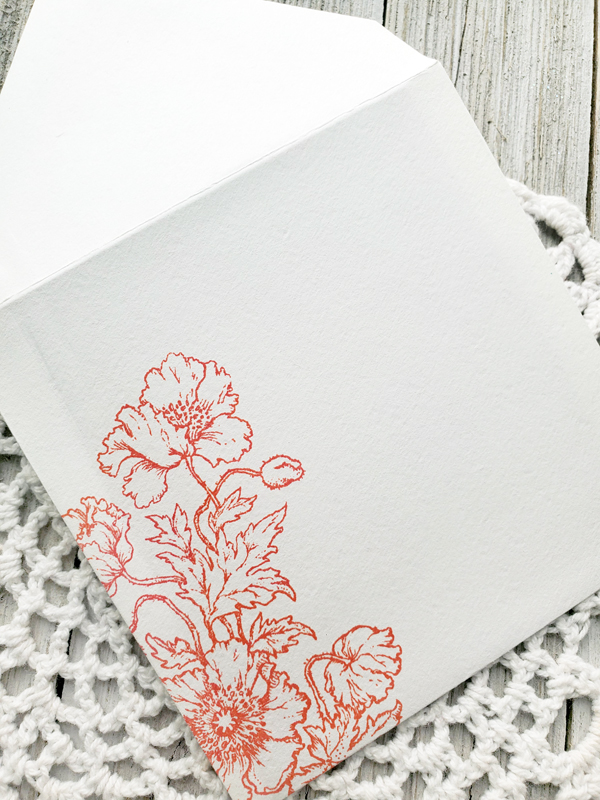
Now all I have to do is pop a stamp on an envelope to get this in the mail! I have a few people who could really use a note. I think my next challenge will be to make a list and take an afternoon or two to get those notes in the mail!

I happen to know that some of the other Power Poppy designers were busy in their crafting places this week! Want to hop on over and see these fine ladies? I hope you do!

Stacy Morgan 
Christine Okken
Barbara Campbell
Lisa Johansen


Thanks for stopping by folks! I hope you play along with me this week! Every entry is a shot at a $25 gift code to the Power Poppy Shop! Just click HERE to learn more.


Happy Creating & Stay Well My Friends!