Showing posts with label Spring. Show all posts

Friday, May 5, 2017

Sharing a Little Power & Spark!

Hello all and welcome to another fun-filled Friday! I have to say, this day is proving to be my favorite day of the week for so many reasons. One of which is sharing a little bit of Power Poppy inspiration with you to help jumpstart your creative weekend! 

Before I forget, did you know that Power Poppy has a brand new 'sprout' in their Instant Garden? If you want to take a peek, just click HERE to see one of Marcella's newest illustrations that you can download, print and then color up right quick! Squeee! I am using this new digital stamp for my card today so you'll be able to see it in full color first! ;-) Here's a little peek at the new set Plant Kindness! 


This fanciful set offers flower-filled seed packs and heirloom plant listings, rosy-faced journals and calico garden gloves — these are a few of Marcella's favorite things! Color up this cheery gardening vignette for a quick card and plant a little kindness along the way! Just click HERE to see! 

While you're here, however, you need to check out our latest Power & Spark Challenge hosted by the most fab Aussie I know- Ms. Kathy Jones! 


HOW TO PLAY: This challenge is just as it sounds -- it's all about FRAMES! Just hear what Ms. Kathy has to say about her challenge to us all!
"This challenge is as easy as Framing It Up! Simply frame your image on a card, decorate a frame or frame your stamped piece as a bit of home decor!"

Do you want to know something super fun? When it comes to the Power & Spark Challenge, Ms. Marcella has UPPED THE ANTE when it comes to the winnings! Now, instead of winning a stamp set of choice you actually win a.....

$50 SHOPPING SPREE AT THE POWER POPPY SHOP! 

Just click HERE for all the official details!

Okay moving on! Because I just couldn't wait to color up Power Poppy's newest digital offering, I decided to mix it up and use it while playing along in Kathy's new Frame It Up Challenge! I had so much fun, I decided to make TWO projects for today!


This first one is pretty self-explanatory. Print the digital image, color with Copic markers (too many to list!) use a pair of rectangle die cuts to create a frame for around your image, distress/sand the frame (used C'ordination cardstock) for an earthy feel, sponge main image with Ranger's Antique Linen Distress Ink for a little added depth, mat onto card decked out in bright, springy colors and accented with candy dots and a bit of jute! 

Here's a close up! 


And here's how I decked out the inside! The little strip of herbs along the left side of my card was done using some Memento Cottage Ivy ink and one of the stamps from the Sage Advice clear stamp set! 


 Now one funny thing happened while crafting the card. I had printed this image below to use on the inside of my card but I printed the Plant Kindness sentiment entirely too large! So, I grabbed more stamps from the Sage Advice stamp set and stamped those around the sentiment, decked it out with some paper piercing and added a dark green mat and voila!


Now you might ask, what are you going to do with that? Well, I am following Kathy's lead in this Frame It Up Challenge and using this as a statement to ponder in a space on my work desk! I had this little easel and thought it just fit perfectly there! 


And that, my friends is it -- a card and a little reminder to live each day planting and sharing a little bit of kindness and love! 💗

Now, it's time to pay a visit to some of the sweetest stampin' sisters a gal could ask for.... THE BLOOMIES! Just click on through our linky list and see what kinds of wonderful they've been up to!

Thanks for stopping by and spending a bit of your day with me!
~Julie

Friday, April 28, 2017

Searchin' for the Mojo!

Hey peeps! It's Friday, which means the Power Poppy gals a.k.a. the Bloom Brigade are ready and raring to go for their Power Poppy Parade and today, I'm joining in on the fun!

I know more than a few of you know what it's like to sit back with plans to create, stare at the blank paper before you and come up empty. The mojo just doesn't want to flow. I was there this week and so I decided that I would grab a cuppa joe, turn to one of my favorite places -- PINTEREST -- and see if I couldn't look for someone else to help me spark that creativity. People, there is no shame in being inspired by others. I mean, isn't that why we are all here?

So, I found this blog post HERE from Olesya Kharkova, of Russia. Yes, I "traveled" five thousand miles for inspiration! ;-)

If you click on over to Olesya's post, you'll see that I pretty much CASE-d it, which means copy and steal everything. I loved the blue and pink combo, the splash of vellum, the white embossing -- I loved it all. So, I dug around my craft room for similar supplies and... here's "my take!"


So, as you can see above, this card is not really "my style" -- it was a bit of a stretch for me and that is exactly why I chose the card I did to CASE. I knew I had THIS stamp set -- Peony Muse by Power Poppy. And, I had the rest of the supplies, so all was good. The sentiment is a portion from the Sending Happy Wishes stamp that's a part of the Natural Beauties set. I just stamped, embossed on black and snipped that front portion off. 

Here's how I went about making it -- I stamped using Versamark Ink on white cardstock and then embossed with white detail powder. From there, I used my Distress Markers in Picked Raspberry and just scribbled the marker onto a palette and picked it up with my Wink of Stella Glitter Brush Pen. 

This was literally my color palette here! Acrylic Block - Check! Pink Marker - Check! Wink of Stella Glitter Brush Glitter Pen (Clear) - Check! 


And as you can see, the glitz shows when you move this card through the light. I have done this technique a few times -- you can see those cards HERE and HERE and I just love the results. It just gives the front of your card that extra "something" without being overwhelming. It's subtle flair! ;-)


From here, I took the cues from my inspiration card, cut out the vellum, and layered it pretty much just the same as Olesya did. I did add a few sequins and rhinestones instead of enamel dots-- mostly because my enamel dot stash is running a little low.

And that, my friends, is it! One way to have some fun, get that mojo a flowin' and be inspired by some of the absolutely fabulous designers out there on the web. Like I said, this one happened to live 5,000 miles away! What a BIG and yet small little crafting world we live in!

Speaking of inspiration from far and wide, it's time to turn things over to the Bloom Brigade for their weekly Friday parade! Pay them a visit, take in their artistic talents and then... be inspired!

Cindy Lawrence
Julie Koerber >>> you are here!
Stacy Morgan
Tosha Leyendekker


Thanks for stopping by and spending a bit of your day with me! I'll see you all back here soon!
~Julie

Friday, April 7, 2017

Power Poppy & Sweet Petunia HOP!


Hello all and welcome to a super fun post! If you came here from Lydia Fiedler's blog you are in perfect order for the Power Poppy & My Sweet Petunia Hop! If not, you can start HERE and track back to the Power Poppy blog. I'm so glad you joined us for this fun, creative and collaborative hop! 

Because Power Poppy just unveiled a brand new line of dies to coordinate with its new Spring Fling Collection, I thought it would be great to showcase how you absolutely CANNOT live without the MISTI when trying to stamp on super fussy die cut shapes. Check this out, will ya? I used the Mini Misti for this tutorial. 

I decided to use the stamp set Natural Beauties with the set's coordinating dies and this, my friends, is the card I made! 


One side note before I get to the "How To" of using the Misti with dies, I am loving my Wink of Stella Clear Glitter Pen. To color my image -- literally in minutes -- I scribbled some watercolor pencil (Derwent Inktense) on my stamped image and then blended using the Wink of Stella glitter pen. You can't see the glitter when you are looking at the image straight on, but check this out-- little flakes of sparkle all over! That just makes my heart happy! It is one of those tools that just leaves a bit of "Wow" behind and is a breeze to blend with.


OKAY, MOVING ON! How do you get a perfectly stamped image on a super-detailed die cut shape? Here's how my sweet stamping friends! First, I started by cutting out a piece of white cardstock with the large Natural Beauties die for the long grouping of flowers. 


Remove the die cut, leaving just the cut-out frame and secure the piece of paper using either the Creative Corners for the Misti or the super strong magnets that come along with your Misti! 


From here, lay the clean stamp face down on the cut-out frame so that the cut out perfectly frames your stamp. I know my stamp looks like it has ink on it but it is just stained from using permanent inks. It really is clean! Also, it is hard to tell that my stamp is lined up perfectly. It is a lot easier to see this in real life! ;-)


Close the "door" of the Misti to make sure the back of your stamp clings to the plastic cover. Open it back up and, as you can see below, put the die cut shape back inside the frame.


Ink up your stamp....


... and then "shut" the door again, letting your inked stamp fall perfectly over the die cut shape!


Look at that will you? A perfectly stamped die cut shape, each and every time! I timed myself as I did this -- FIVE TIMES -- just to prove how quick and easy it is to cut, line up, ink and stamp to get a perfect image. I kid you not, it took 64 seconds from start to finish. ;-) It would take a whole lot longer for me to eye-ball and then, not get it lined up "just so" and line it up again and... well, you get my point! The MISTI makes it amazingly easy!


So, how amazing would it be to WIN a MISTI or a $25 Gift Certificate 
to the Power Poppy Shop? Well YOU can!


All you need to do is whip on through this blog hop and leave a comment on each of the blogs on the hop for a chance to win not only a MISTI (either original or mini)but a $25 Power Poppy Gift Certificate with two different winners! So, my friends, comment away for your shot at one of three fabulous prizes!

MISTI Winners will be announced on this page of the My Sweet Petunia blog on April 14th. Power Poppy Winners of (2) $25 gift certificates will be on the Power Poppy Blog on the 14th.

Like I mentioned if you came here from Lydia's blog-- fabulous! If not, go back to the Power Poppy Blog at the top of the link list and make sure you comment on each blog for your chance to win!


Power Poppy
Lydia Fiedler
Julie Koerber >>> you are here!
Ilina Crouse >>> hop here next! 
Christine Okken
Jeanne Streiff
Cindy Lawrence
Maureen Wong
Ally Cope
Kia Gibson-Clapper
Kathy Jones
Ceal Pritchett
Tosha Leyendekker
Giovana Smith
Stacy Morgan
Katie Sims
My Sweet Petunia

Thanks for stopping by and hopping along! Good luck and happy commenting! ;-)

~Julie


Friday, March 24, 2017

A Cheery Hello!

Hello and happy Friday folks! I have a super quickie post to share today because -- in all honesty? I am surrounded by boxes as we speak! I mentioned a couple times here on the ole blog that we spent the last few months building a home and last weekend brought moving day! It's wonderful but the hard work starts trying to find a "home" for all your stuff! So.... long story short, this post is going to be short! ;-)

When I first got my hands on Power Poppy's Spring Fling Collection, I fell in love with the set Sweet Memories featuring snippets, bits, and tendrils of Sweet Peas! I think these fanciful flowers are so delicately beautiful, I just find joy coloring them up. I have colored sweet peas many times over the years but I have almost always reached for shades of pink. This time, I mixed it all up!

On to my creation!

I only reached (surprisingly) for a few markers -- V01, V04, and V06 for the violet shades and G21, G24 and G28 for the greens. The image was shaded with BG10, BG000, and BG0000. After I was done coloring, I did add a few dots thanks to a white gel pen. 

The layout is pretty darn simple. I had a few different small pieces of decorative paper that I cobbled together. I added a bit of lace and die cut my image thanks to a stitched fishtail die. Here's a little close-up for you!


And that, my friends, is it! A Cheery Hello that will one day be mailed to a cheery friend! Speaking of friends, you have to check out what my fellow Bloomies created this week just to share with YOU! Stop by and see.....


Julie Koerber >>> you are here!


Thanks for stopping and spending a bit of your day with me! :-) See you back here soon!

~Julie

Tuesday, March 14, 2017

It's the BIG DAY!

Hello all! Well, today is the day that we've all been waiting for. It's the day that all the sets (and dies) that the Bloom Brigade has been talking out this week are ready to grab up in the Power Poppy Shop! Say "Hello" to the Spring Fling Collection! 

Today, we have one more fabulous set to unveil! You might have seen this set -- Tiger Lily XL --already HERE with Kathy Racoosin of thedailymarker.com's fabulous show and tell as she kicked off her 30 Day Coloring Challenge! Or HERE as she showcased how to color up this beauty with colored pencils. But, if you missed that for some strange reason, take a gander, will you?


The final introduction is something new for Power Poppy! Wait until you see how XL this Tiger Lily really is! It's a 5" by 5" canvas and this bad boy takes up almost all of that space. Marcella added in a few leaves and a fabulous sentiment as well. The goal was to be able to get in and really color up this highly detailed work of art! We hope you really love the XL size because if you do, there's more where that came from! Think of all the flowers that could be amped up in an extra large size!

On to my creation!


When I saw this image, I wanted to make mine more like a Stargazer Lily coloring. See HERE? Mine didn't turn out as vibrant as these beauties are in real life but I did have fun grabbing those lovely shades of pink and green! Next time, I think I'll stamp the lily in a lighter shade of ink to really let the beauty of the flower sing when it's colored! Here's a peek at the markers that I used.....


After stamping and coloring, the rest is just matting it all up! I added a chartreuse background paper and rose, a little gold cording and then used only a portion of the sentiment from the set so that it just focused on the word "Peace" thanks to a little masking magic. The full sentiment is actually a quote from Mother Teresa which says, "Peace begins with a Smile." I love that! It's a beautiful thought that will be great for all occasion cards. 

Here's a close up! You can see that in addition to the Copic Markers,  I did a little impact thanks to a white gel pen... 


And that my friends is it! Now be sure to run on over to the rest of the Bloomies' Blogs to see how they rolled out this final day of release! I know you will be wowed! And then, hop on by the Power Poppy Shop to see this amazing collection yourself! There are so many fabulous illustrations and creative opportunities with this set of 8 brand new stamp sets! 


Thanks for stopping by! I'll be back Friday with another Power Poppy Hop and I hope you'll join me then!

~Julie

Monday, March 13, 2017

Power Poppy Sneaky Peek Day 4!

Hello folks! Can you even stand it? We are nearing the end of sneaky peeky week at Power Poppy! Tomorrow is the big day peeps! Tomorrow, all of the stamp sets that the Bloom Brigade has been showing off will be ready for the buying! Today, we have two more sets to sneaky peek and.... They. Are. FUN! 

Introducing....


Peony Muse features two big fat peony blooms, a bud, several leaves, a stem along with two berry clusters to create any kind of arrangement that your little heart desires! What's even more fun is that after you stamp, this set has a coordinating die set to make cutting and arranging these blooms a breeze! Go simple, go robust! It's all about customization with this one. Handlettered sentiments in this set are by Marcella herself! 

Artful Display offers a grouping of decorative objects that folks can play with to create "room scenes" with dishes, platters, and even a vintage Oyster plate. There's even a little Staffordshire Dog figurine and bouquet of Ranunculus that can be used all on its own to make a statement! I love how Marcella made a splash with this set that's completely inspired by decorating trends right now. Check out these fun inspiration pieces!

Source

Source


Now, with a little ink, you can create the same feel with fun sentiments to match!

On to my creation! I just had to pick up Peony Muse for my creation because I just knew I wanted to snip and create my own little bouquet to frame this beautiful sentiment! 


I started by stamping some of the blooms and leaves in Memento Tuxedo Black ink and then I let my Copics go to town with shades of pink. I used R81, R83, R85, RV00, RV02, G21, G20, G24, and G28 with Y32 and Y35 for the centers with a little YR04 dotted as well. It's pretty bold, but I think it's happy! I want to try this card again only with super soft shades like THIS. 

And, here's a close up for you! 


And that, my friends, is it! Guess what? Only one more day until all of the stamp sets that we've been sneak peeking are in the Power Poppy Shop! Woot! Woot! And, remember, four of the stamp sets will have coordinating dies to make creating not only a breeze, but downright fun along the way!

The Bloomies are on standby right now, ready and waiting to show you what they've created using these two new sets so, stop by and see them, will you? ;-)

Allison Cope
Christine Okken
Cindy Lawrence
Julie Koerber >> you are here!
Kathy Jones
Katie Sims
Stacy Morgan
Tosha Leyendekker

Tomorrow -- Release Day-- be here (please)! Until then,
~Julie


Sunday, March 12, 2017

Power Poppy Sneaky Peek Day 3!

Hello Folks! Are you super excited yet? Only two days -- TWO DAYS -- until the Power Poppy Shop sprouts some brand new clear stamps as a part of the Spring Fling Collection! And, aside from the fact that there are 8 Fresh and FUN new stamp sets, four of those sets have coordinating dies to make creating extra easy and breezy! 

Before I get carried away, let's take a peek at the two sets being sneaked today!

Introducing.....

Stop. Smell. Savor the virtual sweetness of Sweet Memories! It's a set that offers little flouncy blooms that look like they were just snipped and clipped ready to enjoy as a bouquet, arranged as a border, grouped or even seen as a solo on a card. Want a little more "oomph?" Try adding sweet little tendrils, leaves or even little peas in a pod! 


Loving Tulips offers one of the images that flew off the digital shelves at the Power Poppy Shop --
Tulips in Hobnail Pitcher. Now creative peeps have a clear stamp option that comes with so many "extras!" Marcella paired this image with an exuberant Hello script and yet more polka dot accented sentiments and hearts to make this set sing with a fun and spunky flair! 

On to my creation! When I set my sights on the "hello" in this set, I just knew it would be perfect for sweet and simple creations that you could make in a jiffy. So, I stamped the image with Versamark ink and heat embossed with silver detail powder. Afterward, I went to town adding various sizes of small rhinestones -- just to get that extra bling on! 


You can see I added that bit of bling around some of the curves of the word as well as on the little heart! I had fun pairing this apricot orange with a fun black and white pattern. Punchy & Fun! 


This one was a ten-minute creation for sure! And, it is one that I could recreate in a whole host of colors for a fun card set! I really wanted to showcase this card because I know how many of us struggle when we need to make a card in a jiffy. Well, sweet friends, this is one that you could get done and popped in the mail in no time! ;-)

While I love this sentiment, there's so much more to this set and the Bloom Brigade is on stand by to show just how far you can take this set creatively! So, hop on over and see....

Allison Cope
Christine Okken
Cindy Lawrence
Julie Koerber >> you are here!
Kathy Jones
Katie Sims
Stacy Morgan
Tosha Leyendekker

Remember -- these sets go live in the Power Poppy Shop on March 14! And, four of the brand new fresh and fun sets have coordinating dies to match! So fun! 

Be sure to swing back by tomorrow for yet another sneaky peek! This one offers an eclectic display of decor and a robust set of blooms that's just ready and waiting to be mixed and matched! Have I piqued your curiosity?? Hope so!

See you then!
~Julie

Friday, March 10, 2017

Hello all and welcome to a giant dose of happy today on my blog! Why? Well, today is the very first day of the Power Poppy Sneak Peeks for our March Release. And, I have to say, we have so many surprises that you will be doing the happy dance before the week is over! ;-)

Today's stamp set is a literally a breath of spring! Check it out, will you please?


When Marcella put her ever-so-talented pen to paper to create the new set Natural Beauties, she envisioned a border of garden goodies -- think primroses, daffodils, cowslips, tulips along with other woodland flowers and foliage. Goodness, this one is a feast for the eyes and GUESS WHAT? This set also comes with coordinating dies that will soon be available for pre-order! Also, look for a special bundle price when you purchase both the stamp and die set together! Woot! Woot! 

On to my creation! First up, you can see another card using this new set HERE but for today's post, I thought I'd share a trio of little cards whipped up using these darling and dainty illustrations! I had bought some of those little bankers envelopes (coin envelopes #7) because I thought they would make up cute card sets! So here's the trio of cards I made up! 


Sweet and simple! Don't you absolutely love that Trillium with those darling little mushrooms? Sigh... just makes me happy it's so cute! I love that this set has fun little sentiments perfect for everyday cards. Senties like "Just a Note," "Hello Friend" and "Sending Happy Wishes!" So perfect! 

Here's a peek at the first card! 


 Second card for you!


And the third featuring a little bunch of Lily of the Valley!


And that, my friends, is it! You'll have to make the rounds to see how the rest of the Bloom Brigade put their own creative spin on this brand new set -- Natural Beauties!!

Allison Cope
Christine Okken
Cindy Lawrence
Julie Koerber >> you are here!
Kathy Jones
Katie Sims
Stacy Morgan
Tosha Leyendekker
Power Poppy Blog -- see Marcella's inspiration for this set! 


Be sure to come back tomorrow for day two of the sneaky peeks when the Bloomies will showcase not one, but TWO new stamp sets that will soon hit the shelves at the Power Poppy Shop!


See you soon!
~Julie

Thursday, March 2, 2017

Color YOUR World!

Hello Folks! Are you ready to grab your markers, your colored pencils or paints and color your world? 

Kathy Racoosin of The Daily Marker is unleashing a world of color on her blog and Instagram (@kathyrac) this month, and she wants all of us to join her in the fun!


The Daily Marker 30 Day Coloring Challenge
energizes us to color something every day — even if only for a few minutes. Whether your love markers or prefer paints, colored pencils or crayons, all media is welcome! CLICK HERE to find out where to share what you are coloring and join the encouraging community of happy colorists. You'll also find answers to questions you may have along the way, participate in contests and more! If you share your work on social media, don't forget the hashtag: #thedailymarker30day and if you use Power Poppy stamps or digis, add the hashtag #powerpoppy

On to my colorific creation! 

When Kathy announced that she would be kicking off her 30 Day Coloring Challenge in grand style, I knew I wanted to grab one of Power Poppy's soon-to-be released stamp sets -- just to tease you all a little bit! ;-) 


This stamp set -- called Natural Beauties -- is a part of Power Poppy's March Release, which will start being unveiled on March 10th! That stamp is actually designed as a repeating border, allowing you to stamp and keep on stamping this illustration in one beautiful row... to infinity and beyond! 

I stamped in Tuxedo Black Memento Ink and then grabbed close to every color of Copic marker that I own to doll this image up! I stamped it on an angle, just to give it a little extra interest and then added the sentiment from the set below, also on an angle! Add some paper piercing, a scalloped edge and some minimal, yet fun decorative papers and.... Voila! 

Here's a close-up! 


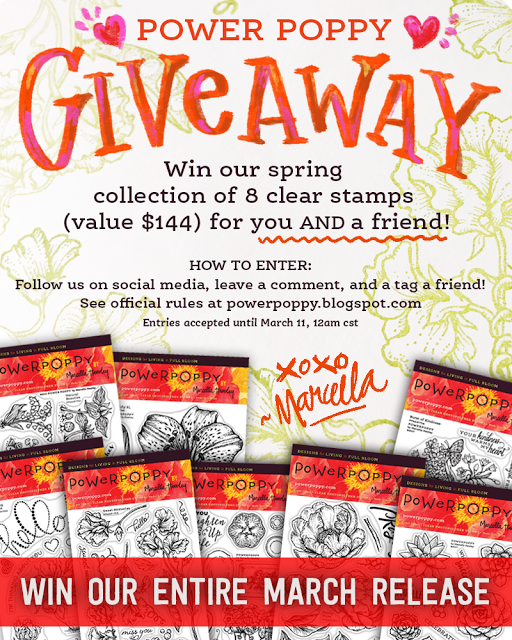
Guess what? You have a chance to win this set, along with 7 other never-before-seen clear stamp sets as well! How? With this.....


GET READY FOR A POWER POPPY GIVEAWAY!
To kick off the challenge, Power Poppy’s Marcella Hawley has a surprise of epic proportions! She’s giving away Power Poppy’s SOON-TO-BE-UNVEILED MARCH CLEAR STAMP SET RELEASE! That means EIGHT of the freshest, most fun Power Poppy designs to hit the market yet. It's a $144 value! Plus you can enter a friend to win.

Winners will be announced on the Power Poppy Blog/Instagram/Facebook on Sunday, March 12th, and also over on thedailymarker.com.


THERE'S ALSO A SUPER SPECIAL DEAL THIS ENTIRE MONTH AS WELL! 

Power Poppy is offering 25% off all digital stamps for folks all month long to tie in with the Daily Marker's 30 Day Coloring Challenge! Just enter the code COLORMEHAPPY at checkout! This is good on digis only to help you enjoy this beautifully colorful month!

Some of my fellow Bloomies are joining in the fun today, so be sure to pay them a visit.....


Allison Cope
Cindy Lawrence
Christine Okken
Julie Koerber >>> you are here!
Kathy Jones
Katie Sims
Stacy Morgan
Tosha Leyendekker


AND THEN -- pop back over to the Power Poppy Blog for the full link list of today's huge 30 Day Coloring Challenge Hop! Kathy Racoosin assembled a HUGE hop to give your creativity a jump start with some of her favorite stamp companies and Online Card Class Partners -- you won't want to miss out!

Thanks for stopping by -- remember to mark your calendar for Power Poppy's HUGE MARCH RELEASE, which will kick off March 10th! 

See you back here soon!
~Julie