Thursday, January 31, 2008

Cardmaking is a team sport!

Well, after yesterday, Ann gave me a great idea on how to modify my card. One of those spiral paper clips.... so I did it! AND, I think, of the three options, I like this one the best. The spiral still is a circle and it actually matches up with the swirls on the coffee's steam. Thanks Anne!!! I promise, this is the end of this card. Let's just say the third time is a charm on this one! :-)


I've got another one to share today. This is kind of like a gift in a card. The card is super dooper simple to make and features one of my favorite easy techniques. I take 4 mondo post-it notes and rip the edges of them. Then I line them up on a card front to make a box. After that, I stamp the images using Vesamark ink. This time I chose leaf stamps. After I stamp all my images in the box, I take a cotton ball or a Fantastix and run different shades of chalk over top until my entire "box" is covered. This creates such a unique look. You can use just about any image you like and any kind of color scheme. Once you are done, stamp a neat setiment over top and fini! It's a quick and easy 10 minute card!

Now to the gift part. This would go to one of my knitting friends... because.. inside is a knitting marker that I made. When you knit more intricate patterns (like cables) you need to mark where you have to do certain stitches. These just slip on your needles so you can mark it up in style!

Off for now! Have a great day!

Wednesday, January 30, 2008

Showing off my rejects!

This is a big step for me ladies, showing my rejects! But, I wanted to do it because this card was a stinker. It was one of those I just couldn't get right. If you read my post yesterday, you saw my challenge card for Taylor's sketch. Well, this was my first attempt. It's so funny because I took her sketch very literally. She said, put the sentiment in the lower right corner.... so I did.

If I did the sketch without looking at that, I would have put the little "Thanks a Latte" up in the circle. So, it left me wondering what on earth do I put there? Well, the set I used from Impression Obsession didn't have any little images. I thought - steam from the cup? No, looked to weird. I tried a LOT of different things and none worked. These little coffee beans are actually from an ancient Stampin' Up set! But, even after all that, I don't think they work! So, I took off the little circle and said, 'Well, I just won't do this card for the challenge.' BUT, when I took off the circle, everything was skewed right and off center. So, my dear friends, suggestions? Am I being to hard on this poor little card??!!???

There are a couple of cool things about this card that I thought I would share. Have you ever made "faux suede?" It's when you brayer Liquid Applique onto a piece of paper and then heat set it? No matter how hard you try, you won't get the application even which makes this such a cool technique. Maybe I'll take some photos of the process to show since all you can see is 1/4" of the mat on this card! It's a neat technique. The other thing I did, which is not rocket science is, I distressed the brown gingham ribbon to look "coffee stained." It worked a whole lot better than the bright white from the ribbon!

Well ladies, have a happy Wednesday! My daughter woke up today and said, "Mom, can we craft today?" What do you think my answer was? :-)

Tuesday, January 29, 2008

Friendship is a sheltering tree....


I was feeling a little drained in the creative department. When that happens, I usually surf a bit to find a challenge lurking out there in the blogosphere! Well, I decided Taylor's was just the one to get me out of my funk.

Here's the sketch...


You'll have to take a trip to her blog and see her card. You can click HERE. She did the most darling Bella with bright, spunky colors. LOVE it!

Her card had a cupcake feel, but I decided to pick up a stamp set I just got to play. This set is so cool! You can build your own tree! It's from Impression Obsession. Isn't this neat?????


The card is really pretty simple. I just stamped the pieces of my tree using brown Vivid ink. The leaves were done with Leaf Green Adirondack ink. After inking up the little leaf, I stamped it twice - once with full ink and then the next a "second generation" to get that color contrast. Don't ya just love the little owl! He is too cute! I stamped him on the smallest circle in my Spellbinders Geometrics Circle set and then matted it on a 1" circle I just punched out. Layer up the paper, punch a ribbon hole, mat up your tree and call it good. I just love the saying... "Friendship is a sheltering tree.."

Off to work. Catch y'all later!

Monday, January 28, 2008

Sexy Little Stilettos!

HHHHHhhhhm. I "googled" the word stiletto to see if it had one "l" or two and came across an interesting tidbit. Did you know these shoes were named after the stiletto dagger? It's a knife specifically used - not to cut - but stab. EEK! Ok, so now you know that if your hubby or SO acts up, you can use your shoes as a weapon! LOL!

I thought I'd keep it flirty today with this little number. I stamped the shoes (Impression Obsession) using Versafine Black Onyx onto my circle shape that I cut thanks to my circle "Nesties". I colored them with watercolor pencils and then added a bunch of bling thanks to my Copic Spicas and a couple little rhinestones. I matted it on a scalloped Nestabilities shape. The saying -gotta love it- is also from IO. Ticket corner punch, scallops, more bling, black and white sheer polka dot ribbon, black mat on a white card... and done!

Hope you all had a wonderful weekend and are rested up to take on the week!

Saturday, January 26, 2008

Stamp Simply


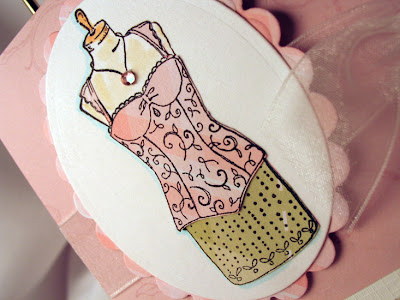
You could say this card is all thanks to Miss Sharon Johnson! It's a part of her Friday "Stamp Simply" challenge. This week's challenge was to make sure your card edge - not a frame - not an embellishment - no - the edge of the card was scalloped. So, scalloped it is with my Martha Stewart edge punch. The stamps are from Impression Obsession and the image was just colored by stamping it on patterned paper and then paper piecing onto my main card image. Add a little white sheer ribbon, a rhinestone for the necklace and a pearl over the knot of the ribbon! I did line the inside of my card with a fun green and pink argyle pattern so that when the card is closed, you see that peeking out.
Here's a close up of the paper piecing...


Thanks Sharon! Another great challenge!


Happy weekend everyone!

P.S. Got an email asking about what I did to the "body" of the dress form. I guess I left that out! I "fake watercolored" it by picking up marker color off a pallete with a blender pen. Thanks for asking!!

Friday, January 25, 2008

N2U and... a sweater!

OHHHHHH... I so wanted to stamp today. I dreamt up some new ideas for some stamps that came recently. In my head... they rock. Who knows if they will work on paper. Do you ever have those ideas? When you think them up and you say to yourself - 'I can't wait to create this one!' And, well, it just doesn't work and you end up crumpling up paper, throwing it, screaming all the way? Anyway, I digress....

I couldn't stamp because it looked like an F4 tornado hit just a 12 by 12 section of my home - my stamp room! It took over an hour just to get it all back put away. I was ---THIS CLOSE-- to taking a picture and posting it in hopes of shaming myself to be a more organized stamper but I just couldn't do it. Maybe I don't want you all to see "the real me!" :-)

So, here's my N2U

This card was created thanks to one of the Outlines Rubber Stamps that I had. These stamps are fun because you stamp the same image multiple times and use different pieces to layer. I stamped the image on a red piece and then used a heart punch to cut it out and align it up on my card. I think this a cool technique that could be used with other stamps. For the black layer, I stamped my image with Versamark and then brushed on some Brilliant Gold Pearl Ex. Love that stuff! The rest is pretty self explanatory - ribbon, ribbon slide.. and Voila!


Here's a close up of the window....


And, here's another reason why I didn't stamp today! I started this sweater more than a year ago. It's made with wool from sheep right in Montana, hand dyed, very cool. Well, I have no idea why I don't just finish the thing! It's a really cool ribbed cardi. So, today I blocked the pieces so I could sew it all together. FUN! And the great part is - it's still cold enough to wear it! Normally, I finish sweaters in the summer when there's no way I can even enjoy the hours it took to put into the darn thing!!!


Well, off to pick up kiddos from school! Happy Friday!

Thursday, January 24, 2008

You Light Up My Life....


I decided work just gets in the way of my stamping addiction, so maybe I shoud quit work.... Ok, maybe that's not the best idea!

Moving on!

This card was so fun because I stared at this little bottle of nail polish in Gina K's Text Messages Set FOREVER.
Here's a look at the nail polish bottle...

I knew if I tried hard, I could see something other than a nail polish bottle (not that there is anything wrong with this darling bottle... just wanted to challenge myself!) So, I had a "light bulb moment".... literally! What's really quite funny about this card is - today I interviewed the Environmental Compliance Officer for the city of Billings (my city) for a story I am doing for the magazine I work for - how appropriate is this card? We're talking energy conservation and I make a light bulb card. It was completely a mistake... I'm not that nutty!

So, what I did was I stamped the polish bottle using Conch Shell Adirondack Ink (it's one of the Sea Brights colors) and then I used my blender pen to bring the color out and into the actual "bulb" part. I stamped and embossed the "bulb" again in silver and cut out the bottom to make it like the part where you screw in the light bulb. The back ground stars are the stars from another Gina K. Set called Heartfelt Hits and the background (can't see it very well) is the desk light stamp also in the Heartfelt Hits set. I used the Stampin' Up Word Window punch to make my little tab that I used to attach my rhinestone brad, which in turn, attached my ribbon to the back of that piece of paper. I stamped the yellow piece of paper with a paisley background stamp from Stampin' Up that is retired now. I LOVE that stamp! The words are from the Heartfelt Hits set too and I stamped them with Versafine Onyx Black. That is my new favorite black ink pad. It is so crisp and it works WONDERFULLY on clear stamps!

When you look at this card, it kind of looks like the light bulbs are floating - well, I just attached them with foam mounting tape. I also "glitterized" them with a little bit of Stickles. Gotta have the bling!

And there, my friends, you have it! Happy Thursday! T minus one day until.... THE WEEKEND!

Wednesday, January 23, 2008

When A Man Loves A Woman....


Golly Jeepers, I wish pearl paper showed up better in photos! This paper actually made my heart stop it is so pretty. It is like a pearl Bazzil but it feels like fabric. I knew right away, a wedding card was in store. The stamp is one of the new ones from Gina K. Designs - Heartfelt Hits I stamped the man and woman with Versafine Smoky Grey ink and that was the only stamping I did! I layered it with the help of one of my rectangle scalloped Nestabilities. The only difference here is - the scallop was cut twice - once from the pearl paper and a second time with the pearl fabric feeling paper. I cut one of them in half and layered to have the reverse colors match up with each side of my base layer on my card - make sense? Hope so! Since the layer is half and half, I didn't want the mat around my stamped image to get lost so I made the scalloped rectangle layer half and half - only in reverse. I put a line of pearls down the center separating both sides of my base mat layer and on the left side of the card, I embellished with some paper piercing (Lasting Impressions template). The fun part about the stamped image is the fact that I wanted the woman to have a kind of wedding dress on - so.... I cut a line at her waist using an Xacto knife and then strung 2 pieces of wired sheer white ribbon through to make her tulle skirt. At the top of the skirt, I added some mini pearls as well.

Like I said - not a lot of stamping - but, thanks to the paper and embellishments, it has plenty of flair!

Happy Hump Day!

p.s. Part of the reason why I chose paper piercing on this card was thanks to a challenge from SBS5 Sister Donna *HERE* That was part of her first ever little ole weekly challenge!
p.p.s. I actually was spoiled today. I got to make TWO, yes two, cards this afternoon. Tomorrow, you'll see my "light bulb" moment with one of the other Gina K. Designs sets I got recently. Fun stuff!

Tuesday, January 22, 2008

Where did this day go!!???!!??


Do you ever wake up, flying by the seat of your pants and soar through the day holding on for dear life?? Well, that my friends, is my day today!

Because I am in the middle of meetings and desperately needed just a few minutes of down time, I thought I'd share a N2U (new to you- old to me) card. This is a ten minute card - my kinda card today!! I've always loved the stark combo of red, black and white! The base card is red, have a little polka dot dp, the center strip is actually a corrugated piece of black card stock (I ran it through my paper crimper). The red flower is a large paper flower from Scissor Sisters. The "stamen" is a punch and I added a little bling in the center. The outline around the flower is a stamp from Hero Arts. What's fun is the photo hinge is actually helping keep shut the little 2 by 2 card. Should have taken a picture of that little baby open... Darn it! If only I had five more minutes to snap off another photo. Oh well, you are all smart cookies, you get it... right? :-)

Happy Tuesday! Hopefully tomorrow will bring me back to my stamp room. I just got a box from Miss Gina K. and I can't wait to play. I have a wedding card in my head - imagine wonderful metallic and pearl.. Yummy!

See y'all tomorrow!

Monday, January 21, 2008

Chattin' It Up (Warning: MONDO post! )


Some of you probably wondered where the heck I have been for the last few days! Well.... here's what I was up to! Chatting it up with my cell and diggin' on the cute little case! When I saw this set, I thought of my 14-year-old neice right away. She is never without her cell and, I am pretty sure she can text in her pocket without even looking at the keys. HUH? Yes, it is a generational thing.

Anywho, I thought, wouldn't it be fun to make a card set with different expressions and then make a card holder to look like a cell phone case? So, I went to town. I just bought this matching dp and thought this would be the perfect project for it! I started by making the cards - they are a tad bit smaller than the norm - 3.5" by 4.75". I have these envies that are, I think, the RSVP size for weddings so, I wanted to use some of them up with this project. In the big picture, you can see I used the little flowers from Gina K's Text Message Set to deck out the envelopes!

Card #1


With all of these cards, I just mixed up the background with the different decorative papers. On this one, I took the leftover curve from the cell case and just sewed it on over a strip of paper that I had punched with the Stampin' Up Spiral punch. I stamped the flowers with Adirondack Lettuce and Cranberry inks, cut them out, added some bling and that was my embellishment. I "corner rounded" the corners and that's pretty much it! The phone was done my stamping on a separate piece of paper and cutting out both the window and the actual phone. You can't really see, but I added some sparkle in places with my Copic Spica pens.
Here's a close up of the little flower!


Card #2


This card was done with different dp on the top and bottom with a rhinestone strip through the two pieces!
Card#3

On this card, I used a kind of zig zag stitch on my sewing machine to sew the strip on, added some bling and that's pretty much all that is different on this card!
Card#4

On this card, I used the largest scalloped oval from my Nestabilities set for the background, placed the phone on an angle and then added the embellishment with the cut out small and large flowers (don't forget the rhinestone!)
Cell Phone Case

This was the super fun part of the project! I measured my cards and added an inch and a half of paper to the sides and the bottom for my sewing. Before I sewed the front to the back I sewed on the "flap" piece. Funny thing on this. To get my curvy edge, I traced the edge of a plate onto the paper and cut along the line! I did that a few times to get both the red edge strip and then used the plate curve line to create a cut line for my scalloped scissors. After I sewed on the flap, I sewed the front and back together, added my flower and bling to the front... and VOILA.. you have a card set with four cards and a cute little case!
This is how it all fits inside!


Want to give this as a gift and give the recipient some saying choices? You could always make up the little windows,cut them out and put that in the case. That way who ever gets this little number as a gift can "choose" their text message before they send off their card!

Happy Monday!
Thanks for reading my "book" of a post today!!! :-)

Friday, January 18, 2008

Book 'Em!


I can't tell you how much of an accident this card is! I started trying to make a book mark. Then, I decided, wouldn't it be cool to, instead of just a book mark, make it magnetic so it just hugged the page? Then, after I did that, I thought, "Wow, this little heart would be cute just on the front of the card like this... and... by accident the back part of the magnet stuck to the front and I said, "By George, I think we have a book mark card!" I can see making these in a variety of shapes with all kinds of fun colors and embellishments!

Here's the breakdown of how I made it.

I stacked the hearts from my Heart Nestabilities dies (both scalloped and classic)and embellished them with prima flowers and crystal rhinestones. I used that super tacky tape on the back and attached my ribbon. Then on top of that, I used a circle punch to punch out my magnets from a magnetic sheet. I attached the magnets to my ribbon with the same super tacky tape.


Attach your bookmark to a card front to give as a fun gift....then let it have it's home on the pages of a book later!


Have a great weekend!!!

Thursday, January 17, 2008

Take It For A Spin....


This card, thanks to my heart Nestabilities dies was a TON easier than those cards we used to make years ago! This isn't a new concept by any stretch of the imagination. BUT, I think with the help of die cut machines, it can certainly take on a new look - with a whole bunch of shape possibilities!

What I did was cut the scalloped heart and classic heart, stamped my birdies on the classic small heart, the sentiment "Some Birdy Loves You" on the back of the pink mat and then I sandwiched a piece of red metallic embroidery thread in between the two pieces when I matted them together. I then matted my polka dot paper to the front of white card stock base with LOW TACK tape. We'll need to take these two pieces apart later to assemble the "spinny" part of our card! I took my large classic heart and then taped it using the low tack Magic Scotch tape to the exact position where I wanted my heart. Make sure if you are using the Wizard to put your spacer plate in the right place so you don't cut a hole through the front AND back of the card. You only want a window here!! After you punch the hole, take the two pieces apart and attach your embroidery thread at the top and bottom of your hole. You'll want to make sure to cut the tail so that when you mat this piece together, you won't see the mechanics of your card.
Here's a close up of the center part spun around to show the sentiment...(ignore my purple pencil helping to spin the sentiment to the front!!)


After I assembled this, I added my bow, my corners, and some bling! I also matted some fun striped paper on the inside to give the card some added pop through the window.

Fun! It even got a ooooOOOOOooo from my daughter. Wow, I feel honored! :-)

Happy Thursday... T-minus one day 'til the weekend!

Wednesday, January 16, 2008

Coloring the afternoon away....


If you read my post a few days ago about kind of missing out on fall stamping, then this card will make sense to you! I had this stamp (Impression Obsession) since early last summer - but with moving and then finishing my stamp room - I never used it! One thing I love is watercoloring. Most times I just use watercolor pencils and a blender pen. This time, I pulled out the good watercolor paper, my paints, put on some classical music and just went to town. Can you say relaxing? I used a mix of deep yellow, reds, browns and then my pallette to mix up different colors in between. I used a watered down version of the yellow to create my shading. To create the card - it was just a pretty simple layout! The one cool thing I did that I don't think you can see is- I stamped the canvas background stamp from Stampin' Up on the base of the card with Versamark ink and then brushed just parts of the piece with a deep bronze shade of Pearl Ex. It gave it that metallic, almost leather look. I might have to do this again on other cards!

Happy Wednesday everyone! Off to work I go!

Tuesday, January 15, 2008

A RAK & The Box

First Things First!!!
When I started this blog at the end of last May, I thought - 'This is so lame Julie, you are going to post pictures of your cards in the hopes that someone will come and visit you and see what you've got cookin' in your craft room.' I really, really, really thought it would be a waste of time. Holy cow was I wrong! Since that time, I have seen many of you drop in daily. Because of that, I have found new inspiration in your sites and on top of ALL that, I really have some wonderful web friends and bloggin' buddies. AMAZING! The fun part? There's completely room for more!

When I first started my blog, one of the first ladies to pay me a visit was Miss Diane LaPointe (dd2njoy). She always had this smile in her words. It just made ya feel great! Well, imagine my surprise the other day when I went to the mailbox and found this creation!


Ok... so now I get the privilege of snail mail too? Diane, you rock! Thank you sooooo much. I can't imagine someone taking the time to make me a card just to say thanks for making cards! What a ball of sunshine!


I did get a few minutes yesterday to make something! Much of my time in my stamp room was trying to put stuff away! I HAD PILES EVERYWHERE! So... it was a quick and easy project (20 minutes tops! And, half that time was picking the paper!). I got the box at Hobby Lobby for a buck and I didn't d do a thing to it. No dp. No nothin'! Don't shreak! I know. I know! It came in that fun decorative mirror paper. I simply used my Wizard Nestabilities in the heart and scalloped heart shapes to layer up a bit of color. On the smallest heart, I stamped, "Be Mine" (Impression Obsession). On another one of the hearts, I "ruffled" a piece of pink tissue paper by cutting it an inch wide and then folding it it create my ruffles. I added some flowers, ribbon and a bit of bling and called it good! So ladies, when your DH gives you a box of Russell Stovers that he picked up at the gas station on the way home from work---at least you can decorate it!!!!! :-) Just kiddin'! I know your hubbies are FAR better than that. They shop at Target! LOL!

Well, busy work day ahead - so I best get at it!
Have a fun Tuesday!

Sunday, January 13, 2008

Go ahead... SMILE!


I admit, you might need sunglasses to view this card! But, it's kind of overcast here in my neck of the woods and I thought I wanted to create a little sunshine if Mother Nature wasn't going to provide some today!

This card is pretty basic. Not a ton of stamping here. I matted my flower patterned paper on the front of my orange textured card base. I cut out an abstract shape from my Wizard Geometrics die, stamped the word "smile" (Hero Arts) and attached it to my abstract shape with the help of one of those cute little clothes pins. The flower was stamped in orange and cut out (Hero Arts) and then I layered it with other pieces - one was a punch and the second layer was a flower sequin also from Hero Arts. On the top layer, I affixed a rhinestone--gotta have bling I say!!

That's it!

Hope you are enjoying your day. We went for a family walk down by the river and actually saw deer and... get this.. a bald eagle! Very cool. Have a good one!

Saturday, January 12, 2008

You've got my heart on a string....


Sweet and simple is what this post is all about. This is one of those easy cards that I think, is kind of sunny! I guess I love the bright colors lately!!

I stamped my hearts on the line on three different colors of paper. One was pink, one was orange and one was striped. I stamped the image again in black on the white card stock piece, added some color to the clothesline and clips and then accented the area around the hearts with a super light blue marker. I cut out my hearts and overlayed them on my white piece. I notched the corners, matted this piece onto a pink piece of cardstock, matted it again onto orange, and added some brads. I also added some sparkle to the cut out hearts with the help of my clear Copic Spica glitter pen. The top part of my card is a striped piece of card stock that I matted on my white card base. The bottom is a piece of plain pink that I stamped with hearts using Versamark ink. I layered my hearts in the center, punched a 1" circle out of the pink paper, added my sentiment, punched a ribbon hole and strung some fun sheer ribbon for a little extra "something something." That's it! Hugs and kisses... ready to go!

Well, my son and I are off to go bowling today. He's only ten but, I tell you what, he's a shark! He'll be bowling 300 before long! He beats me every week!

Happy Saturday!

Friday, January 11, 2008

That's a wrap!


Hello all! More stuff today from Impression Obsession!

There is a story behind this card though! A few weeks before Christmas, my DH and I actually had a "shopping date" to finish up buying Christmas presents. Well, we were at Target and I saw the prettiest paper there---wrapping paper that is! I looked at him and said, "Oh, this could make the prettiest card." He looked at me as if to say "What?" but we just walked away.

Well... Christmas morning comes and what are all my presents wrapped in? This paper! I just cracked up. He said.. "We have the rest of a roll. Do you want me to put it in your craft room?" Funny and sweet man! Did he even have to ask? :-)

So, this card was made with - you guessed it - wrapping paper!

I stamped the heart flourish using a bronze embossing powder and colored it with watercolor pencils. It was a shape I cut out by using my Wizards Nesabilities rectangle die. The mat is the scalloped rectangle that, after cutting it out, I added some "rub-on" copper. You know the stuff that comes in a little pot that you can smooth on with your finger or a cotton ball? I edged my red card stock mat with Versamark and then dipped it in the same embossing powder as my scroll to set that corner off a bit more. I added the wrapping paper triangle, tied a satin bow, matted it on my main card base and then set the image off to the right top. DONE!

So earlier this week I used a paper bag to make a card. Today, it was wrapping paper! What's next??!!?? Who knows!!

Here's a close up of the flourish...


T.G.I.F.!!! Hope you have a great one!

Thursday, January 10, 2008

Heart Bouquet...


Since I am an ice-cream addict, I look at this and see what I call "sweetness" (my code word for icecream. You might say... "Huh?" Oh, I admit, my mind is a bit stange! :-)This image IS sweet isn't it???? This is one of the new stamps from Leigh Hannan's Sweet Hearts set from Impression Obsession. I made the card pretty simple so this little image didn't get overwhelmed. I stamped my heart bouquet onto a piece of white oval card stock that I had cut out with my Wizard Nestabilities. This was then matted onto a black scalloped oval that I had also cut out using the Nestabilities dies. I colored my little heart "flowers" with colored pencil, blended with a blender pen and then "glitterized" the hearts. I took a strip of decorative paper (black with white swirls and used it as a mat for a red textured strip. Added some brads on this strip and then tacked it down to the main part of my card - white card base, black mat and then red card stock that had been run through my Wizard with a Fiskar's texture plate. I also used the ticket corner punch on each of the corners. And... we're done!

Here's a close up of the little heart bouquet...


It's Thursday and I don't even know where this week went! Have a great day! See you tomorrow!

Wednesday, January 9, 2008

Shrinky Dink...

Add Image

"Heart-tini anyone???"
I just love these images from Leigh Hannan with Impression Obsession. I think they are pretty darn original. Fun to color, spunky, like it!

I just stamped with Versafine black, colored with colored pencils and my blender pen, "glitterized" and matted it up! You might recognize the layout, It's one from CPS. I'm just a tad late on this one though - I think it was last week's sketch! Nonetheless, it was fun. On the bottom, I dug out some old Shrinky Dink to make that cute heart! I used my Wizard Heart Nestabilities to cut it out! What a breeze that was. I stamped the heart with another one of IO's hearts, colored it and then blasted it with my heat tool. My four year old daughter was funny... she just went.. "ooooOOOOooooooo...." I have a feeling we are going to be making a lot of Shrinky Dinks today!!!

Here's a close up of the little heart!


Off for now! Have a fun one!

Tuesday, January 8, 2008

You made a card with what???!!???


No joke, I made a card with parts from an Office Max bag! This bag was stuffed in last Sunday's paper and I thought - Hey, don't put that in the recycle bin - I could use that! I loved the design. Seemed kind of odd for an office supply ad. Oh well!

Here's a close up of the part I cut off and used!


And... here's what I came up with!


I actually did this card in the "long and low" style because of the Stamp Simply Challenge over at Sharon's blog - click HERE for the rules!

I basically just cut the strip out of the bag, matted it on a gold edged strip and then matted this piece onto a black mat that had been stamped with a kind of flourish stamp from Impression Obsession. One of my stampin' buds, Penny, uses this stamp all the time. Since I had it and didn't use it yet - I wanted to find out what I was missing! I am a fan!! I also stamped this on the red hearts that were cut thanks to my hearts Nestabilities! I used both the Classic Hearts and the Scalloped Hearts. The rest is pretty self explanatory! I stamped and embossed "Happy Valentines Day" in the corner in gold, used my ticket corner punch and added some hot fix gold nail heads, layered it all up, added some red satin ribbon and I was done!

Off for now... it's kind of a busy work day. Yes, I have to work for a livin'! Thank goodness I can do it from home and in my jammies if I want to!!

Happy Tuesday!

Monday, January 7, 2008

Copy Cat Creation


It's OK to copy every now and then.... isn't it? Well, when I saw this type of creation from the fabulous Sharon Johnson, I thought, wow, that is such an elegant card. And... simple too! I think she should submit it to Take Ten! Maybe we should all tell her that!! You can see her card by clicking HERE. Even after I made mine, I still like hers more. There is something about chocolate and gold that is sooooo striking!

I, of course, used different stamps. I used one of the new Valentine's stamps from Impression Obsession.. It's actually part of a clingable set from Leigh Hannan.

Not much to explain here- stamp and emboss the heart in gold, mat the square on a coordinating piece of card stock, punch two ribbon holes, string ribbon through, tie a bow and mat the entire piece onto a card matted with dp!

Thanks Sharon for the inspiration! You rock!

Sunday, January 6, 2008

My New Desk Set!!!


A few days ago, I showed you my nightmare of a system for designing cards... notes, scribbled pretty much everywhere - junk mail, envies, old coupons, but, mostly junk mail and legal pads. So, I decided that I would come up with a fun little container of some sort to keep index cards in and when the moment hit, I'd grab an index card and sketch out my card. Well, with the help of some dp, embellishments and duo glue, I did it! This little wooden basket is now my inspiration station! Because my stamp room is kind of low key design-wise, I decided not to go too over the top with embellishments, I just kind of kept it simple. I also had enough paper left over to make a cute little desk calendar! It is not as cute as Theresa's (Click Here to see hers) but, I like it none the less!

I also like the fact that I had enough paper to do each side in a different style! Even though the back is plain, I just LOVE the paper!


Not much shaking in my craft room today! My hubby just came home last night from a business trip -- so we are off to go trail walking or something fun like that! It's so nice to live near the river & woods!

Happy Sunday!

p.s. Did anyone else go to the Gina K. Preview Party last night? I did for a bit but I must be too A.D.D! I couldn't keep up!! I knew I was in trouble when I showed up late and there were already 20 pages of posts!!! :-) Great new stamps though! Can't wait to play!!! My fave is actually the Stamps For A Cause Set - that will be in my stamp room for sure. It's so nice to know that if you buy this set, you can feel good about it because you are, at the same time, helping a terrific cause!

Saturday, January 5, 2008

N2U!


NOTE: Sorry the picture above is a bit blurry... I think my camera battery is revolting against me and is about to die!!


Since I am going to be at my LSS today for the Hero Arts Preview, I thought I'd bring you a N2U (new to you)! A while back I was teaching a four cards, one stamp class and I was searching for a little lady bug. I wanted a teeny tiny one that was just cute. Well, I never really found one, so I made one up! I drew this little guy and had him made into a stamp from one of the stamp makers in town (normally they do those business type stamps). FUN!

I used one of the Wordsworth Wild Card Templates. Sadly, I still have all of mine sitting in a drawer. I REALLY SHOULD dig them out every now and then. Anyway, the thought behind this card was to create a little card perfect for a "love note" that could be stuck in a matching envie. What is hysterical is, when I designed the card, I thought it would be cute to have the symbols spell out a message - Well, instead of "Hello Love Bug," my hubby says "hello heart ladybug?" He's a number cruncher-total linear thinker. Can you just hear me???? "NO! Silly! It's....." :-) Oh well! Still love the guy!

Here's a close up!


I embossed the ladybug all over the envie with black embossing powder. I like the subtle dimension.


On the actual card, I just stamped the lady bug all over the red mat. you can't really see it all that well. I also dipped the edges of my white card into back ink to get that uneven look.

Well, off to teach I go! Should be a blast!

Friday, January 4, 2008

A Dose Of Creative Organization.....

One question I seem to get quite a bit because I teach is... "How do you come up with your card designs?" Well, this is a snapshot into my disorganized thought process!

I will stare at a stamp set for what seems like an eternity and try to think up color combos and sketch ideas. I grab the nearest legal pad or really anything I can find.... and I scribble! Nine times out of ten, I will wonder, "Now, where did I put that scribble on the back of that junk mail?" Seriously, it's that bad.

So, I decided today, wouldn't it be fun to have a funky little box to put my sketches in? Instead of a legal pad (or worse yet, junk mail) I would buy some index cards and when I was done, I would put them in the little box. I went searching for the box (I envisioned a recipe type box) but, found THIS instead! This fun little wooden basket! It was only $2.99!


As you can see, I grabbed some patterned paper and embellishments that all match my stamp room. I think, in the end, whatever I come up with will sit on my desk. Need a little creative inspiration- dig in the box!

Now, if only I knew where those index cards were....

Well, it's Friday night and I promised the kiddos I would take them for a little ice cream! YUM!

Enjoy your weekend!